mail_outline sales@mediastorehouse.com
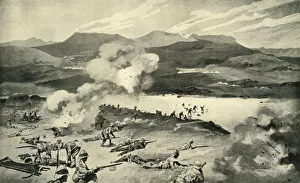
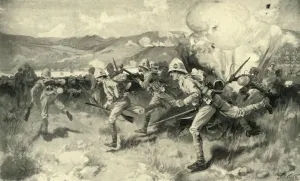
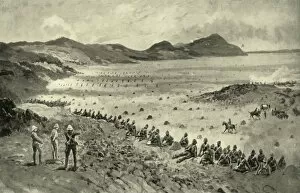
The Battle of Ulundi - Final Rush of the Zulus. The British Square in the Distance, 1900. From " South Africa and the Transvaal War, Vol. I", by Louis Creswicke. [T. C. & E. C
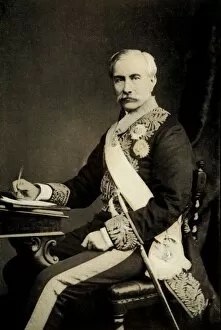
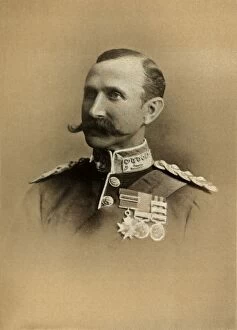
Sir Henry Bartle Frere, Bart. 1900. Creator: UnknownSir Henry Bartle Frere, Bart. 1900. From " South Africa and the Transvaal War, Vol. I", by Louis Creswicke. [T. C. & E. C. Jack, Edinburgh, 1900]
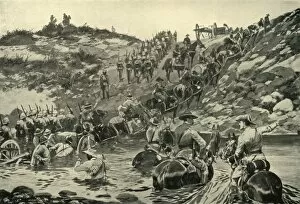
The Battle of Colenso - The Dublin Fusiliers Attempt to Ford the Tugela, 1900. CreatorsThe Battle of Colenso - The Dublin Fusiliers Attempt to Ford the Tugela, 1900. From " South Africa and the Transvaal War, Vol. II", by Louis Creswicke. [T. C. & E. C. Jack, Edinburgh, 1900]
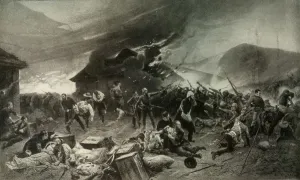
The Defence of Rorkes Drift, 22nd to 23rd January 1879, 1900. Creator: Alphonse de NeuvilleThe Defence of Rorkes Drift, 22nd to 23rd January 1879, 1900. From " South Africa and the Transvaal War, Vol. I", by Louis Creswicke. [T. C. & E. C. Jack, Edinburgh, 1900]
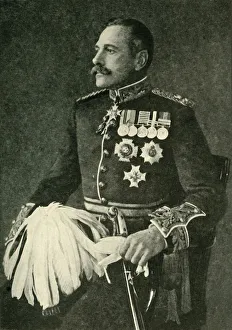
Rt. Hon. Sir Redvers Henry Buller, K. C. B. V. C. 1900. Creator: KnightRt. Hon. Sir Redvers Henry Buller, K.C.B. V.C. 1900. From " South Africa and the Transvaal War, Vol. II", by Louis Creswicke. [T. C. & E. C. Jack, Edinburgh, 1900]
Before Ladysmith - Horse Artillery Galloping to Take Up a New Position, 1900. CreatorBefore Ladysmith - Horse Artillery Galloping to Take Up a New Position, 1900. From " South Africa and the Transvaal War, Vol. II", by Louis Creswicke. [T. C. & E. C. Jack, Edinburgh, 1900]
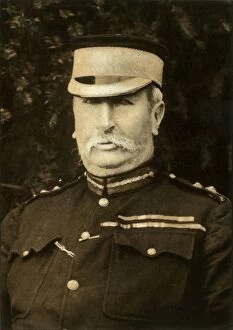
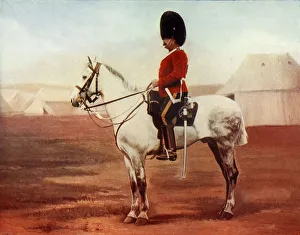
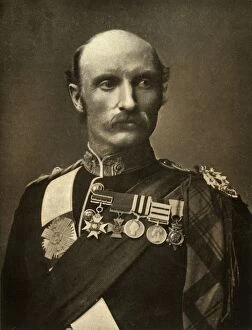
Sergeant-Major of the 2nd Dragoons. (Royal Scots Greys), 1900. Creator: Gregory & CoSergeant-Major of the 2nd Dragoons. (Royal Scots Greys), 1900. From " South Africa and the Transvaal War, Vol. I", by Louis Creswicke. [T. C. & E. C. Jack, Edinburgh, 1900]
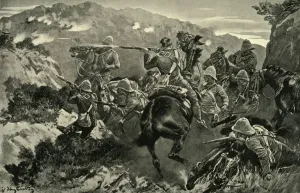
A Picket of 13th Hussars Surprised Near the Tugela River (Hussar Hill), 1900. CreatorA Picket of 13th Hussars Surprised Near the Tugela River (Hussar Hill), 1900. The Battle of Tugela (or Thukela) Heights, was a series of military actions lasting from 14 to 27 February 1900 in which
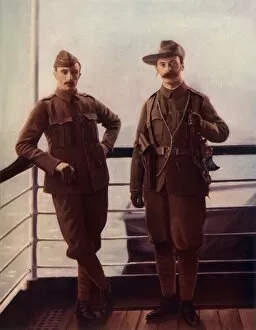
Officers - City of London Imperial Volunteers, 1900. Creator: Gregory & CoOfficers - City of London Imperial Volunteers, 1900. The City Imperial Volunteers Crossing Westminster Bridge, 1900. The City of London Imperial Volunteers (CIV)
Major-General Andrew G. Wauchope, C. B. 1900. Creator: John HorsburghMajor-General Andrew G. Wauchope, C.B. 1900. From " South Africa and the Transvaal War, Vol. II", by Louis Creswicke. [T. C. & E. C. Jack, Edinburgh, 1900]
The Battle of Colenso - Queens (Royal West Surrey) Regiment Leading the Central Attack, 1900. From " South Africa and the Transvaal War, Vol. II", by Louis Creswicke. [T. C. & E. C
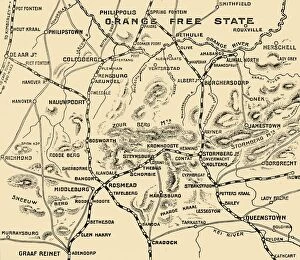
Movements of Gatacre and French, 1900. Creator: UnknownMovements of Gatacre and French, 1900. William Forbes Gatacre commanded the British Army at the Battle of Omdurman and the 3rd Division during the first months of the Second Boer War
Types of Arms - 4. 7 Naval Gun on Carriage Improvised by Capt. Percy Scott of H. MTypes of Arms - 4.7 Naval Gun on Carriage Improvised by Capt. Percy Scott of H.M.S Terrible, 1900. From " South Africa and the Transvaal War, Vol. II", by Louis Creswicke. [T. C. & E. C
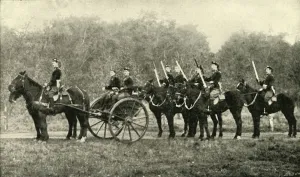
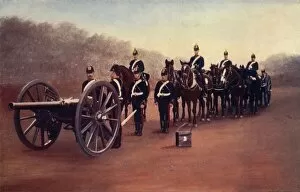
Sergeants of the Royal Horse Artillery with a 12-Pounder, 1900. Creator: Gregory & CoSergeants of the Royal Horse Artillery with a 12-Pounder, 1900. From " South Africa and the Transvaal War, Vol. II", by Louis Creswicke. [T. C. & E. C. Jack, Edinburgh, 1900]
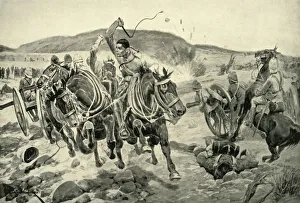
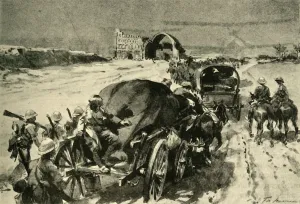
From Frere to Chieveley - Difficultues of Transport, 1900. Creator: Richard Caton Woodville IIFrom Frere to Chieveley - Difficultues of Transport, 1900. From " South Africa and the Transvaal War, Vol. II", by Louis Creswicke. [T. C. & E. C. Jack, Edinburgh, 1900]
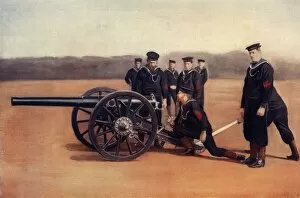
Sighting A Naval Field Gun, 1900. Creator: Gregory & CoSighting A Naval Field Gun, 1900. From " South Africa and the Transvaal War, Vol. II", by Louis Creswicke. [T. C. & E. C. Jack, Edinburgh, 1900]
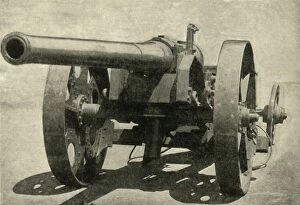
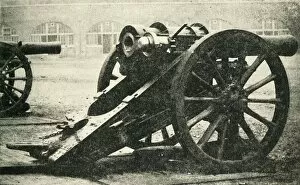
Types of Arms - The 5-Inch Howitzer or Siege Gun, 1900. Creator: UnknownTypes of Arms - The 5-Inch Howitzer or Siege Gun, 1900. From " South Africa and the Transvaal War, Vol. II", by Louis Creswicke. [T. C. & E. C. Jack, Edinburgh, 1900]
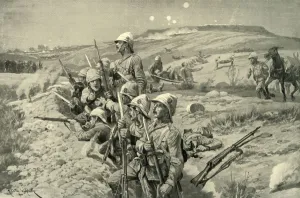
Fix Bayonets! - Repelling an Attack from the Trenches around Ladysmith, 1900. CreatorFix Bayonets! - Repelling an Attack from the Trenches around Ladysmith, 1900. From " South Africa and the Transvaal War, Vol. II", by Louis Creswicke. [T. C. & E. C. Jack, Edinburgh, 1900]
Complete Machine Gun Detachment of Mounted Infantry, 1900. Creator: EldridgeComplete Machine Gun Detachment of Mounted Infantry, 1900. From " South Africa and the Transvaal War, Vol. II", by Louis Creswicke. [T. C. & E. C. Jack, Edinburgh, 1900]
Colonel Pilchers Attack on Sunnyside Kopje, 1900. Creator: HC Seppings WrightColonel Pilchers Attack on Sunnyside Kopje-Canadian and Australian Contingents Receive Their " Baptism of Fire". 1900
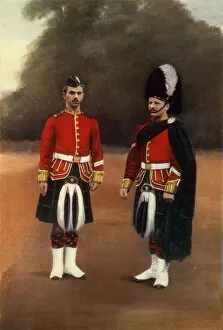
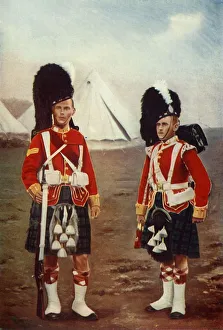
Private and Corporal of the Gordon Highlanders, 1900. Creator: Gregory & CoPrivate and Corporal of the Gordon Highlanders, 1900. From " South Africa and the Transvaal War, Vol. II", by Louis Creswicke. [T. C. & E. C. Jack, Edinburgh, 1900]
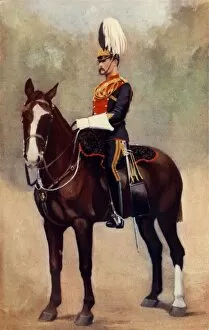
Officer of the Ninth Lancers, 1900. Creator: UnknownOfficer of the Ninth Lancers, 1900. From " South Africa and the Transvaal War, Vol. II", by Louis Creswicke. [T. C. & E. C. Jack, Edinburgh, 1900]
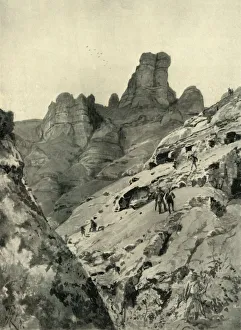
The Outbreak of War - The Drakenberg Mountains Where The Boers Were Laagered, 1900. From " South Africa and the Transvaal War, Vol. II", by Louis Creswicke. [T. C. & E. C
General Sir George Stewart White V. C. G. C. B. The Defender of Ladysmith, 1900. Creator: UnknownGeneral Sir George Stewart White V.C. G.C.B. The Defender of Ladysmith, 1900. From " South Africa and the Transvaal War, Vol. II", by Louis Creswicke. [T. C. & E. C. Jack, Edinburgh, 1900]
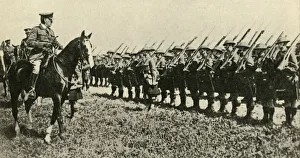
Royal Field Artillery (Action Front), 1900. Creator: Gregory & CoRoyal Field Artillery (Action Front), 1900. From " South Africa and the Transvaal War, Vol. III", by Louis Creswicke. [T. C. & E. C. Jack, Edinburgh, 1900]
Types of Arms - 15-Pounder Field-Gun, 1900. Creator: CribbTypes of Arms - 15-Pounder Field-Gun, 1900. From " South Africa and the Transvaal War, Vol. II", by Louis Creswicke. [T. C. & E. C. Jack, Edinburgh, 1900]
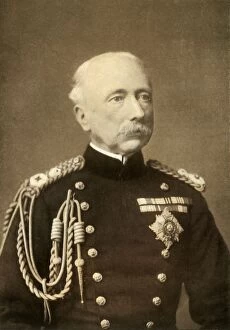
Viscount Wolseley, Commander-in-Chief of the British Army, 1900. From " South Africa and the Transvaal War, Vol. I", by Louis Creswicke. [T. C. & E. C. Jack, Edinburgh, 1900]
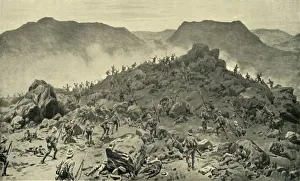
The Battle of Belmont, 23rd November 1899 - Bayonet Attack by the Scots and Grenadier Guards, 1900. From " South Africa and the Transvaal War, Vol. II", by Louis Creswicke. [T. C. & E. C
Major-General Sir W. Penn Symons, K. C. B. 1900. Creator: UnknownMajor-General Sir W. Penn Symons, K.C.B. 1900. From " South Africa and the Transvaal War, Vol. II", by Louis Creswicke. [T. C. & E. C. Jack, Edinburgh, 1900]
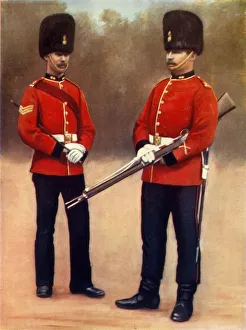
Sergeant and Private of the Dubin Fusiliers, 1900. Creator: Gregory & CoSergeant and Private of the Dubin Fusiliers, 1900. From " South Africa and the Transvaal War, Vol. II", by Louis Creswicke. [T. C. & E. C. Jack, Edinburgh, 1900]
Sergeant and Bugler, 1st Argyle and Sutherland Highlanders, 1900. Creator: Gregory & CoSergeant and Bugler, 1st Argyle and Sutherland Highlanders, 1900. From " South Africa and the Transvaal War, Vol. I", by Louis Creswicke. [T. C. & E. C. Jack, Edinburgh, 1900]
General Sir William Robertson inspecting British troops in Germany, First World War, 1919, (c1920). With the British Army of Occupation on the [River] Rhine: General Sir William Robertson
Prisoners of War: interrogating captured Turks, First World War, c1917-1918, (c1920). British soldiers with Turkish prisoners on the Eastern Front
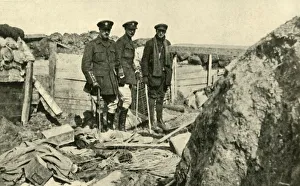
Inspecting One of the German Trenches after its Capture, First World War, 1917, (c1920)Inspecting One of the German Trenches after its Capture by the British Troops, First World War, 1917, (c1920). British army officers on the Western Front
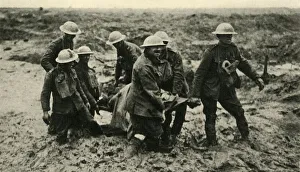
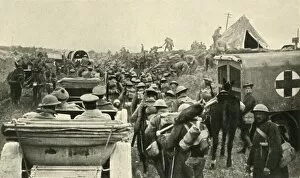
Red Cross Work in the Flanders Mud, First World War, 1 August 1917, (c1920). Creator: UnknownRed Cross Work in the Flanders Mud, First World War, 1 August 1917, (c1920). R.A.M.C. stretcher-bearers bringing in wounded during the advance on Passchendaele
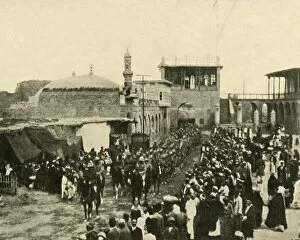
The British Entry into Bagdad, March 11, 1917, (c1920). Creator: UnknownThe British Entry into Bagdad, March 11, 1917, (c1920). Sir Frederick Stanley Maude leads the Indian Army into Baghdad, Iraq, First World War
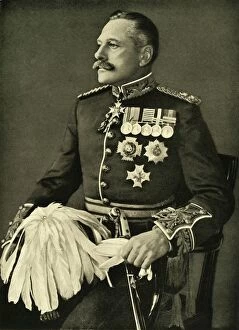
Field Marshal Sir Douglas Haig, K. C. B. late 19th century-early 20th century, (c1920)Field Marshal Sir Douglas Haig, K.C.B. Commanding the British Army in France, late 19th century-early 20th century, (c1920)
British soldiers on the Western Front, Belgium, First World War, 1917, (c1920). Creator: UnknownBritish soldiers on the Western Front, Belgium, First World War, 1917, (c1920). On the Way to the Fighting Zone: busy scenes on the Pilkem road
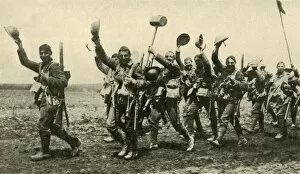
On their Way to Battle, First World War, c1916, (c1920). Creator: UnknownOn their Way to Battle, First World War, c1916, (c1920)....some of the Worcesters [Worcestershire Regiment], mentioned by Sir Douglas Haig for their gallantry against the German counter-attacks
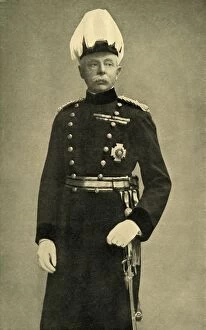
General Sir Herbert Plumer G. C. B. c1916, (c1920). Creator: LafayetteGeneral Sir Herbert Plumer G.C.B. c1916, (c1920). Portrait of British soldier Herbert Charles Onslow Plumer, 1st Viscount Plumer (1857-1932)
King George V at the Somme, northern France, First World War, c1916, (c1920). Creator: UnknownKing George V at the Somme, northern France, First World War, c1916, (c1920). His Majestys Visit to the Somme Battle-field
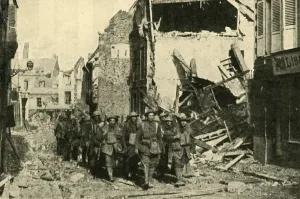
British troops in Peronne, northern France, First World War, 18 March 1917, (c1920). British troops entering the town abandoned by the retreating enemy
Field Marshal Sir Douglas Haig... late 19th century-early 20th century, (c1920)Field Marshal Sir Douglas Haig, Commanding the British Army in France, late 19th century-early 20th century, (c1920). Portrait of Field Marshal Douglas Haig
Nearing Bagdad: British transport column passing the ruins of... Ctesiphon, (c1920)Nearing Bagdad: British transport column passing the ruins of the ancient arch of Ctesiphon, (c1920)....near the scene of General Townshends costly victory on November 22, 1915
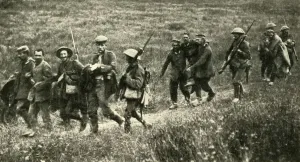
British soldiers with German prisoners of war, northern France, First World War, 1916, (c1920). Prisoners in British Hands: bringing in a batch of wounded during the Battle of the Somme
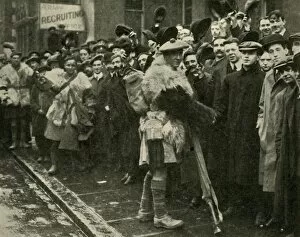
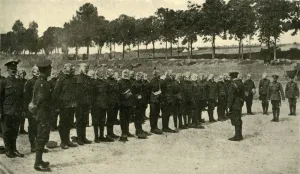
Scottish soldiers and would-be recruits, Britain, First World War, (c1920). Creator: UnknownScottish soldiers and would-be recruits, Britain, First World War, (c1920). The Recruiting Campaign in the Winter of 1915-16
Preparing for Battle on the Somme, northern France, First World War, c1916, (c1920)....respirator drill for the Guards behind the lines
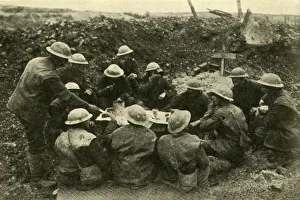
British troops spend Christmas on the battlefield, First World War, c1916, (c1920). Yule-tide on the Western Front: " Tommy s" Christmas dinner in a shell-hole