mail_outline sales@mediastorehouse.com
Lieutenant General Sir J. L. Pennefather and Staff, 1855. Creator: Roger FentonLieutenant General Sir J. L. Pennefather and Staff, 1855
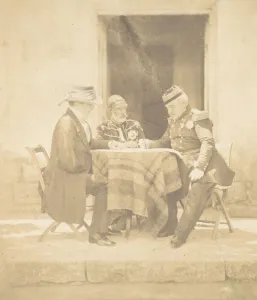
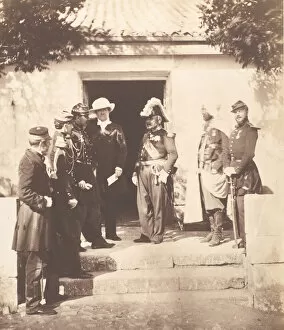
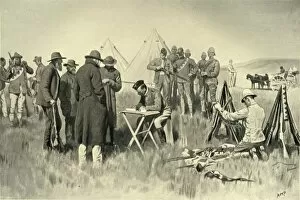
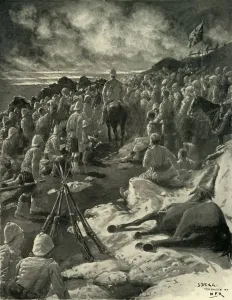
The Council of War on the Morning of the Taking of the Mamelon. Lord Raglan, Omar Pasha, Marshal Pelissier, 1855
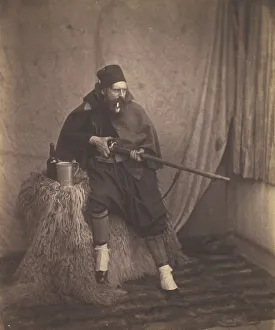
Zouave, 2nd Division, 1855. Creator: Roger FentonZouave, 2nd Division, 1855
Major General A. H. King, 1855. Creator: Roger FentonMajor General A. H. King, 1855
Captain Burnaby of the Grenadier Guards, 1855. Creator: Roger FentonCaptain Burnaby of the Grenadier Guards, 1855
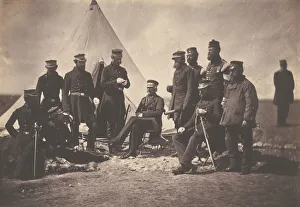
Group at Head Quarters, 1855. Creator: Roger FentonGroup at Head Quarters, 1855
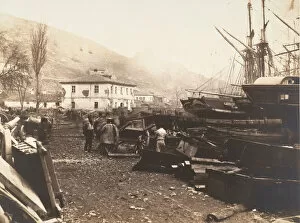
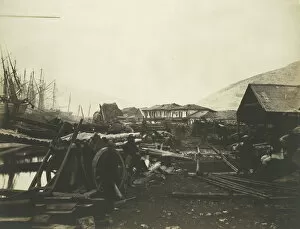
Landing Place, Ordnance Wharf, Balaklava, 1855. Creator: Roger FentonLanding Place, Ordnance Wharf, Balaklava, 1855
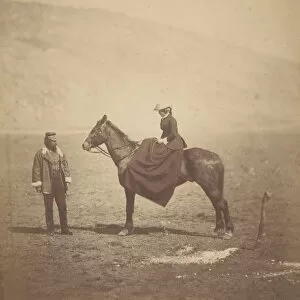
Henry Duberly and Mrs. Duberly, 1855. Creator: Roger FentonHenry Duberly and Mrs. Duberly, 1855
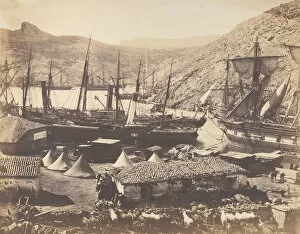
Cossack Bay, Balaklava, 1855. Creator: Roger FentonCossack Bay, Balaklava, 1855
Landing Place, Railway Stores, Balaklava, 1855. Creator: Roger FentonLanding Place, Railway Stores, Balaklava, 1855
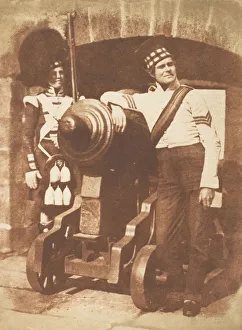
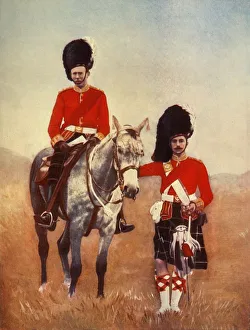
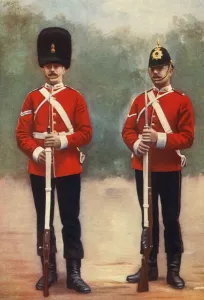
The Porthole / Sergeant and Private of the 42nd Gordon Highlanders, Edinburgh Castle, 1843-47
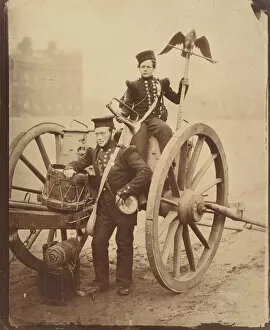
Trumpeter Gritten and Trumpeter Lang at Woolwich, 1856. Creator: Cundall & HowlettTrumpeter Gritten and Trumpeter Lang at Woolwich, 1856
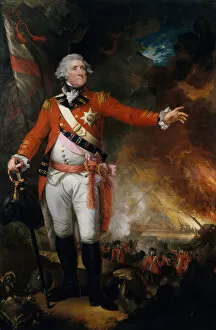
General George Eliott, 1790. Creator: Mather BrownGeneral George Eliott, 1790
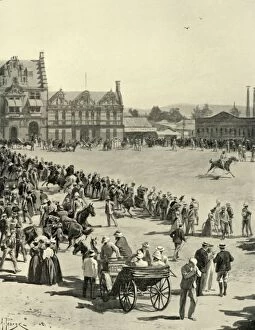
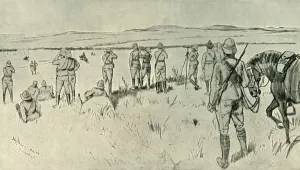
Boers Taking the Oath of Neutrality at Greylingstad, 1901. Creator: Henry Marriott PagetBoers Taking the Oath of Neutrality at Greylingstad, 1901. Boer farmers who took an oath of neutrality were assured safe conduct to their homes
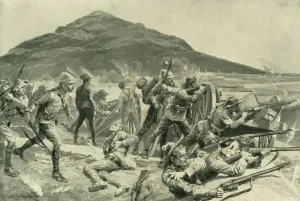
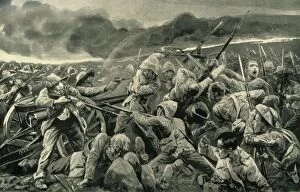
No Surrender! The Defence of Fort Italia on September 26, 1901, 1902" No Surrender!" The Defence of Fort Italia on September 26, 1901, 1902. British forces defend a garrison at Fort Itala, from Boer attack on 26 September 1901
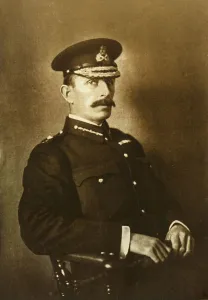
Major-General R. A. P. Clements, 1901. Creator: Elliott & FryMajor-General R. A. P. Clements, 1901. Ralph Arthur Penrhyn Clements (1855- 1909) senior British Army officer appointed a brigade commander during the Second Boer War
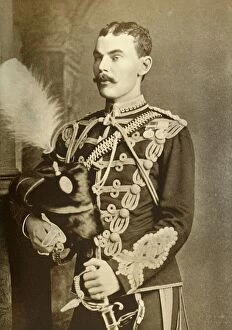
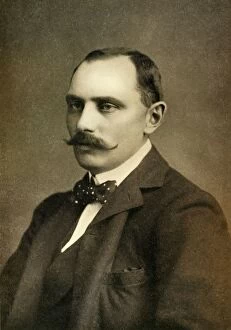
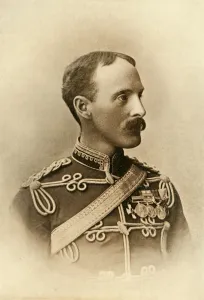
Lieut. -Colonel The Earl of Airlie (12th Lancers), 1901. Creator: Bassano LtdLieut.-Colonel The Earl of Airlie (12th Lancers), 1901. David Ogilvy, 11th Earl of Airlie (1856-1900) Scottish peer of the 12th Royal Lancers who took part in the Battle of Magersfontein
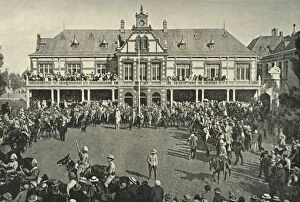
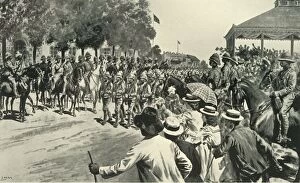
The Entry of Lord Roberts and Staff into Pretoria, 1901. Creator: UnknownThe Entry of Lord Roberts and Staff into Pretoria, 1901. At 2:00 in the afternoon, Pretoria, capital of the South African Republic, surrendered to British General Lord Roberts
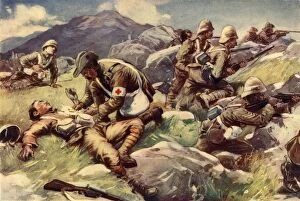
A Non-Combatant Hero - An Army Doctor at Work in the Firing Line, 1902. Creator: UnknownA Non-Combatant Hero - An Army Doctor at Work in the Firing Line, 1902. From " South Africa and the Transvaal War, Vol. VII", by Louis Creswicke. [The Caxton Publishing Co. London, 1902]
Scene in Pretoria Square, June 5: Waiting for the Entry of Lord Roberts and his Army, 1901. At 2:00 in the afternoon, Pretoria, capital of the South African Republic
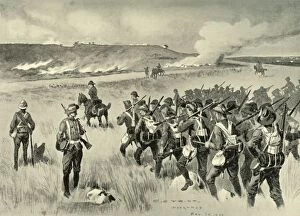
General Bullers Advance: Pursuing the Boers After the Fight on Helpmakaar Heights, 1901. British artillery in pursuit of General Botha on Helpmekaar heights during the Second Boer War
The City of London Imperial Volunteers at Doornkop on the 29th of May, 1901. CreatorThe City of London Imperial Volunteers Supporting General Hamiltons Left Flank in the Action at Doornkop on the 29th of May, 1901
General Ian Hamilton Thanking the Gordons for their Attack at the Battle of Doornkop, 1901. The Gordon Highlanders suffered severe losses, in May 1900 in action at Doornkop
The Capture of De Wets Convoy at Reitz, June 6, 1901, 1902. Attack on Boer waggons by Colonel De Lisles Force.. From " South Africa and the Transvaal War, Vol. VII", by Louis Creswicke
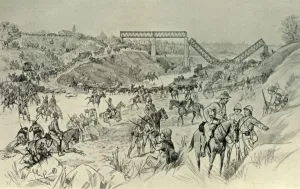
Lord Roberts and His Army Crossing the Wall River, 1901. Creator: RM PaxtonLord Roberts and His Army Crossing the Wall River, 1901. Lord Roberts crossed the Vaal River, a boundary between two Boer republics, to occupy the town of Vereeniging during the Second Boer War
Officers of the Seaforth Highlanders, 1901. Creator: Gregory & CoOfficers of the Seaforth Highlanders, 1901. The Seaforth Highlanders line infantry regiment of the British Army, travelled to South Africa in November 1899
Hauling Down the Transvaal Flag at Johannesburg, 1901. Creator: Lionel JamesHauling Down the Transvaal Flag at Johannesburg, 1901. From " South Africa and the Transvaal War, Vol. V", by Louis Creswicke. [T. C. & E. C. Jack, Edinburgh, 1901]
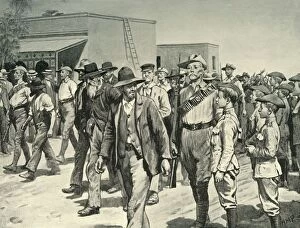
The Last Attack on Mafeking: B. S. A. Police Escorting Boer Prisoners to the Gaol, 1901The Last Attack on Mafeking: B.S.A. Police Escorting Boer Prisoners to the Gaol, 1901. The siege of Mafeking was lifted on 17 May 1900 - British South Africa Police escort Boers to jail
Lieut. -Colonel Plumer, 1901. Creator: Bassano LtdLieut.-Colonel Plumer, 1901. Herbert Charles Onslow Plumer (1857-1932) senior British Army officer who led the mounted infantry at the Relief of Mafeking during the Second Boer War
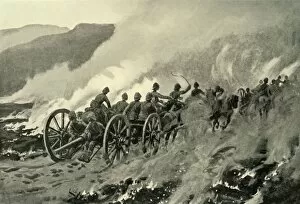
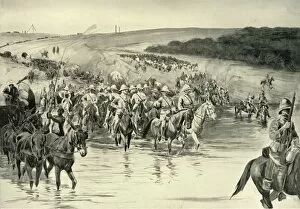
The Great Advance: Royal Horse Artillery (Cavalry Division) Crossing the Vaal, 1901. From " South Africa and the Transvaal War, Vol. V", by Louis Creswicke. [T. C. & E. C
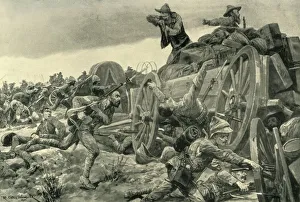
The Engagement at Vlakfontein: The Derbyshires Re-Taking their Guns, 1902. Creator: UnknownThe Engagement at Vlakfontein: The Derbyshires Re-Taking the Guns at the Point of the Bayonet, 1902. The Derbyshire Regiment recapture guns taken by Boers at high cost, 18 were killed and 70 wounded
General Baden-Powell, Lord Edward Cecil, and Other Officers, at the Entrance to their " Dug-Out". 1901. Lord Edward Cecil was in the town of Mafeking during siege by the Boers
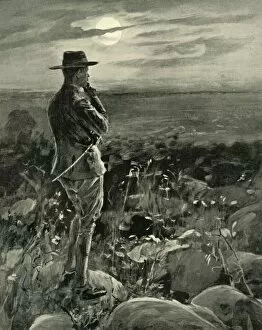
Mafeking: The Wolf That Never Sleeps, 1901. Creator: William HatherellMafeking: " The Wolf That Never Sleeps", 1901. Robert Baden-Powell (1857-1941) British Army officer successfully defended the town during the Siege of Mafeking and was nicknamed Impeesa
Major-General Charles Knox, 1902. Creator: Elliott & FryMajor-General Charles Knox, 1902. Charles Edmond Knox, (1846-1938) Anglo-Irish soldier of the British Army commanded the 13th Infantry Brigade during the Battle of Paardeberg in February 1900
Lieut. -Colonel Bryan T Mahon, D. S. O. 1901. Creator: UnknownLieut.-Colonel Bryan T Mahon, D.S.O. 1901. Bryan Thomas Mahon (1862-1930) Irish born general in the British Army who led South African volunteers from Kimberley to the Relief of Mafeking
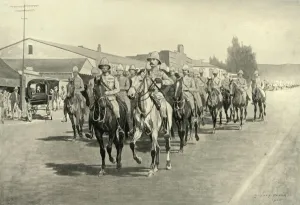
The Surrender of Kroonstadt: Troops Marching Past Lord Roberts and Staff, 1901. CreatorThe Surrender of Kroonstadt: Troops Marching Past Lord Roberts and Staff, 1901. Kroonstad - temporary capital of the Orange Free State - was surrendered to the British on the 11th May, 1900
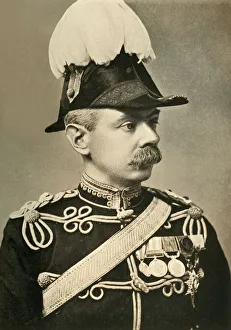
Lieut. -General Sir Frederick Carrington, K. C. M. G. 1901. Creator: Elliot & FryLieut.-General Sir Frederick Carrington, K.C.M.G. 1901. Sir Frederick Carrington (1844-1913) British soldier who left for South Africa in March 1900
Lord Roberts and His Staff Watching the Boers Retreat from Zand River; General French in Pursuit on the Extreme Left, 1901. From " South Africa and the Transvaal War, Vol
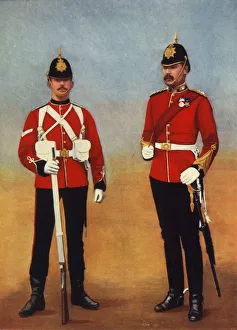
West Surrey (Adjutant) and East Surrey (Sergeant-Major), 1901. Creator: Gregory & CoWest Surrey (Adjutant) and East Surrey (Sergeant-Major), 1901. The East and West Surrey line infantry regiments fought in South Africa from 1899 to 1904 including during the Second Boer War
The Great Advance: Lord Robertss Column Crossing the Sand River Drift, 1901. Creator: UnknownThe Great Advance: Lord Robertss Column Crossing the Sand River Drift, 1901. British forces cross the Sand River advancing on Boer positions during the Second Boer War
Major-General Ian Hamilton, 1901. Creator: Johnston & HoffmannMajor-General Ian Hamilton, 1901. Ian Hamilton (1853-1947) Scottish British Army General, with an extensive Imperial military career
The Royal Marines, 1901. Creator: Gregory & CoThe Royal Marines, 1901. The Royal Marines, a light infantry unit of the Royal Navy were sent to attack Graspan in South Africa in 1899. From " South Africa and the Transvaal War, Vol
Northumberland Fusiliers (Corporal) and DurhamLight Infantry (Lance-Corporal), 1901Northumberland Fusiliers (Corporal) and Durham Light Infantry (Lance-Corporal), 1901. The Northumberland Fusiliers received battle honours for the Battle of Modder River during the second Boer War
Scout - 6th Dragoon Guards (Carabineers), 1901. Creator: Gregory & CoScout - 6th Dragoon Guards (Carabineers), 1901. 6th Dragoon Guards cavalry regiment of the British Army was sent to South Africa in November 1899
Major-General Pole-Carew, 1901. Creator: Gregory & CoMajor-General Pole-Carew, 1901. Reginald Pole-Carew (1849-1924) British Army officer who served with Lord Roberts during the Second Boer War 1899-1902
Lieut. -General Sir H. M. Leslie-Rundle, K. C. B. 1901. Creator: Russell & SonsLieut.-General Sir H. M. Leslie-Rundle, K.C.B. 1901. Leslie Rundle (1856-1934) British Army general during the Second Boer War commanding the 8th Division of the South African Field Force
Sergeant - 18th Hussars, 1901. Creator: Gregory & CoSergeant - 18th Hussars, 1901. 18th Royal Hussars, a cavalry regiment of the British Army was deployed to South Africa in 1899 for service in the Second Boer War
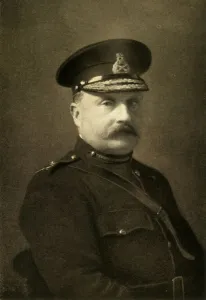
Lieutenant-General Tucker, C. B. 1901. Creator: Raja Deen DajalLieutenant-General Tucker, C.B. 1901. Charles Tucker (1838-1935) British Army officer who commanded the garrison in the City of Pretoria