mail_outline sales@mediastorehouse.com
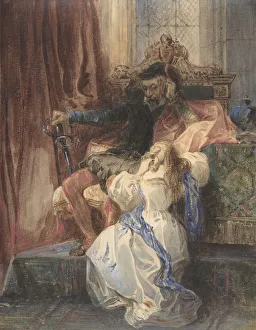
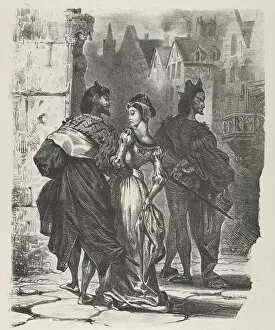
The Pardon Refused (from Sir Walter Scotts "Kenilworth"), ca. 1826-29The Pardon Refused (from Sir Walter Scotts " Kenilworth" ), ca. 1826-29
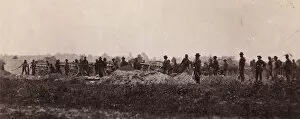
Pennsylvania Light Artillery, Battery B, Petersburg, Virginia, 1864. Formerly attributed to Mathew B. Brady
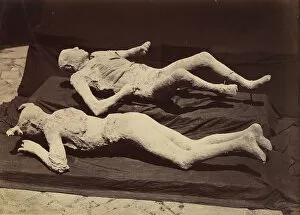
[Plaster Casts of Bodies, Pompeii], ca. 1875. Creator: Giorgio Sommer[Plaster Casts of Bodies, Pompeii], ca. 1875
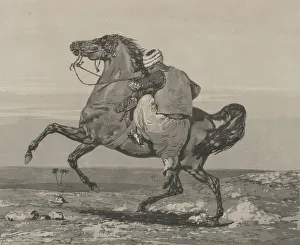
Turk Mounting His Horse, 1824. 1824. Creator: Eugene DelacroixTurk Mounting His Horse, 1824
Faust Trying to Seduce Marguerite (Goethe, Faust), 1825-27. 1825-27Faust Trying to Seduce Marguerite (Goethe, Faust), 1825-27. Illustration for a French translation by Albert Stapfer of Goethes Faust
Washington, Crossing the Delaware-On the Evening of Dec. 25th 1776, previous to the Battle of Trenton. 1876. During the American Revolution
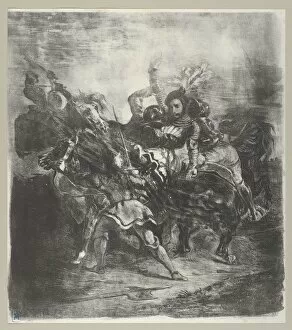
Weislingen attacked by Goetzs Men, 1836-43. 1836-43. Creator: Eugene DelacroixWeislingen attacked by Goetzs Men, 1836-43
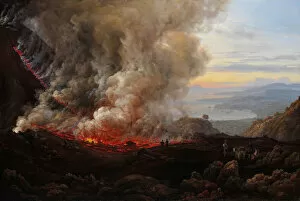
An Eruption of Vesuvius, 1824. Creator: Johan Christian DahlAn Eruption of Vesuvius, 1824
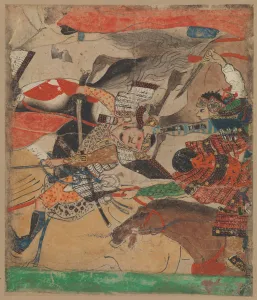
Battle at Rokuhara, from The Tale of the Heiji Rebellion (Heiji monogatari)... 14th centuryBattle at Rokuhara, from The Tale of the Heiji Rebellion (Heiji monogatari), first quarter of the14th century. Battles between the Minamoto and Taira military clans that took place in late 1159
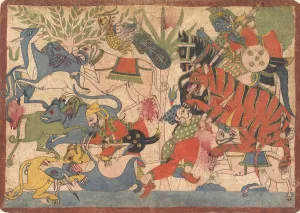
Royal Hunt, folio from a Mahabharata, 1800-1850. Creator: Unknown" Royal Hunt", folio from a Mahabharata, 1800-1850
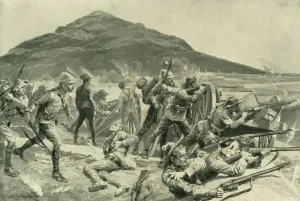
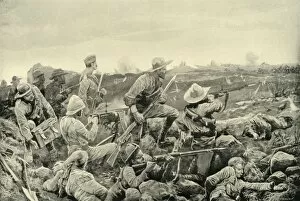
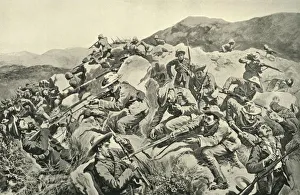
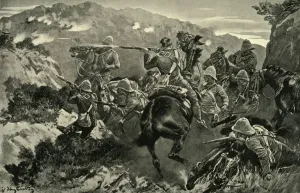
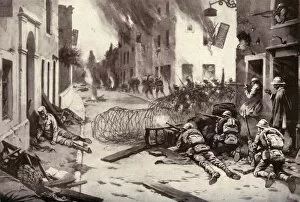
No Surrender! The Defence of Fort Italia on September 26, 1901, 1902" No Surrender!" The Defence of Fort Italia on September 26, 1901, 1902. British forces defend a garrison at Fort Itala, from Boer attack on 26 September 1901
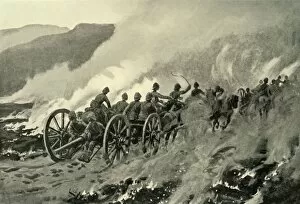
General Bullers Advance: Pursuing the Boers After the Fight on Helpmakaar Heights, 1901. British artillery in pursuit of General Botha on Helpmekaar heights during the Second Boer War
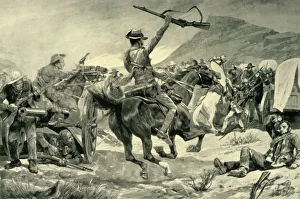
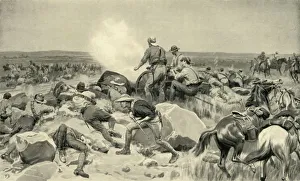
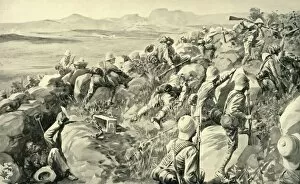
Charge of the Bushmen and New Zealanders on Boer Guns near Klerksdorp, March 24, 1901Charge of the Bushmen and New Zealanders on the Boer Guns During the Attack on Babingtons Convoy near Klerksdorp, March 24, 1901, 1902
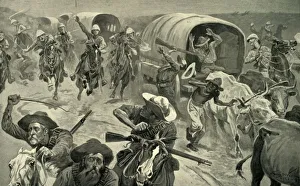
The Capture of De Wets Convoy at Reitz, June 6, 1901, 1902. Attack on Boer waggons by Colonel De Lisles Force.. From " South Africa and the Transvaal War, Vol. VII", by Louis Creswicke
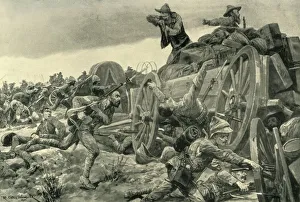
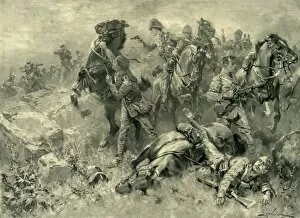
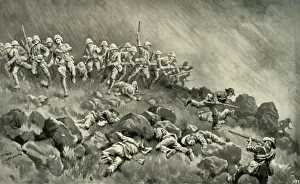
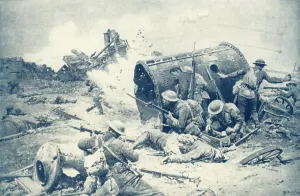
The Engagement at Vlakfontein: The Derbyshires Re-Taking their Guns, 1902. Creator: UnknownThe Engagement at Vlakfontein: The Derbyshires Re-Taking the Guns at the Point of the Bayonet, 1902. The Derbyshire Regiment recapture guns taken by Boers at high cost, 18 were killed and 70 wounded
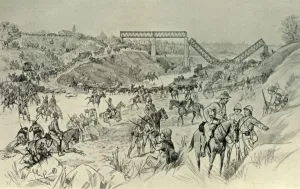
The Great Advance: Lord Robertss Column Crossing the Sand River Drift, 1901. Creator: UnknownThe Great Advance: Lord Robertss Column Crossing the Sand River Drift, 1901. British forces cross the Sand River advancing on Boer positions during the Second Boer War
Colonel Plumers Gallant Attempt to Relieve Mafeking from the North, 1900. Creator: Frank DaddColonel Plumers Gallant Attempt to Relieve Mafeking from the North, 1900. The Siege of Mafeking lasted 217 days during the Second Boer War
Brilliant Defence by New Zealanders at Holspruit, February 25, 1902, 1902. CreatorBrilliant Defence by New Zealanders at Holspruit, February 25, 1902, 1902. Hoedspruit in Limpopo, South Africa was seconded by the British as a garrison to intercept shipments of arms being sent by
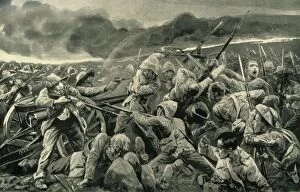
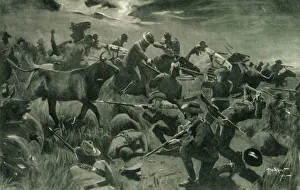
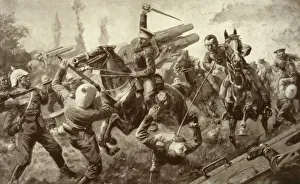
Mishap to the Scots Greys at Klippan, February 18, 1902, 1902. Creator: Hermanus Willem KoekkoekMishap to the Scots Greys at Klippan, February 18, 1902, 1902. Klippan was the last battle fought by the Greys in the Boer War, the British suffered many casualties
The Relief of Ladysmith - The Last Rush at Hlangwane Hill, 1900. Creator: Rene BullThe Relief of Ladysmith - The Last Rush at Hlangwane Hill, 1900. The Boers, under heavy bombardment abandoned Hlangwane and withdrew north of the Tugela
Sleepless Mafeking - Hot Work in the Trenches, 1900. Creator: Richard Caton Woodville IISleepless Mafeking - Hot Work in the Trenches, 1900. The Siege of Mafeking took place from 14th October 1899 to 16th May 1900. From " South Africa and the Transvaal War, Vol
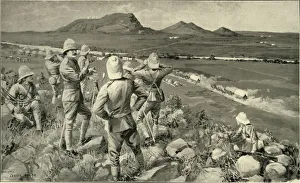
Shell from the Naval Brigade Dispersing Boers from Behind the Seven Sisters Kopjes, 1900Shell from the Naval Brigade Dispersing Boers from Behind the Seven Sisters Kopjes, During the Action of 7th March at Le Gallais Kopje, near Osfontein, 1900
Cronjes Stronghold on the Modder River, 1900. Creator: HC Seppings WrightCronjes Stronghold on the Modder River, 1900. Piet Cronjes Boer army and British forces in entrenched opposition on the Modder River. From " South Africa and the Transvaal War, Vol
Capture of a Boer Convoy by General Frenchs Troops near Kimberley, 1900. CreatorCapture of a Boer Convoy by General Frenchs Troops near Kimberley, 1900. During the Relief of Kimberle, a convoy of Boer wagons reached the crossing of the Modder at Paardeberg Drift when British
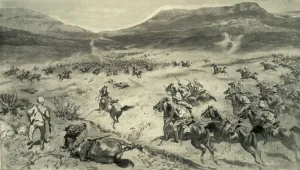
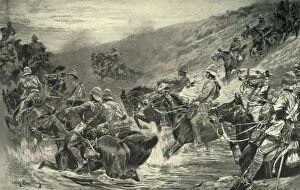
The Last Stand Made By The Boers Before Kimberley-Charge of British Cavalry, 1900The Last Stand Made By The Boers Before Kimberley-Charge of British Cavalry in the Engagement at Klip Drift, 1900. Major-General John French charged his cavalry at Klip Drift during the Relief of
The Dash for Kimberley - The 10th Hussars Crossing Klip Drift, 1900. Creator: John CharltonThe Dash for Kimberley - The 10th Hussars Crossing Klip Drift, 1900. The regiment sailed for South Africa in November 1899 and after fighting at Colesberg
The Great Assault on Ladysmith - The Devons Clearing Wagon Hill, 1900. Creator: William T MaudThe Great Assault on Ladysmith - The Devons Clearing Wagon Hill, 1900. The Battle of Wagon Hill took place during the Siege of Ladysmith in South Africa in 1900
Fighting Mac and the Highland Brigade in Action at Koodoesberg, 1900" Fighting Mac" and the Highland Brigade in Action at Koodoesberg, 1900. General MacDonald took a position at Koodoesberg drift on the Modder River
With General French: New Zealanders Saving a Picket of the Yorkshire Regiment, 1900With General French: New Zealanders Saving a Picket of the Yorkshire Regiment near Slingersfontein on January 15, 1900. From " South Africa and the Transvaal War, Vol
A Picket of 13th Hussars Surprised Near the Tugela River (Hussar Hill), 1900. CreatorA Picket of 13th Hussars Surprised Near the Tugela River (Hussar Hill), 1900. The Battle of Tugela (or Thukela) Heights, was a series of military actions lasting from 14 to 27 February 1900 in which
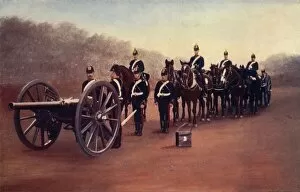
Royal Field Artillery (Action Front), 1900. Creator: Gregory & CoRoyal Field Artillery (Action Front), 1900. From " South Africa and the Transvaal War, Vol. III", by Louis Creswicke. [T. C. & E. C. Jack, Edinburgh, 1900]
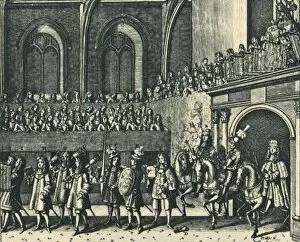
The Kings Challenger Entering Westminster Hall, 1684, (1947). Creator: M. YeatesThe Kings Challenger Entering Westminster Hall, 1684, (1947). Officials and nobles inside Westminster Hall in the Palace of Westminster, London
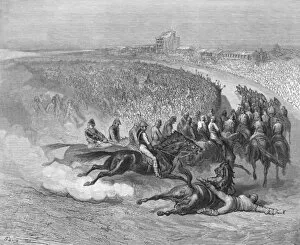
The Derby - Tattenham Corner, 1872. Creator: Gustave DoréThe Derby-Tattenham Corner, 1872. A horse falls at Tattenham Corner, a sharp bend in the track on Epsom Racecourse. From, " LONDON. A Pilgrimage" by Gustave Dore and Blanchard Jerrold
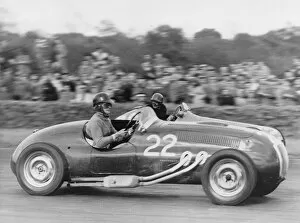
1952 Frazer-Nash, Tony Crook being overtaken by de Graffenrieds Maserati. Creator: Unknown1952 Frazer-Nash, Tony Crook being overtaken by de Graffenrieds Maserati
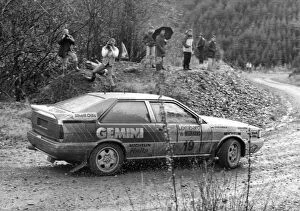
1987 Audi Quattro, David Llewellin, R. A. C. Rally. Creator: Unknown1987 Audi Quattro, David Llewellin, R.A.C. Rally
1995 BMW F650. Creator: Unknown1995 BMW F650
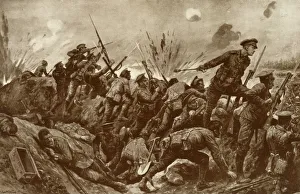
The First V. C. ever Won by a Territorial, 1916. Creator: UnknownThe First V.C. ever Won by a Territorial, 1916. Second-Lieut. G. H. Woolley s. defence of Hill 60 made him the first British Territorial Army officer to be awarded the Victoria Cross
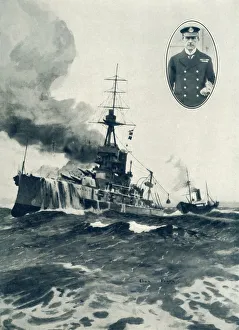
Vice Admiral Sir John Jellicoes Flagship, Iron Duke, Being Coaled at Sea. Inset: Vice-Admiral Jellicoe, 1915. Iron Duke was flagship of the Grand Fleet during the First World War
Missed! U Boats Torpedo Passes Beyond the Stern of British War Vessel, 1916. Creator: UnknownMissed! U Boats Torpedo Passes Beyond the Stern of British War Vessel, 1916. From " The War Illustrated Album De Luxe - Volume VI. The Spring and Summer Campaign of 1916", edited by J. A
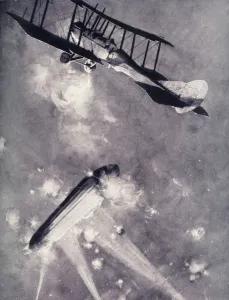
Lieutenant A. de Bathe Brandon Attacking a Zeppelin Raider, 1916. Creator: UnknownLieutenant A. de Bathe Brandon Attacking a Zeppelin Raider, 1916. Alfred de Bathe Brandon (1883-1974) New Zealand military aviator credited with the destruction of two Zeppelin airships
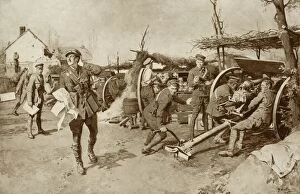
With a British Battery at the Front, 1916. Creator: UnknownWith a British Battery at the Front, 1916. From " The War Illustrated Album De Luxe - Volume IV. The Summer Campaign - 1915", edited by J. A. Hammerton
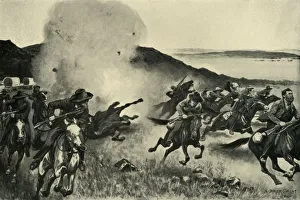
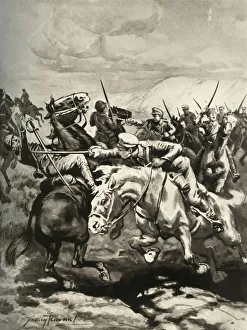
Fearless Cossacks Sabre and Put to Flight Hungarian Hussars, 1916. Creator: UnknownFearless Cossacks Sabre and Put to Flight Hungarian Hussars, 1916. on the eve of World War I the Cossacks had 328, 705 men ready to take up arms for Russia
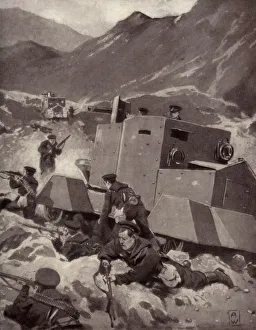
British Armoured Cars in the Caucasus, 1917. Creator: UnknownBritish Armoured Cars in the Caucasus, 1917. The main objective of the Ottoman Empire was the recovery of territory in the Caucasus
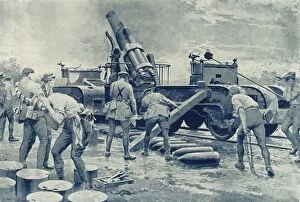
British Heavy Howitzer in Action on the Western Front, 1916. Creator: UnknownBritish Heavy Howitzer in Action on the Western Front, 1916. Artillery played a huge role in the First World War, at the start of the war the British bombarded the enemy before sending infantry over
How the Italians Drove the Austrians out of Burning Asiago, 1917. Creator: UnknownHow the Italians Drove the Austrians out of Burning Asiago, 1917. Asiago was nearly destroyed in the war having seen many battles between Italian and Austro-Hungarian troops
Retreat from Belgium: British Troops on the River Prepared To Resist the German AdvanceAn Incident in the Hard-Fought Retreat from Belgium: British Troops on the River Bank Prepared To Resist the German Advance, 1915
The Glorious Charge of the Ninth Lancers During the Great Retreat from Mons to Cambrai, 1915. British Expeditionary Forces on the Western Front during the First World War
Canadas Great Day at Courcelette, 1917. Creator: UnknownCanadas Great Day at Courcelette, 1917. The Battle of Flers-Courcelette (15-22 September 1916) was fought during the Battle of the Somme, the Canadian Corps fought for the first time