mail_outline sales@mediastorehouse.com
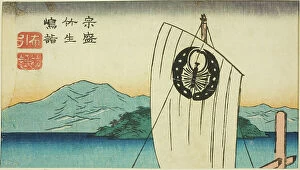
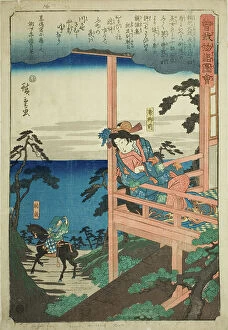
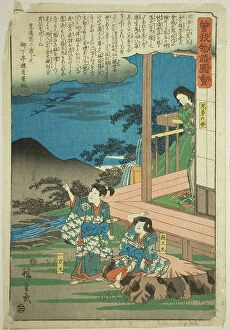
Munemori Visiting Chikubu Island in the play Nunobiki Monogatari (Munemori Chikubushima mo... 1854)Munemori Visiting Chikubu Island in the play Nunobiki Monogatari (Munemori Chikubushima mode, Nunobiki Monogatari), section of a sheet from the series "Reflections of Dramas in Cutouts
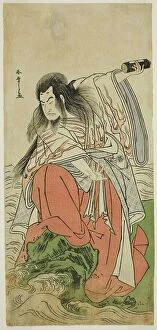
The Actor Onoe Matsusuke I as Retired Emperor Sutoku in the Play Kitekaeru Nishiki no... c. 1780. Creator: ShunshoThe Actor Onoe Matsusuke I as Retired Emperor Sutoku in the Play Kitekaeru Nishiki no Wakayaka, Performed at the Nakamura Theater in the Eleventh Month, 1780, Japan, c. 1780
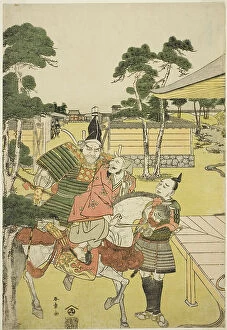
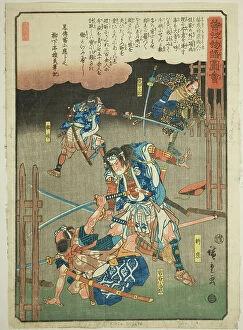
Musashibo Benkei Brings the Captured Tosabo Shoshun to Yoshitsune in the Play Horikawa...c. 1782. Creator: ShunshoMusashibo Benkei Brings the Captured Tosabo Shoshun to Yoshitsune in the Play Horikawa Youchi no Zu Uki-e Nimaitsuzuki, Japan, c. 1782
Oiso no Tora telling Soga Brothers where to find Suketsune, from the series "Illustr... c. 1843/47Oiso no Tora telling Soga Brothers where to find Suketsune, from the series "Illustrated Tale of the Soga Brothers (Soga monogatari zue)", c. 1843/47
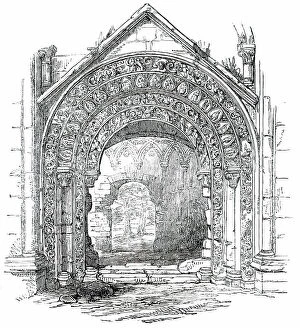
Glastonbury Abbey - North Door of St. Joseph's Chapel, 1850. Creator: UnknownGlastonbury Abbey - North Door of St. Joseph's Chapel, 1850. Ruined medieval abbey in Glastonbury, Somerset. View showing...the North Portal of St
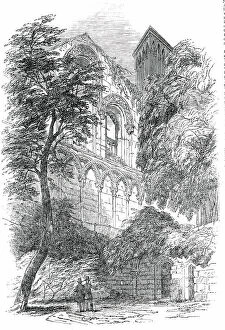
Glastonbury Abbey - interior of St. Joseph's Chapel, from the Crypt, 1850. Creator: UnknownGlastonbury Abbey - interior of St. Joseph's Chapel, from the Crypt, 1850. Ruined medieval abbey in Glastonbury, Somerset
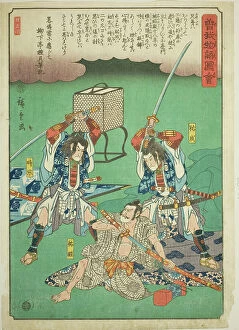
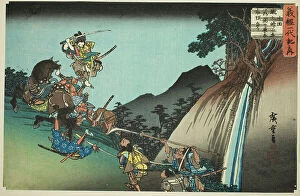
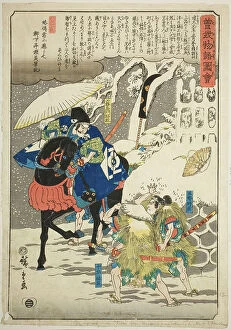
Tokimune, Sukenari, Kikko Kojiro and Aiko Saburo fighting in the rain, from the seri... c. 1843/47Tokimune, Sukenari, Kikko Kojiro and Aiko Saburo fighting in the rain, from the series "Illustrated Tale of the Soga Brothers (Soga monogatari zue)", c. 1843/47
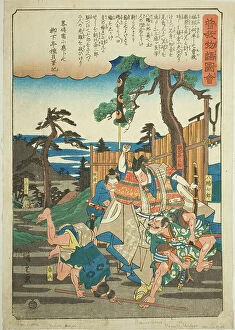
Sukenari (Soga no Juro) and Tokimune (Soga no Goro) assasinating Suketsune, from the... c. 1843/47Sukenari (Soga no Juro) and Tokimune (Soga no Goro) assasinating Suketsune, from the series "Illustrated Tale of the Soga Brothers (Soga monogatari zue)", c. 1843/47
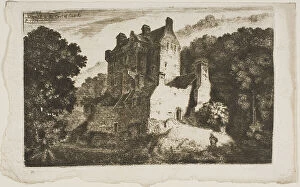
Wenlock Abbey, Sharpshire, n.d. Creator: George Augustus HolmesWenlock Abbey, Sharpshire, n.d
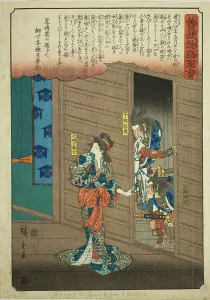
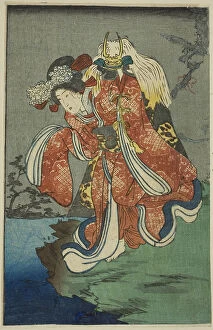
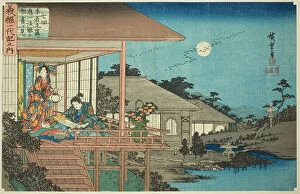
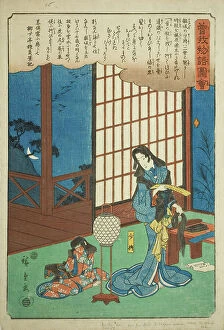
Shizuka Gozen, section of a sheet from the series "A Harimaze Mirror of Joruri...", 1854Shizuka Gozen, section of a sheet from the series "A Harimaze Mirror of Joruri Plays (Harimaze joruri kagami)", 1854
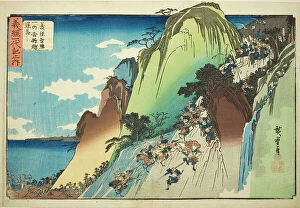
No. 4: Yoshitsune Leading His Cavalry Down Hiyodori Pass at Ichinotani (Yonkai, Yosh... c. 1832/34)No. 4: Yoshitsune Leading His Cavalry Down Hiyodori Pass at Ichinotani (Yonkai, Yoshitsune chiryaku Ichinotani Hiyodori-goe saka otoshi)
No. 5: Yoshitsune Takes a Shortcut and Scales the Steep and Dangerous Precipice at... c. 1832/34No. 5: Yoshitsune Takes a Shortcut and Scales the Steep and Dangerous Precipice at Hiyodori Pass (Gokai, Kando ni omomuku Yoshitsune Hiyodori goe no kenshun nansho o yojinoboru)
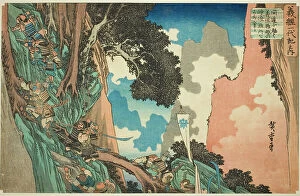
No. 3: Yoshitsune's Night Attack Against the Taira Army at the Battle of Mount Mikus... c. 1832/34No. 3: Yoshitsune's Night Attack Against the Taira Army at the Battle of Mount Mikusa (Sankai, Mikusa gassen Yoshitsune Heijin batsu yoru utsu)
No. 10: Ushiwaka Defeats Sekigahara Yoichi at Keage Mountain Pass (Jukkai, Keage tog... c. 1832/34)No. 10: Ushiwaka Defeats Sekigahara Yoichi at Keage Mountain Pass (Jukkai, Keage toge ni Ushiwaka Sekigahara Yoichi uchikiru)
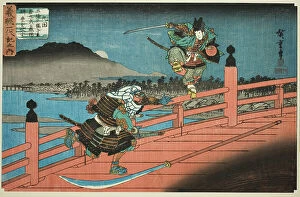
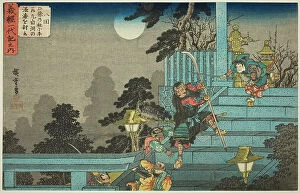
No. 9: Ushiwakamaru Defeats Musashibo Benkei at Gojo Bridge (Kyukai, Gojo no hashi... c. 1832/34)No. 9: Ushiwakamaru Defeats Musashibo Benkei at Gojo Bridge (Kyukai, Gojo no hashi ni Ushiwakamaru Musashibo Benkei o fusu)
No. 7: Ushiwakamaru Reading Kiichi Hogan's Secret Scroll (Nanakai, Ushiwakamaru hiso... c. 1832/34)No. 7: Ushiwakamaru Reading Kiichi Hogan's Secret Scroll (Nanakai, Ushiwakamaru hisoka ni Kiichi Hogan no hisho o miru)
No. 6: Ise no Saburo Swears Loyalty to Ushiwakamaru (Rokukai, Ise no Saburo ga kakur... c. 1832/34)No. 6: Ise no Saburo Swears Loyalty to Ushiwakamaru (Rokukai, Ise no Saburo ga kakurega ni yadorite Ushiwakamaru shuju o yakusu)
Sukenari (Soga no Juro) dancing before Suketsune, from the series "Illustrated Tale... c. 1843/47Sukenari (Soga no Juro) dancing before Suketsune, from the series "Illustrated Tale of the Soga Brothers (Soga monogatari zue)", c. 1843/47
Soga no Juro and Soga no Goro pursuing Suketsune's hunting party at Miharano, from... c. 1843/47Soga no Juro and Soga no Goro pursuing Suketsune's hunting party at Miharano, from the series "Illustrated Tale of the Soga Brothers (Soga monogatari zue)", c. 1843/47
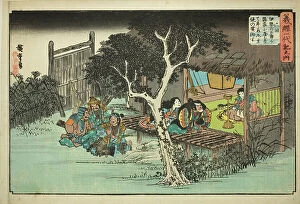
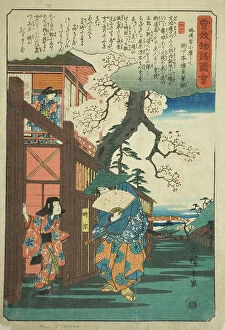
Sukenari (Soga no Juro), Tokimune (Soga no Goro), and their mother at a farewell... c. 1843/47. Creator: Ando HiroshigeSukenari (Soga no Juro), Tokimune (Soga no Goro), and their mother at a farewell party, from the series "Illustrated Tale of the Soga Brothers (Soga monogatari zue)", c. 1843/47
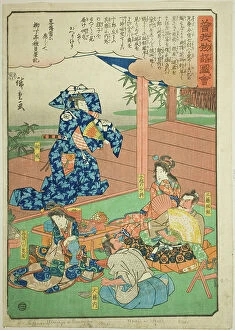
Soga no Juro's lover Tora Gozen seated on a balcony, from the series "Illustrated Tale... c1843/47Soga no Juro's lover Tora Gozen seated on a balcony, from the series "Illustrated Tale of the Soga Brothers (Soga monogatari zue)", c. 1843/47
Kewaizaka no Shosho cutting her hair to become a nun, from the series "Illustrated Tale... cKewaizaka no Shosho cutting her hair to become a nun, from the series "Illustrated Tale of the Soga Brothers (Soga monogatari zue)", c. 1843/47
Tokimune (Soga no Goro) visiting his lover Kewaizaka no Shosho, from the series... c. 1843/47. Creator: Ando HiroshigeTokimune (Soga no Goro) visiting his lover Kewaizaka no Shosho, from the series "Illustrated Tale of the Soga Brothers (Soga monogatari zue)", c. 1843/47
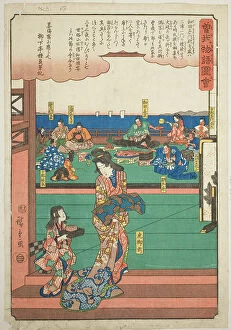
Tora Gozen at the banquet of Wada no Yoshimori, from the series "Illustrated Tale... c. 1843/47Tora Gozen at the banquet of Wada no Yoshimori, from the series "Illustrated Tale of the Soga Brothers (Soga monogatari zue)", c. 1843/47
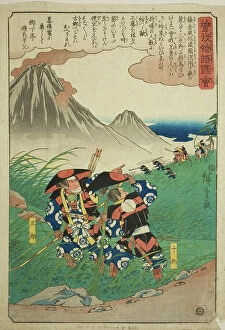
Soga no Juro and Soga no Goro ambushing Suketsune, from the series "Illustrated Tale... c. 1843/47Soga no Juro and Soga no Goro ambushing Suketsune, from the series "Illustrated Tale of the Soga Brothers (Soga monogatari zue)", c. 1843/47
Asahina Saburo saves the Soga brothers from Hachiman Shichiro, from the series... c. 1843/47. Creator: Ando HiroshigeAsahina Saburo saves the Soga brothers from Hachiman Shichiro, from the series "Illustrated Tale of the Soga Brothers (Soga monogatari zue)", c. 1843/47
Soga brothers bid farewell to the summer grasses, from the series "Illustrated Tale... c. 1843/47Soga brothers bid farewell to the summer grasses, from the series "Illustrated Tale of the Soga Brothers (Soga monogatari zue)", c. 1843/47
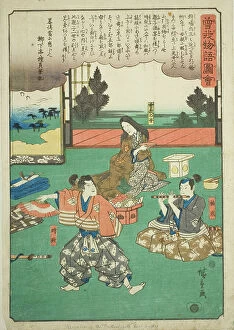
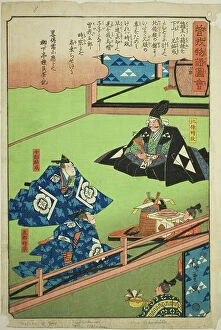
Hojo Tokimune and Soga no Juro Sukenari celebrate Goro's coming of age, from the... c. 1843/47Hojo Tokimune and Soga no Juro Sukenari celebrate Goro's coming of age, from the series "Illustrated Tale of the Soga Brothers (Soga monogatari zue)", c. 1843/47
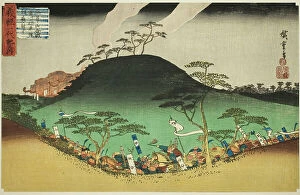
Ichimanmaru (Soga no Juro) and Hakoomaru (Soga no Goro) with their mother, from the... c. 1843/47Ichimanmaru (Soga no Juro) and Hakoomaru (Soga no Goro) with their mother, from the series "Illustrated Tale of the Soga Brothers (Soga monogatari zue)", c. 1843/47
Ichimanmaru (Soga no Juro) and Hakoomaru (Soga no Goro) about to be executed at Yuig... c. 1843/47Ichimanmaru (Soga no Juro) and Hakoomaru (Soga no Goro) about to be executed at Yuigahama, from the series "Illustrated Tale of the Soga Brothers (Soga monogatari zue)", c. 1843/47
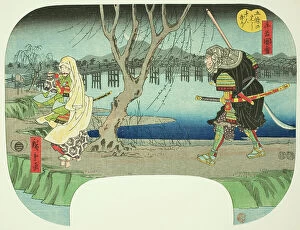
Killing One Thousand People at Gojo Bridge (Gojo no hashi sennin kiri), from the... c. 1849/52. Creator: Ando HiroshigeKilling One Thousand People at Gojo Bridge (Gojo no hashi sennin kiri), from the series "Scenes from the Life of Yoshitsune (Ushiwaka zue)", c. 1849/52
No. 2: Ushiwakamaru Learns Swordsplay from the Tengu at Sojogatani on Mount Kurama... c. 1832/34No. 2: Ushiwakamaru Learns Swordsplay from the Tengu at Sojogatani on Mount Kurama (Nikai, Kuramayama Sojogatani ni oite Ushiwakamaru ijin yori kenpo o manabu)
No. 8: Ushiwakamaru Defeats Tankai of Shirakawa at the Gojo Shrine (Hachikai, Gojo... c. 1832/34)No. 8: Ushiwakamaru Defeats Tankai of Shirakawa at the Gojo Shrine (Hachikai, Gojo no yashiro ni Ushiwakamaru Shirakawa no Tankai o uchitori)
The Beginning: Tokiwa Gozen Fleeing with Her Three Children (Hattan, sanshi o tomona... c. 1832/34)The Beginning: Tokiwa Gozen Fleeing with Her Three Children (Hattan, sanshi o tomonatte Tokiwa Gozen hyorosu), from the series "The Life of Yoshitsune (Yoshitsune ichidai zue)", c. 1832/34
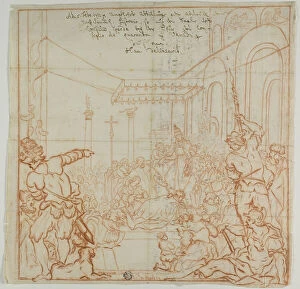
Submission of the Emperor Frederick Barbarossa to Pope Alexander III, 1712. Creator: Hieronymus HauSubmission of the Emperor Frederick Barbarossa to Pope Alexander III, 1712
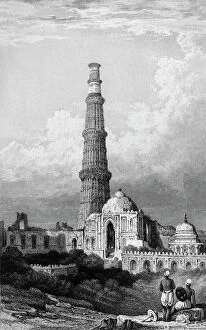
Cootub Minar, Delhi, 1834. Creator: Samuel ProutCootub Minar, Delhi, 1834. View of the Qutb Minar in Delhi, India. From "Views in India, China and on the Shores of the Red Sea, Vol. I". [Fisher, Son & Co. London, 1835]
Opening of the Whitehaven and Furness Junction Railway - St. Bees Priory Church, 1850. Creator: UnknownOpening of the Whitehaven and Furness Junction Railway - St. Bees Priory Church, 1850. The Priory Church of St Mary and St Bega was founded c 1120
Part of Holyrood Palace and Abbey, 1850. Creator: UnknownPart of Holyrood Palace and Abbey, 1850. Exterior of the abbey and Palace of Holyrood at Edinburgh in Scotland. Holyrood Abbey was founded in 1128, by David II
Lobed Cup and Stand with Floral Sprays and Stylized Leaves, North Korea, Goryeo... 12th /13th cent. Creator: UnknownLobed Cup and Stand with Floral Sprays and Stylized Leaves ?? ?? ? ??, North Korea, Goryeo dynasty (918-1392), 12th /13th century
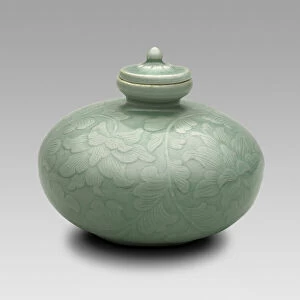
Covered Oil Bottle with Flowering Lotus and Scrolling Leaves, North Korea, Goryeo... 12th century. Creator: UnknownCovered Oil Bottle with Flowering Lotus and Scrolling Leaves, North Korea, Goryeo dynasty (918-1392), 12th century
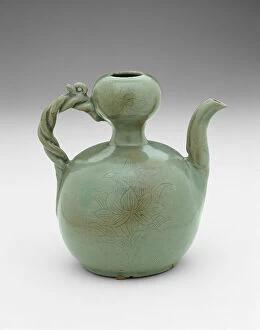
Gourd-Shaped Ewer with Twisted Rope Handle, Lotus Leaves, and Floral Sprays... 12th century. Creator: UnknownGourd-Shaped Ewer with Twisted Rope Handle, Lotus Leaves, and Floral Sprays, Korea, Goryeo dynasty (918-1392), 12th century
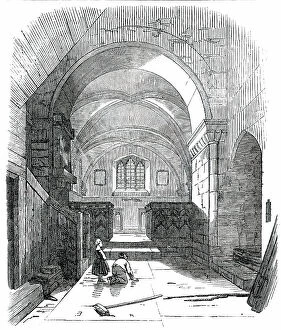
Interior of Upton Church, Bucks. 1850. Creator: UnknownInterior of Upton Church, Buckinghamshire, 1850. St Laurence's Church at Upton-cum-Chalvey, 12th-century Norman. The interior presents a sad picture of desolation
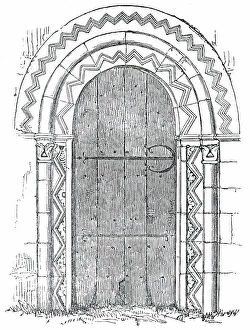
Door of Upton Church, Bucks. 1850. Creator: UnknownDoor of Upton Church, Buckinghamshire, 1850. 12th-century Norman door at St Laurence's Church, Upton-cum-Chalvey. Of late years
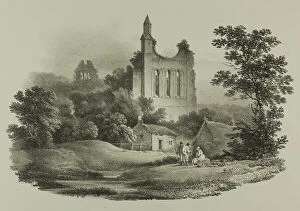
Byland Abbey, Yorkshire, 1821. Creator: Francis NicholsonByland Abbey, Yorkshire, 1821
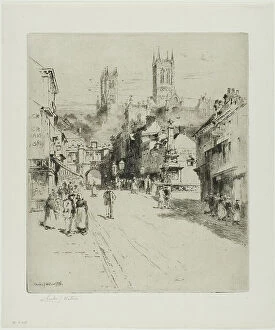
Lincoln Cathedral, 1896. Creator: Charles John WatsonLincoln Cathedral, 1896
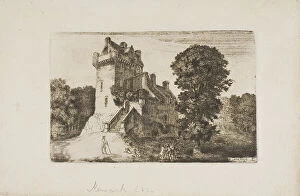
Newark Castle, n.d. Creator: John ClerkNewark Castle, n.d