mail_outline sales@mediastorehouse.com
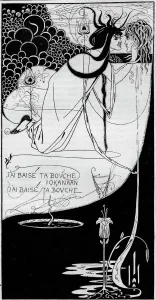
The Climax, c1893. Artist: Aubrey BeardsleyThe Climax, c1893. An illustration for Oscar Wildes Salome. From The Studio Volume 1 [London Offices of the Studio, London, 1893]
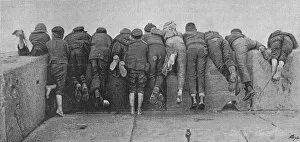
Stern Reality, 1892. Artist: Frank Meadow SutcliffeStern Reality, 1892. From The Studio Volume 1 [London Offices of the Studio, London, 1893]
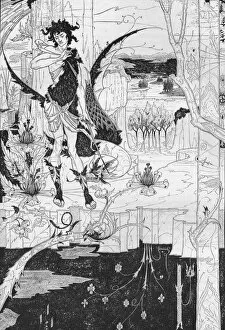
Siegfried, Act II, c1893. Artist: Aubrey BeardsleySiegfried, Act II, c1893. This drawing is an illustration relating to Act II of Richard Wagners (1813-1883) opera Siegfried. From The Studio Volume 1 [London Offices of the Studio, London, 1893]
Music Gallery with scuplture, c1893. The Music Gallery designed by George James Frampton (1860-1928) at 11 Kensington Court. From The Studio Volume 1 [London Offices of the Studio, London, 1893]
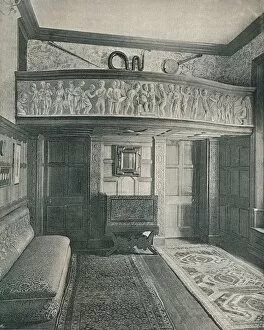
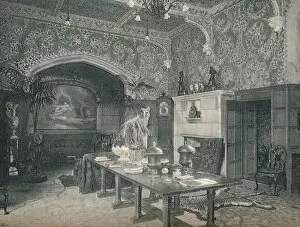
The Entrance Hall of Stanmore Hall, c1891. Decorated by William Morris and Co. From The Studio Volume 1 [London Offices of the Studio, London, 1893]
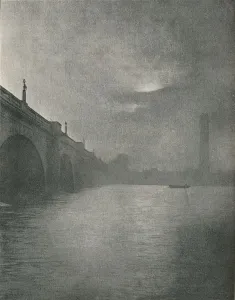
Waterloo Bridge, 1877. Artist: Frederick HollyerWaterloo Bridge, 1877. From The Studio Volume 1 [London Offices of the Studio, London, 1893]
White Memorial Altar Cloth, Parish Church, Cheddleton, c1891. Artist: Gerald Callcott HorsleyWhite Memorial Altar Cloth, Parish Church, Cheddleton, c1891. From The Studio Volume 1 [London Offices of the Studio, London, 1893]
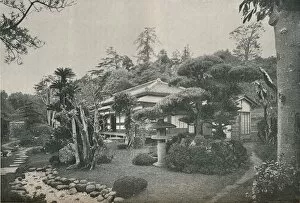
A Private Garden at Yokohama, c1892. From The Studio Volume 1 [London Offices of the Studio, London, 1893]
Who Could Have Sent It?, c1885. Artist: Henry Peach RobinsonWho Could Have Sent It?, c1885. From The Studio Volume 1 [London Offices of the Studio, London, 1893]
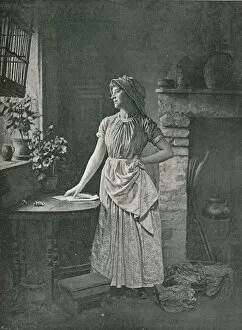
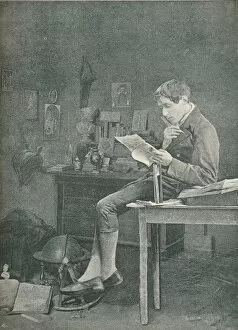
The Student, c1877. Artist: Adam DistonThe Student, c1877. From The Studio Volume 1 [London Offices of the Studio, London, 1893]
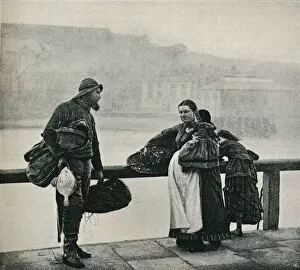
Fisher people, Whitby, c1890. Artist: Frank Meadow SutcliffeFisher people, Whitby, c1890. From The Studio Volume 1 [London Offices of the Studio, London, 1893]
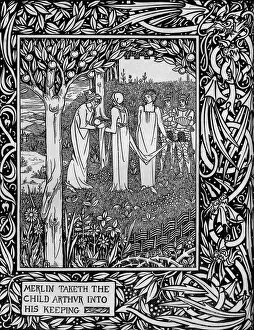
Merlin Taketh the Child Arthur into His Keeping, c1893. Artist: Aubrey BeardsleyMerlin Taketh the Child Arthur into His Keeping, c1893. An illustration for Sir Thomas Malory (d1471) reworking of Le Morte d Arthur
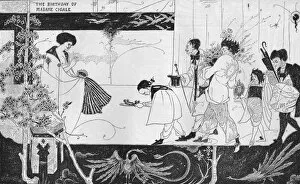
The Birthday of Madame Cigale, c1893. Artist: Aubrey BeardsleyThe Birthday of Madame Cigale, c1893. From The Studio Volume 1 [London Offices of the Studio, London, 1893]