mail_outline sales@mediastorehouse.com
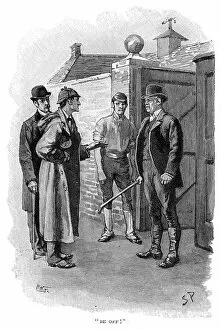
The Adventure of Silver Blaze, Holmes questioning a suspect. Artist: Sidney E PagetThe Adventure of Silver Blaze, Holmes questioning a suspect. Encounter between Silas Brown, the trainer who was hiding the lost racehorse Silver Blaze, and Holmes
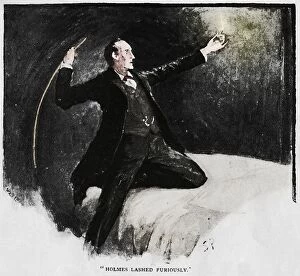
Holmes Lashed Furiously, 1892. Artist: Sidney E PagetHolmes Lashed Furiously, 1892. Illustration from The Adventure of the Speckled Band by Arthur Conan Doyle. From The Strand Magazine: An Illustrated Monthly - Vol. III
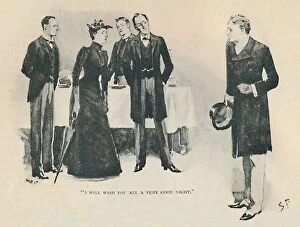
I Will Wish You All A Very Good Night, 1892. Artist: Sidney E PagetI Will Wish You All A Very Good Night, 1892. Illustration from The Adventure of the Noble Bachelor by Arthur Conan Doyle. From The Strand Magazine: An Illustrated Monthly - Vol. III
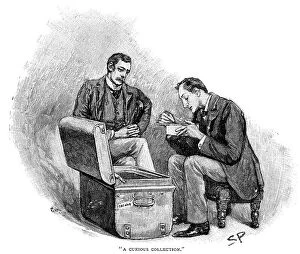
The Adventure of the Musgrave Ritual, Sherlock Holmes going through the mememtoes of old cases. Artist: Sidney E PagetThe Adventure of the Musgrave Ritual: Dr Watson watching Sherlock Holmes going through the mememtoes of his old cases. Illustration by Sidney E
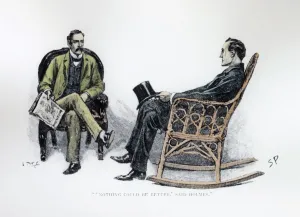
Nothing could be Better said Holmes, 1893. Artist: Sidney E PagetNothing could be Better said Holmes, 1893. Illustration from The Stockbrokers Clerk by Arthur Conan Doyle, published in Strand Magazine March 1893
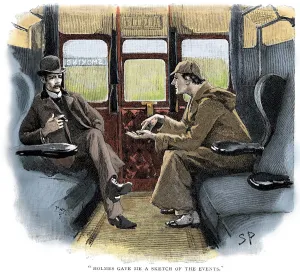
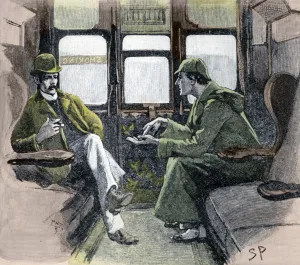
The Adventure of Silver Blaze, Holmes and Watson on train. Artist: Sidney E PagetThe Adventure of Silver Blaze: Holmes gave me a sketch of the events. Sherlock Holmes and Dr Watson on train to Devon to investigate a murder and the disappearance of a famous racehorse
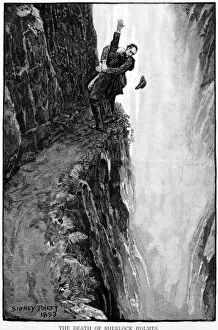
The death of Sherlock Holmes, 1893. Artist: Sidney E PagetThe death of Sherlock Holmes, 1893. Scene from The Adventure of the Final Problem, illustrated by Sidney E Paget, the first artist to draw Sherlock Holmes
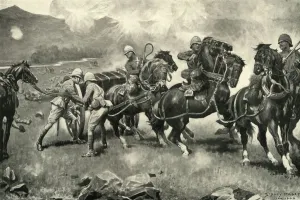
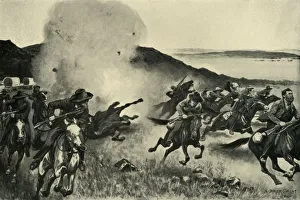
The Battle of Colenso - The Last Desperate Attempt to Save the Guns of the 14th and 66th Batteries, 1900. From " South Africa and the Transvaal War, Vol. II", by Louis Creswicke. [T. C
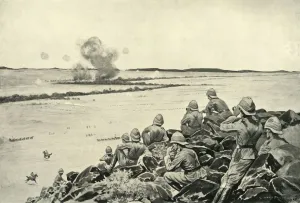
Shell from the Naval Brigade Dispersing Boers from Behind the Seven Sisters Kopjes, 1900Shell from the Naval Brigade Dispersing Boers from Behind the Seven Sisters Kopjes, During the Action of 7th March at Le Gallais Kopje, near Osfontein, 1900
The Battle of Paardeberg, 1900. Creator: Sidney E PagetThe Battle of Paardeberg, 1900. The Battle of Paardeberg was fought during the Second Boer War. Piet Cronjes Boer army in retreat, was intercepted by Major General John French at Paardeberg
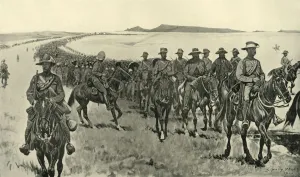
Cronjes Force on their March South, 1900. Creator: Sidney E PagetCronjes Force on their March South, 1900. Boer army Boer prisoners under escort head south after the Battle of Paardeberg on 27th February 1900. From " South Africa and the Transvaal War, Vol
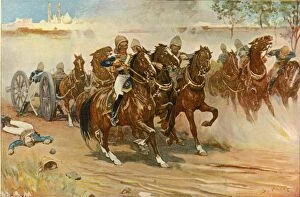
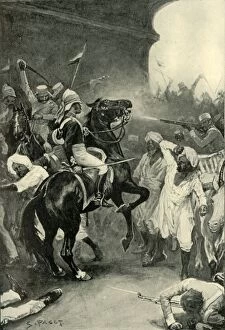
Lieutenant Roberts Saving His Battery Under the Walls of Delhi, (1901). Creator: Sidney E PagetLieutenant Roberts Saving His Battery Under the Walls of Delhi, (1901). British soldier Frederick Sleigh Roberts (1832-1914) fought in the Indian Rebellion of 1857
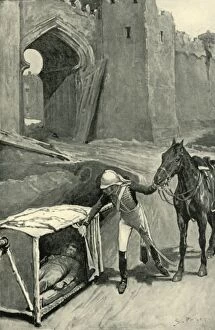
Roberts Finds Nicholson Mortally Wounded Under the Walls of Delhi, (1901). CreatorRoberts Finds Nicholson Mortally Wounded Under the Walls of Delhi, (1901). Delhi was besieged and captured by the British in 1857 during the Indian Mutiny
Roberts Has His Charger Shot Through The Head at Bulandshair, (1901). Creator: Sidney E PagetRoberts Has His Charger Shot Through The Head at Bulandshair, (1901). The horse ridden by Lieutenant Frederick Sleigh Roberts of the Bengal Horse Artillery is shot at Bulandshahr during the Indian
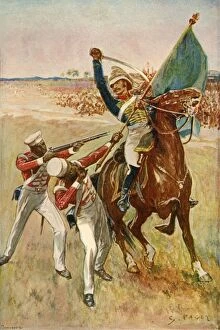
Roberts Wins the Victoria Cross, (1901). Creator: Sidney E PagetRoberts Wins the Victoria Cross, (1901). British soldier Frederick Sleigh Roberts (1832-1914) was awarded the Victoria Cross for actions on 2 January 1858 at Khudaganj in Uttar Pradesh, India
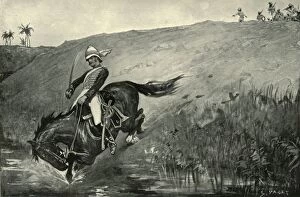
Narrow Escape of Lieutenant Roberts While Pursued by Natives Near Lucknow, (1901). British soldier Frederick Sleigh Roberts (1832-1914)
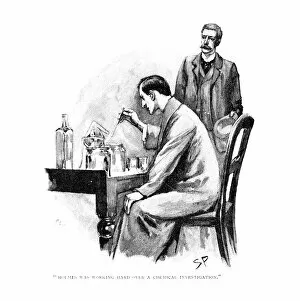
Holmes was working Hard over a Chemical Investigation, 1893. Artist: Sidney E PagetHolmes was working Hard over a Chemical Investigation, 1893. Illustration for The Naval Treaty2 by Arthur Conan Doyle (1859-1930), published in Strand Magazine, October and November 1893
Holmes gave me a sketch of the Events, 1901. Artist: Sidney E PagetHolmes gave me a sketch of the Events, 1901. Sherlock Holmes and Dr Watson on a train to Devon to investigate a murder and the disappearance of a famous racehorse
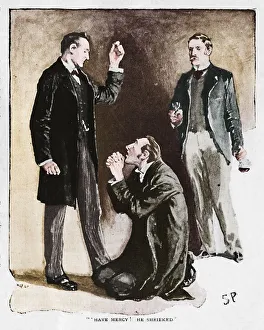
Have Mercy! He Shrieked, 1892. Artist: Sidney E PagetHave Mercy! He Shrieked, 1892. Illustration from The Adventure of the Blue Carbuncle by Arthur Conan Doyle. From The Strand Magazine: An Illustrated Monthly - Vol. III
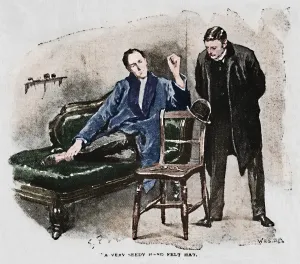
A Very Seedy Hard Felt Hat, 1892. Artist: Sidney E PagetA Very Seedy Hard Felt Hat, 1892. Illustration from The Adventure of the Blue Carbuncle by Arthur Conan Doyle. From The Strand Magazine: An Illustrated Monthly - Vol. III
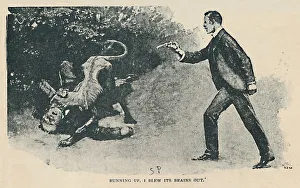
Running Up. I Blew Its Brains Out, 1892. Artist: Sidney E PagetRunning Up. I Blew Its Brains Out, 1892. Illustration from The Adventure of the Copper Beeches by Arthur Conan Doyle. From The Strand Magazine: An Illustrated Monthly - Vol. III
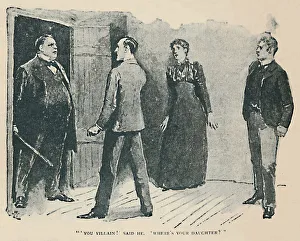
You Villain! Said He. Wheres My Daughter?, 1892. Artist: Sidney E PagetYou Villain! Said He. Wheres My Daughter?, 1892. Illustration from The Adventure of the Copper Beeches by Arthur Conan Doyle. From The Strand Magazine: An Illustrated Monthly - Vol. III
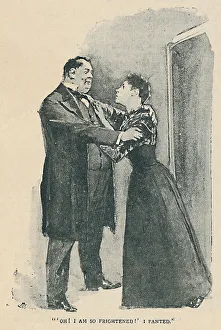
Oh! I Am So Frightened! I Panted, 1892. Artist: Sidney E PagetOh! I Am So Frightened! I Panted, 1892. Illustration from The Adventure of the Copper Beeches by Arthur Conan Doyle. From The Strand Magazine: An Illustrated Monthly - Vol. III
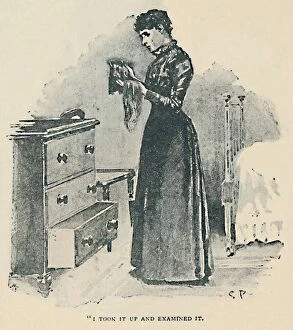
I Took It Up And Examined It, 1892. Artist: Sidney E PagetI Took It Up And Examined It, 1892. Illustration from The Adventure of the Copper Beeches by Arthur Conan Doyle. From The Strand Magazine: An Illustrated Monthly - Vol. III
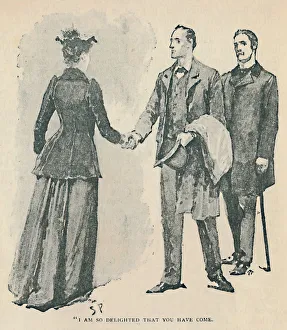
I Am So Delighted That You Have Come, 1892. Artist: Sidney E PagetI Am So Delighted That You Have Come, 1892. Illustration from The Adventure of the Copper Beeches by Arthur Conan Doyle. From The Strand Magazine: An Illustrated Monthly - Vol. III
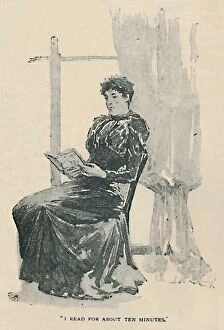
I Read For About Ten Minutes, 1892. Artist: Sidney E PagetI Read For About Ten Minutes, 1892. Illustration from The Adventure of the Copper Beeches by Arthur Conan Doyle. From The Strand Magazine: An Illustrated Monthly - Vol. III
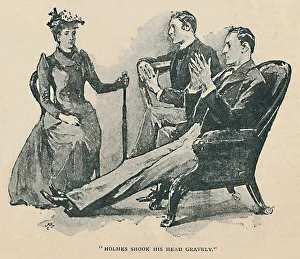
Holmes Shook His Head Gravely, 1892. Artist: Sidney E PagetHolmes Shook His Head Gravely, 1892. Illustration from The Adventure of the Copper Beeches by Arthur Conan Doyle. From The Strand Magazine: An Illustrated Monthly - Vol. III
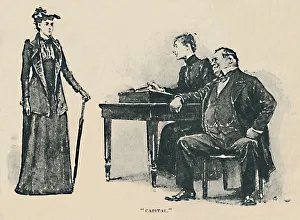
Capital, 1892. Artist: Sidney E PagetCapital, 1892. Illustration from The Adventure of the Copper Beeches by Arthur Conan Doyle. From The Strand Magazine: An Illustrated Monthly - Vol. III. January to June, edited by George Newnes
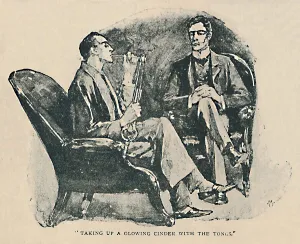
Taking Up A Glowing Cinder With The Tongs, 1892. Artist: Sidney E PagetTaking Up A Glowing Cinder With The Tongs, 1892. Illustration from The Adventure of the Copper Beeches by Arthur Conan Doyle. From The Strand Magazine: An Illustrated Monthly - Vol. III
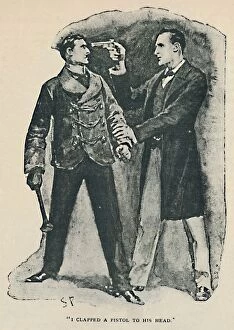
I Clapped A Pistol To His Head, 1892. Artist: Sidney E PagetI Clapped A Pistol To His Head, 1892. Illustration from The Adventure of the Beryl Coronet by Arthur Conan Doyle. From The Strand Magazine: An Illustrated Monthly - Vol. III
Arthur Caught Him, 1892. Artist: Sidney E PagetArthur Caught Him, 1892. Illustration from The Adventure of the Beryl Coronet by Arthur Conan Doyle. From The Strand Magazine: An Illustrated Monthly - Vol. III
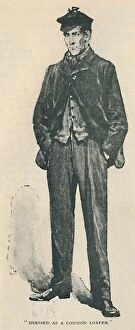
Dressed As A Common Loafer, 1892. Artist: Sidney E PagetDressed As A Common Loafer, 1892. Illustration from The Adventure of the Beryl Coronet by Arthur Conan Doyle. From The Strand Magazine: An Illustrated Monthly - Vol. III
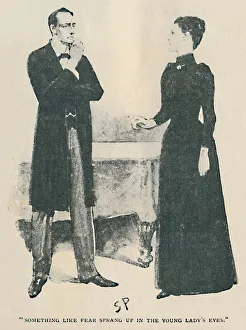
Something Like Fear Sprang Up In The Young Ladys Eyes, 1892. Artist: Sidney E PagetSomething Like Fear Sprang Up In The Young Ladys Eyes, 1892. Illustration from The Adventure of the Beryl Coronet by Arthur Conan Doyle. From The Strand Magazine: An Illustrated Monthly - Vol. III
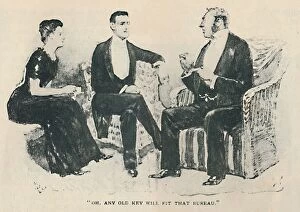
Oh, Any Old Key Will Fit That Bureau, 1892. Artist: Sidney E PagetOh, Any Old Key Will Fit That Bureau, 1892. Illustration from The Adventure of the Beryl Coronet by Arthur Conan Doyle. From The Strand Magazine: An Illustrated Monthly - Vol. III
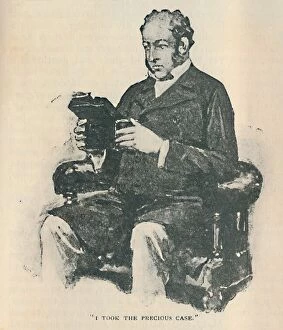
I Took The Precious Case, 1892. Artist: Sidney E PagetI Took The Precious Case, 1892.. Illustration from The Adventure of the Beryl Coronet by Arthur Conan Doyle. From The Strand Magazine: An Illustrated Monthly - Vol. III
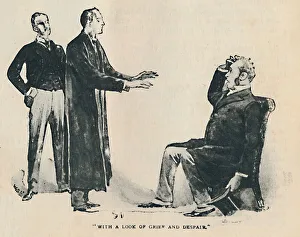
With A Look Of Grief And Despair, 1892. Artist: Sidney E PagetWith A Look Of Grief And Despair, 1892. Illustration from The Adventure of the Beryl Coronet by Arthur Conan Doyle. From The Strand Magazine: An Illustrated Monthly - Vol. III
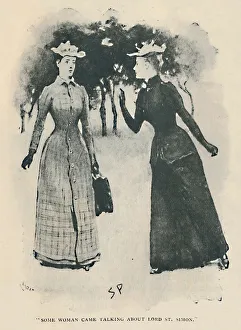
Some Woman Came Talking About Lord St. Simon, 1892. Artist: Sidney E PagetSome Woman Came Talking About Lord St. Simon, 1892. Illustration from The Adventure of the Noble Bachelor by Arthur Conan Doyle. From The Strand Magazine: An Illustrated Monthly - Vol. III
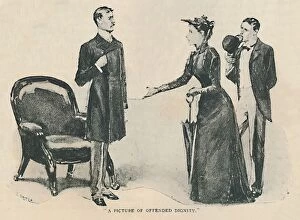
A Picture Of Offended Dignity, 1892. Artist: Sidney E PagetA Picture Of Offended Dignity, 1892. Illustration from The Adventure of the Noble Bachelor by Arthur Conan Doyle. From The Strand Magazine: An Illustrated Monthly - Vol. III
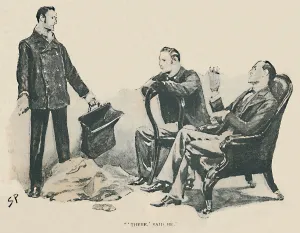
There, Said He, 1892. Artist: Sidney E PagetThere, Said He, 1892. Illustration from The Adventure of the Noble Bachelor by Arthur Conan Doyle. From The Strand Magazine: An Illustrated Monthly - Vol. III
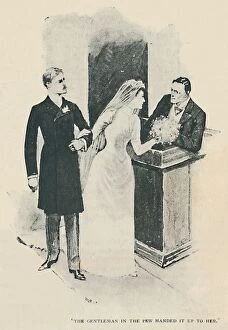
The Gentleman In The Few Handed It Up To Her, 1892. Artist: Sidney E PagetThe Gentleman In The Pew Handed It Up To Her, 1892. Illustration from The Adventure of the Noble Bachelor by Arthur Conan Doyle. From The Strand Magazine: An Illustrated Monthly - Vol. III
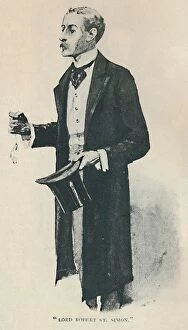
Lord Robert St. Simon, 1892. Artist: Sidney E PagetLord Robert St. Simon, 1892. Illustration from The Adventure of the Noble Bachelor by Arthur Conan Doyle. From The Strand Magazine: An Illustrated Monthly - Vol. III
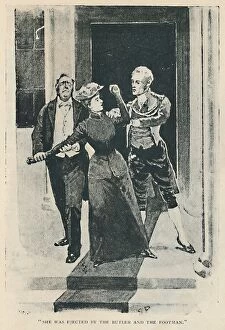
She Was Ejected By The Butler And The Footman, 1892. Artist: Sidney E PagetShe Was Ejected By The Butler And The Footman, 1892. Illustration from The Adventure of the Noble Bachelor by Arthur Conan Doyle. From The Strand Magazine: An Illustrated Monthly - Vol. III
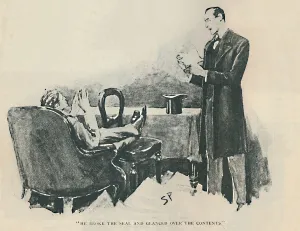
He Broke The Seal And Glanced Over The Contents, 1892. Artist: Sidney E PagetHe Broke The Seal And Glanced Over The Contents, 1892. Illustration from The Adventure of the Noble Bachelor by Arthur Conan Doyle. From The Strand Magazine: An Illustrated Monthly - Vol. III
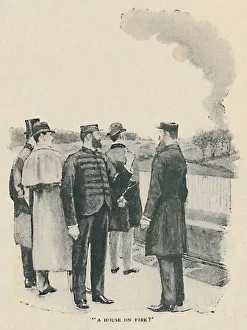
A House On Fire?, 1892. Artist: Sidney E PagetA House On Fire?, 1892. Illustration from The Adventure of the Engineers Thumb by Arthur Conan Doyle. From The Strand Magazine: An Illustrated Monthly - Vol. III
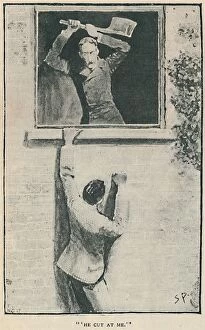
He Cut At Me, 1892. Artist: Sidney E PagetHe Cut At Me, 1892. Illustration from The Adventure of the Engineers Thumb by Arthur Conan Doyle. From The Strand Magazine: An Illustrated Monthly - Vol. III
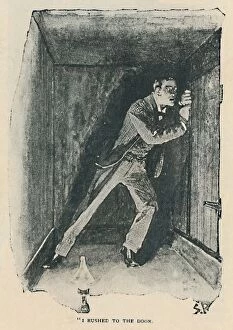
I Rushed To The Door, 1892. Artist: Sidney E PagetI Rushed To The Door, 1892. Illustration from The Adventure of the Engineers Thumb by Arthur Conan Doyle. From The Strand Magazine: An Illustrated Monthly - Vol. III
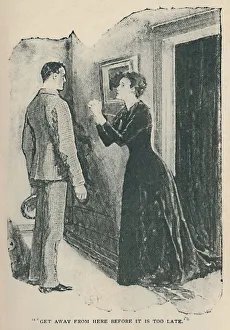
Get Away From Here Before It Is Too Late, 1892. Artist: Sidney E PagetGet Away From Here Before It Is Too Late, 1892. Illustration from The Adventure of the Engineers Thumb by Arthur Conan Doyle. From The Strand Magazine: An Illustrated Monthly - Vol. III
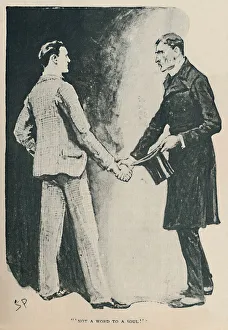
Not A Word To A Soul, 1892. Artist: Sidney E PagetNot A Word To A Soul, 1892. Illustration from The Adventure of the Engineers Thumb by Arthur Conan Doyle. From The Strand Magazine: An Illustrated Monthly - Vol. III