mail_outline sales@mediastorehouse.com
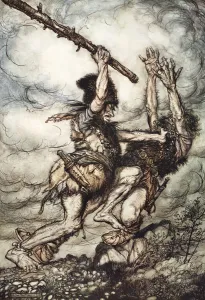
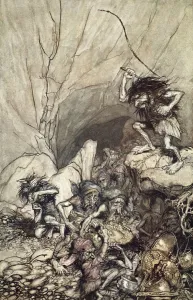
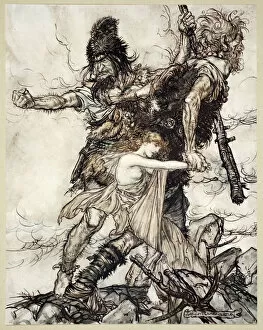
Fafner kills Fasolt, 1910. Artist: Arthur RackhamFafner kills Fasolt, 1910. Illustration from The Rhinegold and the Valkyrie. Showing Alberichs curse. The giants Fafner and Fasolt begin to fight over the ring of the Nibelungen
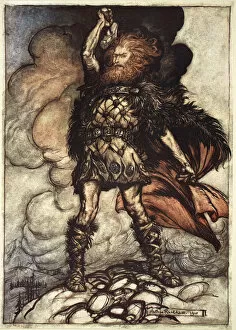
One of the Gods, Donner, summons the mist away, 1910. Artist: Arthur RackhamOne of the Gods, Donner, summons the mist away, 1910. To my hammers swing Hitherward sweep Vapours and fogs! Hovering mists! Donner, your lord, summons his hosts!
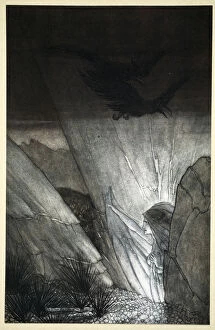
Erda bids thee beware, 1910. Artist: Arthur RackhamErda bids thee beware, 1910. Illustration from The Rhinegold and the Valkyrie. As the gods return to Walhalla, Erda, the goddess of Earth
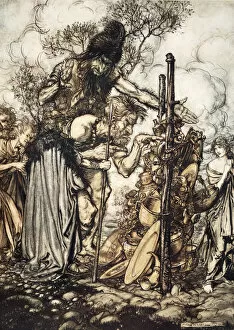
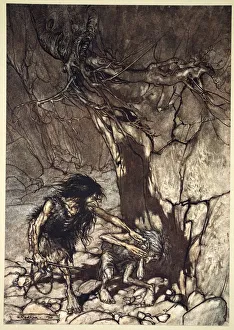
Fafner: Hey! Come hither, And stop me this cranny!, 1910. Artist: Arthur RackhamFafner: Hey! Come hither, And stop me this cranny!, 1910. Illustration from The Rhinegold and the Valkyrie. Fasolt has fallen in love with Freia
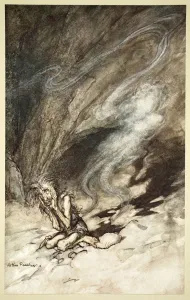
Ohe! Ohe! Horrible dragon, O swallow me not! Spare the life of poor Loge!, 1910. Illustration from The Rhinegold and the Valkyrie
Alberich drives in a band of Nibelungs with gold and silver treasures, 1910. ArtistAlberich drives in a band of Nibelungs with gold and silver treasures, 1910. Illustration from The Rhinegold and the Valkyrie
Mime writhes under the lashes he receives, 1910. Artist: Arthur RackhamMime writhes under the lashes he receives, 1910. Illustration from The Rhinegold and the Valkyrie. Alberich puts on the Tarnhelm and becomes invisible, beating Mime to taunt him. From Das Rheingold
Mime howling Ohe! Ohe! Oh! Oh!, 1910. Artist: Arthur RackhamMime howling Ohe! Ohe! Oh! Oh!, 1910. Illustration from The Rhinegold and the Valkyrie. Alberich beats his brother Mime for taking too long working on the Tarnhelm. From Das Rheingold
The Gods grow wan and aged at the loss of Freia, 1910. Artist: Arthur RackhamThe Gods grow wan and aged at the loss of Freia, 1910. Illustration from The Rhinegold and the Valkyrie. Without Freias golden apples which bring eternal youth, the gods begin to age and grow weak
Fasolt suddenly seizes Freia and drags her to one side with Fafner, 1910. ArtistFasolt suddenly seizes Freia and drags her to one side with Fafner, 1910. Illustration from The Rhinegold and the Valkyrie
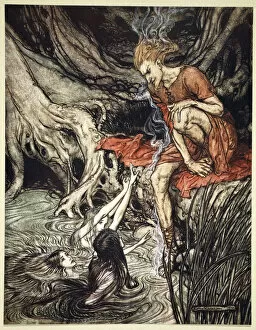
The Rhines pure gleaming children told me of their sorrow, 1910. Illustration from The Rhinegold and the Valkyrie. The Rhinemaidens tell Loge that Alberich has stolen the Rhinegold
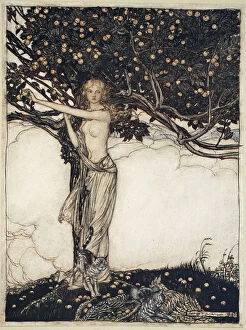
Freia, the fair one, 1910. Artist: Arthur RackhamFreia, the fair one, 1910. Illustration from The Rhinegold and the Valkyrie. Freia, Frickas sister, with her golden apple tree in the garden. From Das Rheingold. From a private collection
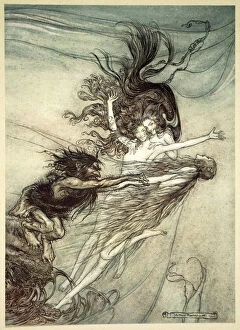
Seize the despoiler! Rescue the gold! Help us! Help us! Woe! Woe!, 1910. ArtistSeize the despoiler! Rescue the gold! Help us! Help us! Woe! Woe!, 1910. Illustration from The Rhinegold and the Valkyrie
The Rhinemaidens teasing Alberich, 1910. Artist: Arthur RackhamThe Rhinemaidens teasing Alberich, 1910. Illustration from The Rhinegold and the Valkyrie. Alberich arrives at the river and tries to flatter the Rhinemaidens to get closer to the Rhinegold
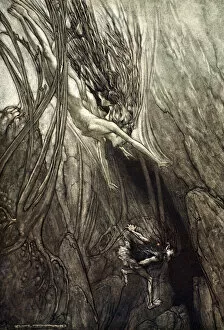
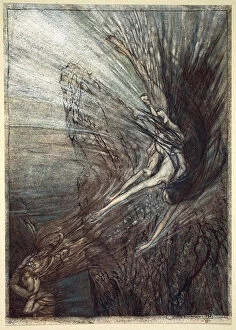
Mock away! Mock! The Nibelung makes for your toy!, 1910. Artist: Arthur RackhamMock away! Mock! The Nibelung makes for your toy!, 1910. Illustration from The Rhinegold and the Valkyrie. Alberich climbs up to get the Rhinegold as the Rhinemaidens tease him. From Das Rheingold
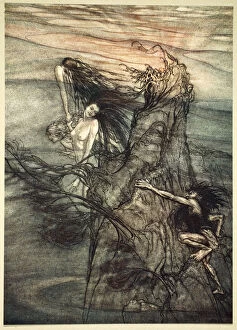
The frolic of the Rhine-Maidens, 1910. Artist: Arthur RackhamThe frolic of the Rhine-Maidens, 1910. Illustration from The Rhinegold and the Valkyrie. The three River goddesses who keep the treasure; Woglinde, Wellgunde and Flosshilde play in the Rhine
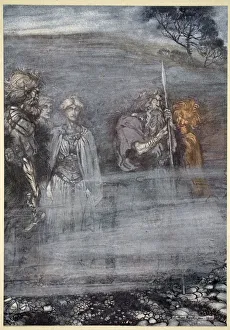
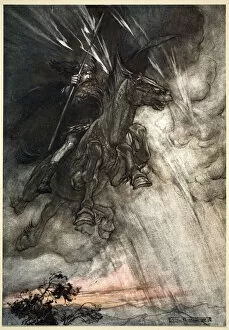
Raging, Wotan Rides to the Rock! Like a Storm-wind he comes!, 1910. Frontispiece to The Rhinegold and the Valkyrie. Wotan discovers that Brunnhilde has betrayed his wishes
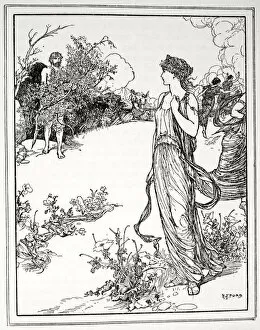
How Ulysses met Nausicaa, 1926. Artist: Henry Justice FordHow Ulysses met Nausicaa, 1926. Ulysses (Odysseus) encounters Nausicaa, the beautiful daughter of King Alcinous. A print from Tales of the Greek Seas by Andrew Lang, 1926
Helgi Hundingsbane returns to Valhalla, 1890. Artist: James Doyle PenroseHelgi Hundingsbane returns to Valhalla, 1890. Illustration from Teutonic Myths and Legends by Donald A Mackenzie, 1890
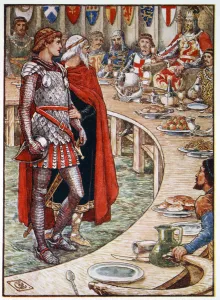
The Fight in the Queens Ante-Chamber, 1911. Of the plots of Sir Mordred; and how Sir Lancelot saved the Queen. From Stories of the Knights of the Round Table by Henry Gilbert, first edition, 1911
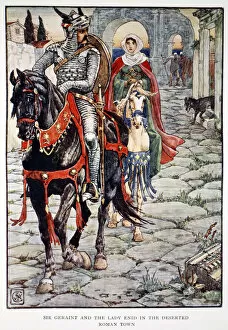
Sir Geraint and the Lady Enid in the Deserted Roman Town, 1911. The deeds of Sir Geraint. From Stories of the Knights of the Round Table by Henry Gilbert, first edition, 1911
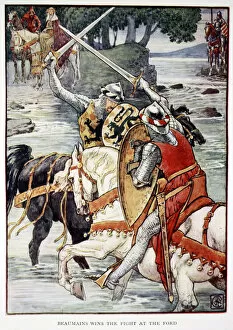
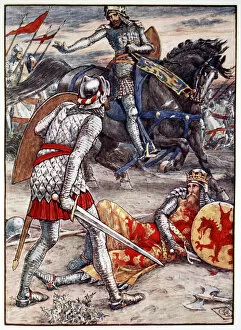
Beaumains Wins the Fight at the Ford, 1911. Beaumains (Good Hands) aslo known as the Knight of the Kitchen and Sir Gareth
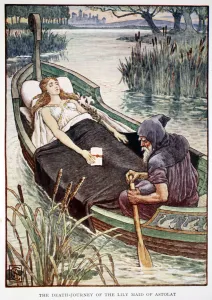
The Death Journey of the Lily Maid of Astolat, 1911. From Stories of the Knights of the Round Table by Henry Gilbert, first edition, 1911
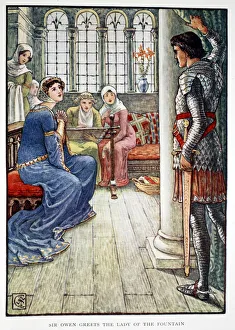
Sir Owen Greets the Lady of the Fountain, 1911. How Sir Owen won the Earldom of the Fountain. From Stories of the Knights of the Round Table by Henry Gilbert, first edition, 1911
The Witch gives Advice as to Sir Tristrams Wound, 1911. How Sir Tristram kept his word. From Stories of the Knights of the Round Table by Henry Gilbert, first edition, 1911
Percival Obtains the Shield of the Beating Heart, 1911. How Sir Percival was taught chivalry, and ended the evil wrought by Sir Balins Dolorous Stroke
Young Percival Questions Sir Owen, 1911. How Sir Percival was taught chivalry, and ended the evil wrought by Sir Balins Dolorous Stroke
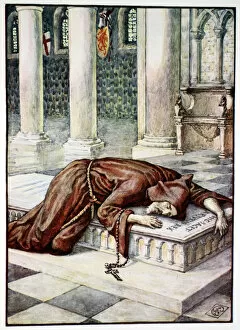
The Death of Sir Lancelot, 1911. The Rebellion of Mordred and the death of King Arthur. Lancelot died lying on the tomb of King Arthur and Lady Guinevere
Sir Lancelot forbids Sir Bors to Slay the King, 1911. From Stories of the Knights of the Round Table by Henry Gilbert, first edition, 1911
Sir Galahad is brought to the Court of King Arthur, 1911. How the three good knights achieved the Holy Grail. From Stories of the Knights of the Round Table by Henry Gilbert, first edition, 1911
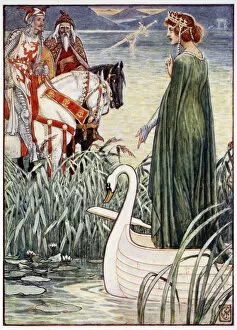
King Arthur asks the Lady of the Lake for the sword Excalibur, 1911. Sir Baldwin and the stroke Dolorous. The sword Excalibur given by the Lady of the Lake promises to keep Arthur safe
Sir Lancelot in the Chapel Perilous, 1911. How Lancelot was made a knight. Chapel Perilous was the mythical home of the Holy Grail
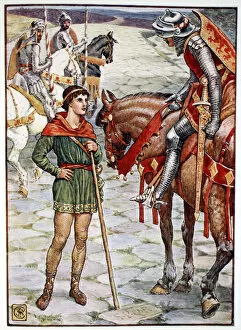
Young Owen Appeals to the King, 1911. How Arthur was made king and won his kingdom. From Stories of the Knights of the Round Table by Henry Gilbert, first edition, 1911
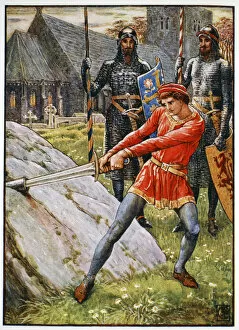
Arthur Draws the Sword from the Stone, 1911Arthur Draws the Sword form the Stone, 1911. The young Arthur pulls the sword from the stone to become King of England. Frontispiece of Stories of the Knights of the Round Table by Henry Gilbert
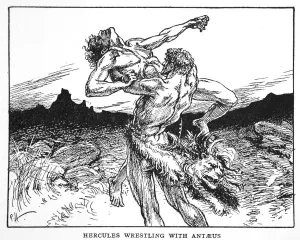
Hercules Wrestling with Antaeus, 1925. According to Greek Mythology, Antaeus was a giant, the son of Poseidon and Gaia. He would challenge passers-by to a wrestling match
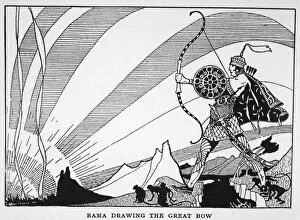
Rama Drawing the Great Bow, 1925. A scene form the Hindu epic poem the Ramayana. Rama preparing to fire the Brahmastra in his final victorious battle with the demon-king Ravana
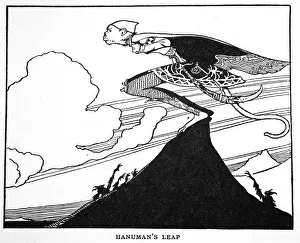
Hanumans Leap, 1925. A scene from the Hindu epic poem, the Ramayana. Hanuman is a vanara, an ape-like forest-dweller, who hepls Rama in his struggle against the demon-king Ravana
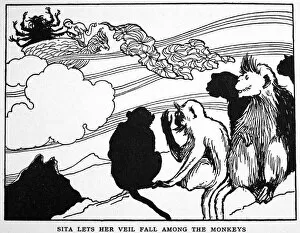
Sita Lets Her Veil Fall among the Monkeys, 1925. Sita is one of the principal characters of the Hindu epic, the Ramayana. From The Book of Myths by Amy Cruse, 1925
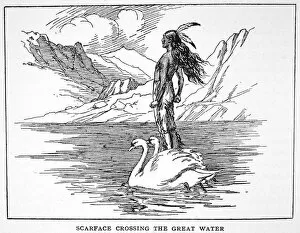
Scarface Crossing the Great Water, 1925. Native American legend. Scarface, seeking the Kingdom of the Sun-God, is taken across the water on the backs of two swans
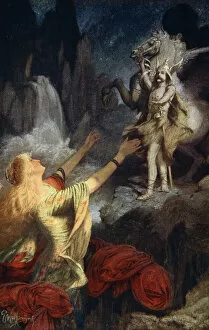
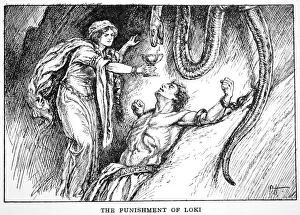
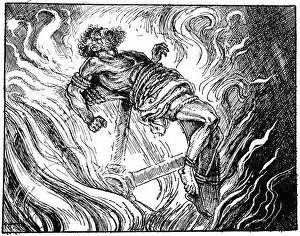
The Punishment of Loki, 1925. Loki is a giant in Norse mythology, who is bound to a rock by the other gods and forced to have poison from a snake dropped on his face
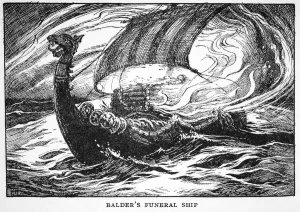
Balders Funeral Ship, 1925. Balder (Baldr) is a Norse god associated with light and beauty. From The Book of Myths by Amy Cruse, 1925
Ixion on the wheel, 1925. Ixion, king of the Lapiths, killed his father-in-law and offended Zeus, so was bound to a burning wheel for eternity. From The Book of Myths by Amy Cruse, 1925
The old gods vanquished, 1925. A princess of ancient Mexico is shown the coming of a new faith. From The Book of Myths by Amy Cruse, 1925
Then they went to Sir Galahad, 1905. Artist: Dora CurtisThen they went to Sir Galahad, 1905. An illustration from Stories of King Arthur and the Round Table by Beatrice Clay, 1st Edition, 1905
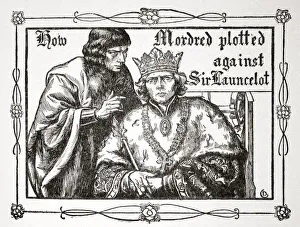
How Mordred plotted against Sir Launcelot, 1905. Artist: Dora CurtisHow Mordred plotted against Sir Launcelot, 1905. An illustration from Stories of King Arthur and the Round Table by Beatrice Clay, 1st Edition, 1905
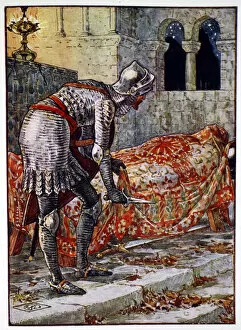
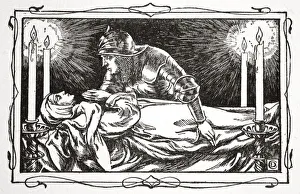
Found the Queen Dead, 1905. Artist: Dora CurtisFound the Queen Dead, 1905. An illustration from Stories of King Arthur and the Round Table by Beatrice Clay, 1st Edition, 1905
Sir Galahad at the Abbey, 1905. Artist: Dora CurtisSir Galahad at the Abbey, 1905. Sir Galahad, a Knight of the Round Table, was the son of Sir Lancelot and achiever of the Holy Grail
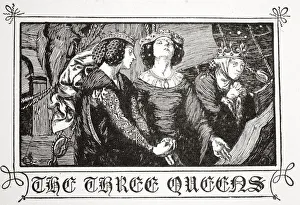
The Three Queens, 1905. Artist: Dora CurtisThe Three Queens, 1905. An illustration from Stories of King Arthur and the Round Table by Beatrice Clay, 1st Edition, 1905