mail_outline sales@mediastorehouse.com
The altar of Surkh Kotal Temple. Creator: Unknown photographerThe altar of Surkh Kotal Temple. Found in the Collection of the Nationalmuseum von Afghanistan, Kabul.
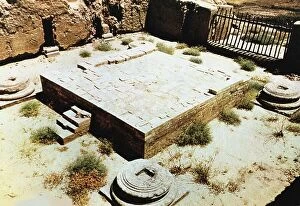
The stairs of Surkh Kotal Temple. Creator: Unknown photographerThe stairs of Surkh Kotal Temple. Found in the Collection of the Nationalmuseum von Afghanistan, Kabul.
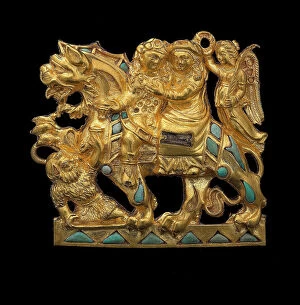
Belt buckle, 1st century. Creator: The Oriental Applied ArtsBelt buckle, 1st century. Found in the Collection of the National Museum of Afghanistan, Kabul
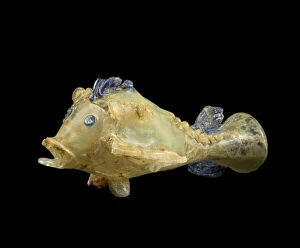
Fish-shaped glass flask, 1st century. Creator: The Oriental Applied ArtsFish-shaped glass flask, 1st century. Found in the Collection of the National Museum of Afghanistan, Kabul
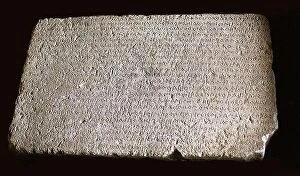
The Rabatak inscription, 2nd cen. AD. Creator: Historic ObjectThe Rabatak inscription, 2nd cen. AD. Found in the Collection of the National Museum of Afghanistan, Kabul
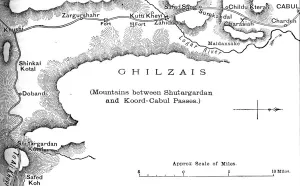
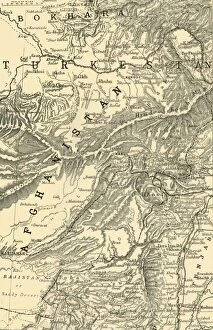
Plan of the Road from the Shutargardan Pass to Cabul, c1880. From British Battles on Land and Sea, Vol. IV, by James Grant. [Cassell Petter & Galpin, London, Paris & Melbourne, c1880]
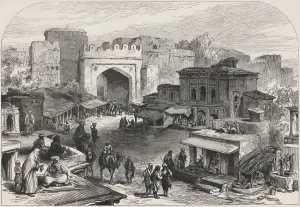
Inside the City of Kabul (The Bala Hissar), c1840, (1901). Creators: Unknown, James AtkinsonInside the City of Kabul (The Bala Hissar), c1840, (1901). Quadrangle occupied by the Durbar-Khaneh and the Harem Serai. View of the Bala Hissar ( High Fort )
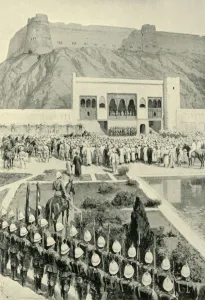
General Roberts Reading His Proclamation at Kabul, October 12, 1879, (1901). CreatorGeneral Roberts Reading His Proclamation at Kabul, October 12, 1879, (1901). British soldier Frederick, 1st Earl Roberts (1832-1914)
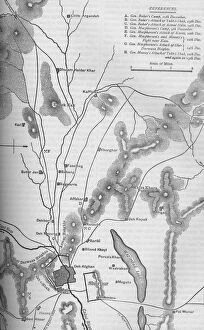
Map of the Fighting in the Chardeh Valley, 1901. Creator: UnknownMap of the Fighting in the Chardeh Valley, 1901. British and Punjab cavalry attacked the Afghans in the Chardeh Valley, Afghanistan, at the Battle of Kabul in December 1879
Map Indicating General Robertss Route to Kabul... and the British and Russian Boundaries, 1901Map Indicating General Robertss Route to Kabul, and Thence to Kandahar, and the British and Russian Boundaries, 1901. The route taken through Afghanistan by British officer Sir Frederick Sleigh
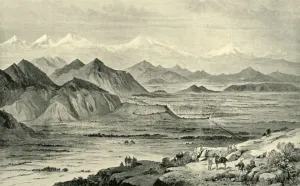
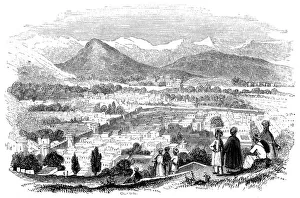
Kabul, Looking North from the Hill above the British Camp at Beni Hissar, October 8, 1879, (1901). View of Kabul, Afghanistan, with the Bala Hissar fortress in the centre
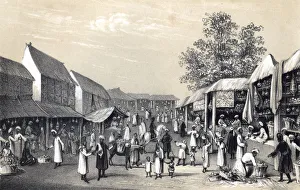
The Main Street in the Bazaar at Kabul in the Fruit Season, c1840, (1901). CreatorThe Main Street in the Bazaar at Kabul in the Fruit Season, c1840, (1901). Market in the capital of Afghanistan. From " The Life and Deeds of Earl Roberts, Vol. I
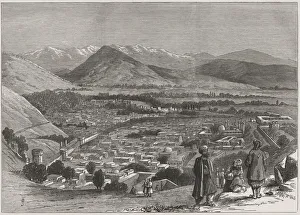
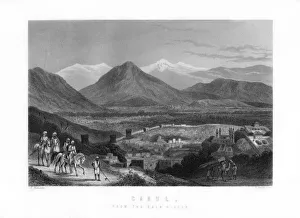
The Bala Hissar and City of Kabul from the Upper Part of the Citadel, c1842, (1901). View of Kabul, Afghanistan, with the Bala Hissar fortress. From " The Life and Deeds of Earl Roberts, Vol
British-Afghan war, view of Kabul city from the top of the Citadel. Afghanistan
British-Afghan war, Kabul, capital of the territories of Shere Ali in Afghanistan
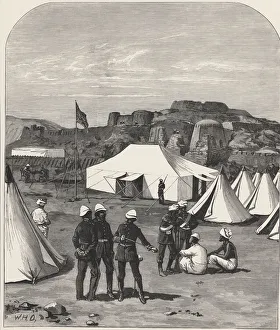
Afghan-British War, British military camp in Kabul, near the pass of Khiyber, drawing by Major Cavagnari, Afghanistan November 1878
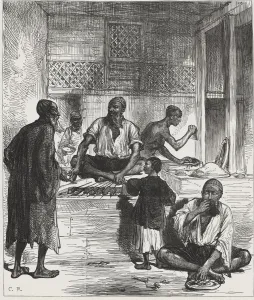
British-Afghan war, Afghan scenes, grocery shop in a Kabul market, engraving from 1878
British-Afghan war, scenes in the city of Kabul. Afghanistan entrance gate and market bazaars, November 1878
British-Afghan war, overview of Kabul in Afghanistan
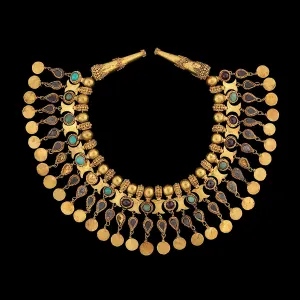
Necklace from Tillya Tepe, 1st century. Found in the Collection of National Museum of Afghanistan, Kabul
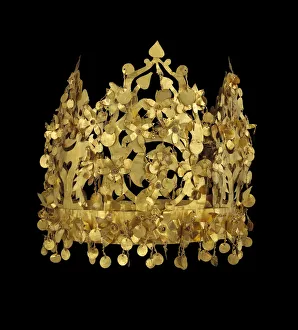
Gold crown from Tillya Tepe, 1st century. Found in the Collection of National Museum of Afghanistan, Kabul
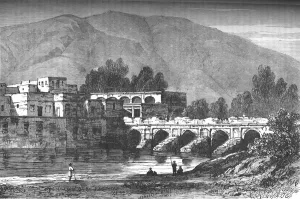
The Bridge, Cabul, c1880. Episode of the Second Anglo-Afghan War, from 1878 to 1880. From British Battles on Land and Sea, Vol. IV, by James Grant
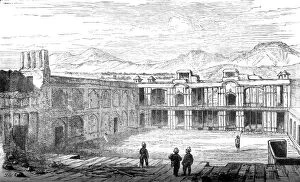
Interior of the British Residency, Cabul, Looking South, 1879, (c1880). Episode of the Second Anglo-Afghan War, from 1878 to 1880. From British Battles on Land and Sea, Vol. IV, by James Grant
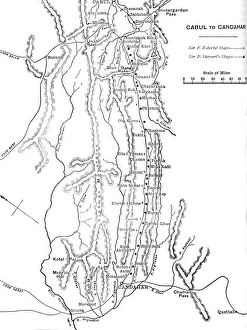
Plan of General Robertss March from Cabul to Candahar, c1880. From British Battles on Land and Sea, Vol. IV, by James Grant. [Cassell Petter & Galpin, London, Paris & Melbourne, c1880]
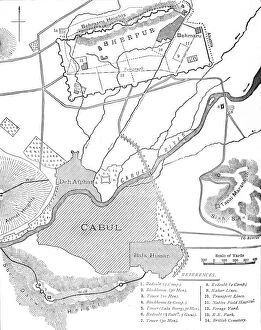
Plan of the Sherpur Cantonments, c1880. Episode of the Second Anglo?Afghan War, from 1878 to 1880. From British Battles on Land and Sea, Vol. IV, by James Grant
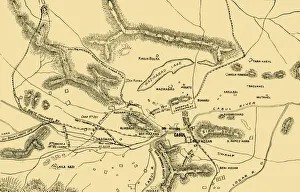
Plan of the Operations Round Cabul, Dec. 9-15, 1879, c1880. From British Battles on Land and Sea, Vol. IV, by James Grant. [Cassell Petter & Galpin, London, Paris & Melbourne, c1880]
View in Cabul: The Bala Hissar and Part of the City from Deh Afghan, c1880. Episode of the Second Anglo-Afghan War, from 1878 to 1880. From British Battles on Land and Sea, Vol. IV, by James Grant
Retreat of the British Army from Kabul, c1912. The 1842 Kabul Retreat (or Massacre of Elphinstones army) took place during the First Anglo-Afghan War
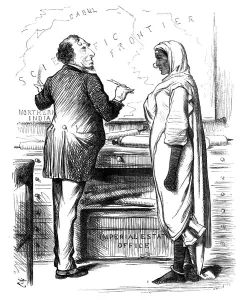
Whos to Pay?, 1878. Artist: SwainWhos to Pay?, 1878. British prime minister Benjamin Disraeli and a personification of India wearing a sari. Behind is a map of Indias North West Frontier and Afghanistan
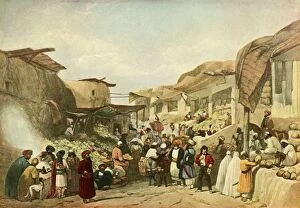
Bazaar at Cabul, in the fruit season, 1847. Market in Kabul, Afghanistan. Illustration from The History of China and India, by Miss Corner, (Dean and Co, London, 1847)
View of Cabul, 1847. Artist: GilesView of Cabul, 1847. The town of Kabul in Afghanistan. Illustration from The History of China and India, by Miss Corner, (Dean and Co, London, 1847)
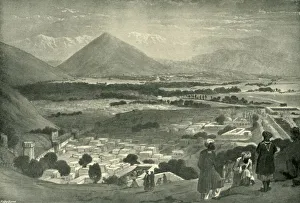
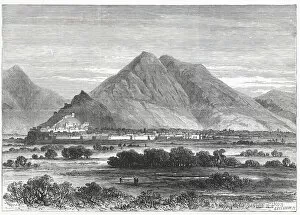
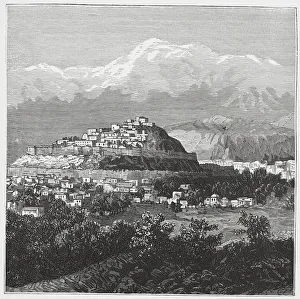
Cabul, from the Bala Hissar, 1883. Artist: J StephensonCabul, from the Bala Hissar, 1883. View of Kabul, Afghanistan, from the fort of Bala Hissar
Kabul from the Bala Hissar, Afghanistan, 1893. Artist: J StephensonKabul from the Bala Hissar, Afghanistan, 1893. An Engraving from James Taylors The Age We Live In: A History of the Nineteenth Century, From the Peace of 1815 to the Present Time, William Mackenzie
Surrender of Dost Mohammad Khan, Kabul, First Anglo-Afghan War, 1838-1842. Artist: James AtkinsonSurrender of Dost Mohammad Khan, Kabul, First Anglo-Afghan War, 1838-1842. Dost Mohammed Khan, ruler of Afghanistan, surrendering to William MacNaghten (1793-1841)
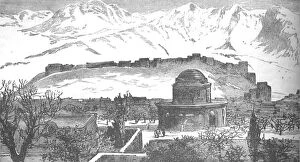
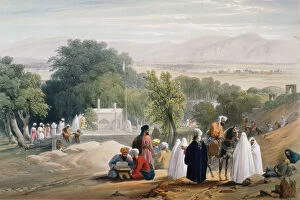
Tomb of Emperor Babur, Kabul, First Anglo-Afghan War 1838-1842. Artist: James AtkinsonTomb of Emperor Babur, First Anglo-Afghan War 1838-1842. Babur (c1483-1530) was the Islamic conqueror of India who founded the Mughal dynasty
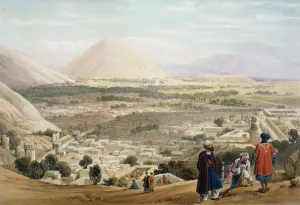
Kabul from the Citadel, showing the old walled city, First Anglo-Afghan War 1838-1842. Artist: James AtkinsonKabul from the Citadel, showing the old walled city, First Anglo-Afghan War 1838-1842. British troops were massacred here in both the Anglo-Afghan Wars
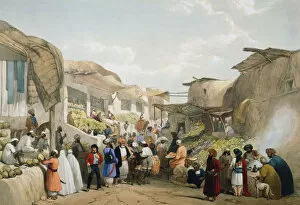
Bazaar at Kabul during the fruit season, First Anglo-Afghan War, 1838-1842. Artist: James AtkinsonBazaar at Kabul during the fruit season, First Anglo-Afghan War, 1838-1842. The British fought the Anglo-Afghan Wars in an attempt to block the expansion of Russias sphere of influence towards India
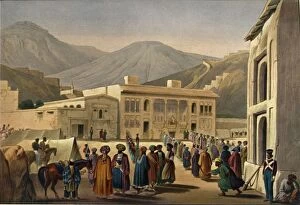
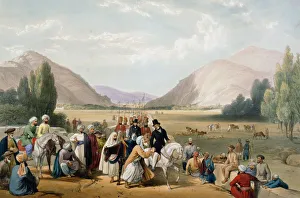
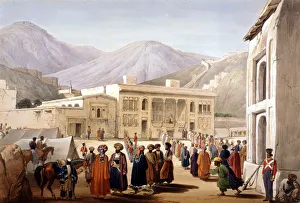
Shah Shoja, puppet of the British, holding a durbar at Kabul, First Anglo-Afghan War, 1838-1842. Artist: James AtkinsonShah Shoja, puppet of the British, holding a durbar at Kabul, First Anglo-Afghan War, 1838-1842. A former ally of the British from the Napoleonic Wars
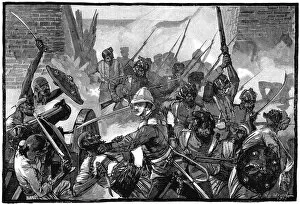
Second Anglo-Afghan War (1878-1880), c1885. Attack on the British Residency, Cabul (Kabul) and the massacre of its occupants including the Resident, Sir Louis Cavagnari, 3 September 1879
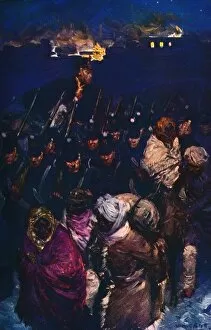
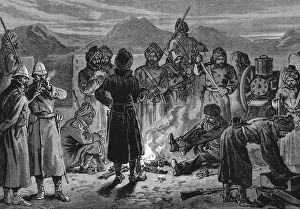
Second Anglo-Afghan War (1878-1900), 1880: British position at Sherpore, Cabul (Kabul). Gatling gun bastion making ready to repel attack by the Ghazis, 23 December 1879
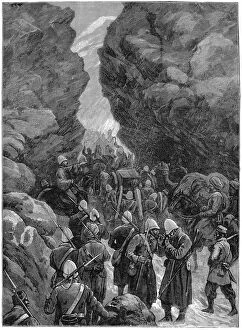
Second Anglo-Afghan War (1878-1880), 1880. A block in the Jugdulluk Pass: British troops having difficulties on their way to reinforce General Roberts at Cabul (Kabul). December 1879