mail_outline sales@mediastorehouse.com
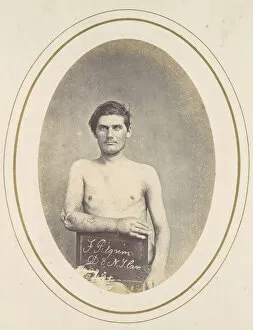
Frederick Pilgrim, 1865. Creator: Reed Brockway BontecouFrederick Pilgrim, 1865
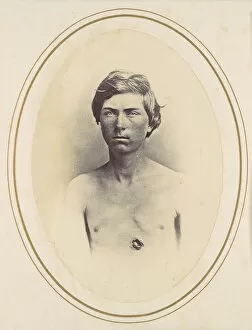
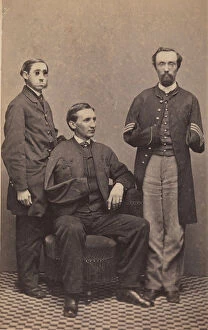
Herman Rice, 1865. Creator: Reed Brockway BontecouHerman Rice, 1865
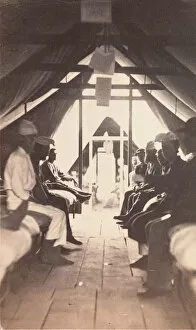
[Wounded Soldiers on Cots, possibly at Harewood Hospital], 1865
John A. Dixon, 1865. Creator: Reed Brockway BontecouJohn A. Dixon, 1865
Frederick A. Bentley, 1865. Creator: Reed Brockway BontecouFrederick A. Bentley, 1865
Frederick Hohmann, 1865. Creator: Reed Brockway BontecouFrederick Hohmann, 1865
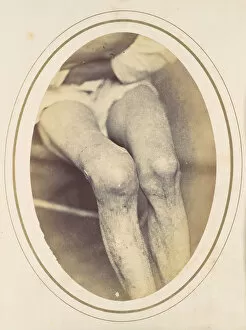
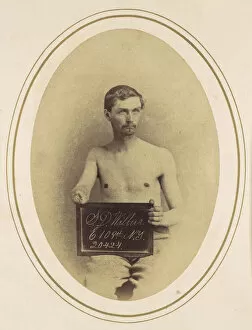
Stephen D. Wilbur, 1865. Creator: Reed Brockway BontecouStephen D. Wilbur, 1865
Disabled Union Soldiers Posed in Aid of the U. S. Sanitary Commission at the New YorDisabled Union Soldiers Posed in Aid of the U.S. Sanitary Commission at the New York Metropolitan Fair, April 1864
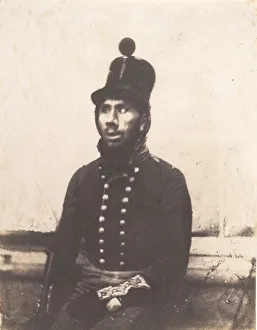
Soldier, 1845-50. Creator: Calvert Jones[Soldier], 1845-50
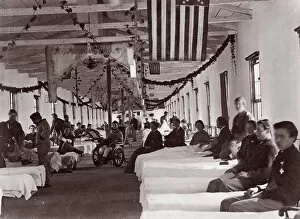
Washington. Armory Square Hospital, 1861-65. Creator: UnknownWashington. Armory Square Hospital, 1861-65
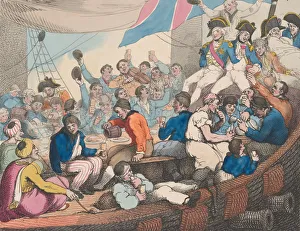
Admiral Nelson Recreating with his Brave Tars after the Glorious Battle of the Nile, October 20, 1798
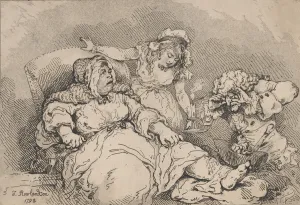
A Bawd on her Last Legs, 1792. 1792. Creator: Thomas RowlandsonA Bawd on her Last Legs, 1792
A Bawd on her Last Legs, October 1, 1792. October 1, 1792. Creator: Thomas RowlandsonA Bawd on her Last Legs, October 1, 1792
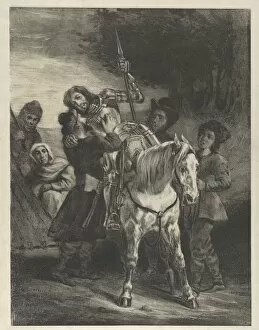
The Wounded Goetz Taken in by the Gypsies, 1836-43. 1836-43. Creator: Eugene DelacroixThe Wounded Goetz Taken in by the Gypsies, 1836-43
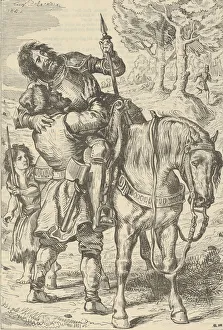
Goetz Aided by the Gypsies, after 1845. after 1845. Creator: Eugene DelacroixGoetz Aided by the Gypsies, after 1845. Published by " Le Magasin Pittoresque"
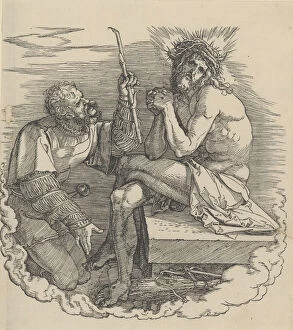
The Man of Sorrows Mocked by a Soldier, Frontispiece to the Great Passion, . n. d. n. dThe Man of Sorrows Mocked by a Soldier, Frontispiece to the Great Passion, .n.d
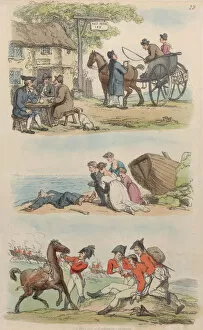
Plate 12, from World in Miniature, 1816. 1816. Creator: Thomas RowlandsonPlate 12, from " World in Miniature", 1816
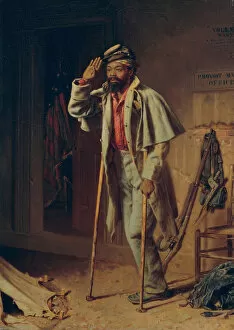
A Bit of War History: The Veteran, 1866. Creator: Thomas Waterman WoodA Bit of War History: The Veteran, 1866
Dying Stag, ca. 1830. Creator: Edwin Henry LandseerDying Stag, ca. 1830
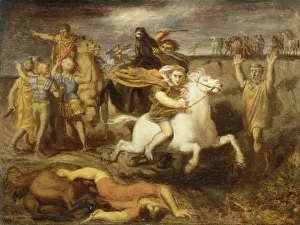
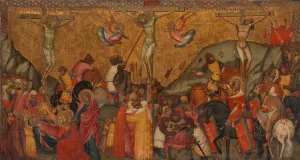
Scene from the Gallic Wars: The Gaul Littavicus, Betraying the Roman Cause, Flees to Gergovie to Support Vercingetorix, ca. 1838-40
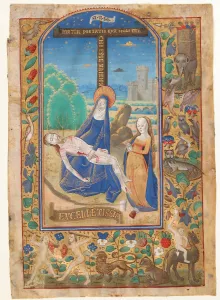
Manuscript Leaf with the Pieta, from a Book of Hours, last quarter 15th century. Creator: UnknownManuscript Leaf with the Pieta, from a Book of Hours, last quarter 15th century
Nata Ragina: Folio from a ragamala series (Garland of Musical Modes), 1714. Creator: MohamedNata Ragina: Folio from a ragamala series (Garland of Musical Modes), 1714
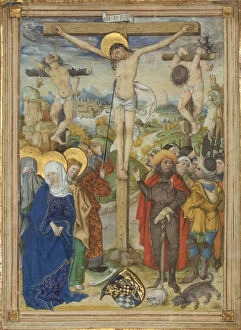
The Crucifixion, 1481-82. Creator: Circle of the Housebook Master (German, active Middle Rhineland)The Crucifixion, 1481-82
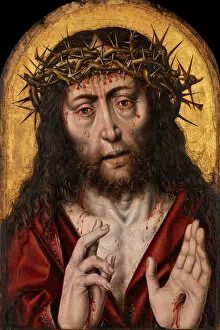
The Man of Sorrows, ca. 1525. Creator: Workshop of Aelbert Bouts (Netherlandish, Leuven caThe Man of Sorrows, ca. 1525
The Crucifixion. Creator: Andrea di BartoloThe Crucifixion
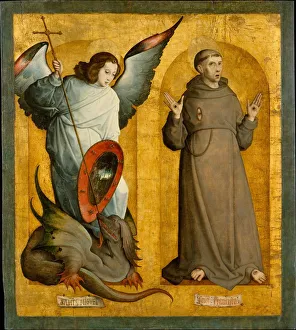
Saints Michael and Francis, ca. 1505-9. Creator: Juan de Flandes, the ElderSaints Michael and Francis, ca. 1505-9
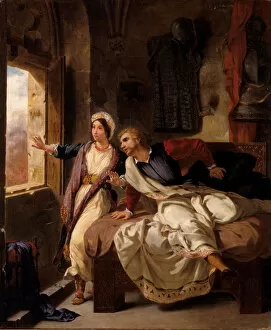
Rebecca and the Wounded Ivanhoe, 1823. Creator: Eugene DelacroixRebecca and the Wounded Ivanhoe, 1823
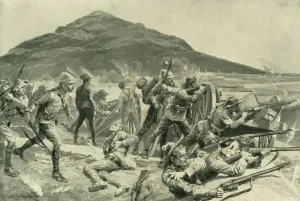
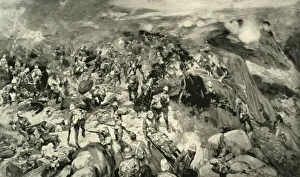
No Surrender! The Defence of Fort Italia on September 26, 1901, 1902" No Surrender!" The Defence of Fort Italia on September 26, 1901, 1902. British forces defend a garrison at Fort Itala, from Boer attack on 26 September 1901
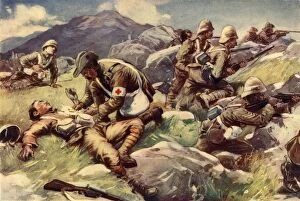
A Non-Combatant Hero - An Army Doctor at Work in the Firing Line, 1902. Creator: UnknownA Non-Combatant Hero - An Army Doctor at Work in the Firing Line, 1902. From " South Africa and the Transvaal War, Vol. VII", by Louis Creswicke. [The Caxton Publishing Co. London, 1902]
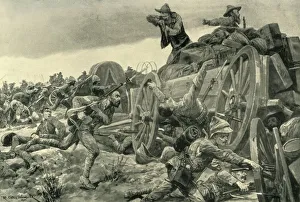
The Capture of De Wets Convoy at Reitz, June 6, 1901, 1902. Attack on Boer waggons by Colonel De Lisles Force.. From " South Africa and the Transvaal War, Vol. VII", by Louis Creswicke
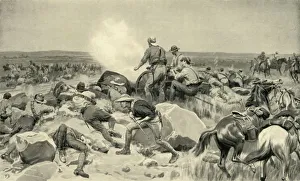
The Engagement at Vlakfontein: The Derbyshires Re-Taking their Guns, 1902. Creator: UnknownThe Engagement at Vlakfontein: The Derbyshires Re-Taking the Guns at the Point of the Bayonet, 1902. The Derbyshire Regiment recapture guns taken by Boers at high cost, 18 were killed and 70 wounded
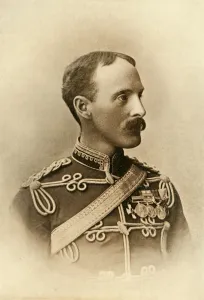
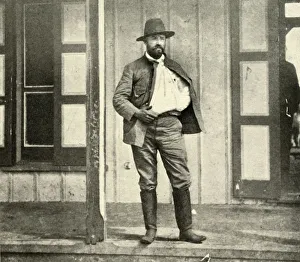
Major-General Ian Hamilton, 1901. Creator: Johnston & HoffmannMajor-General Ian Hamilton, 1901. Ian Hamilton (1853-1947) Scottish British Army General, with an extensive Imperial military career
Colonel Plumers Gallant Attempt to Relieve Mafeking from the North, 1900. Creator: Frank DaddColonel Plumers Gallant Attempt to Relieve Mafeking from the North, 1900. The Siege of Mafeking lasted 217 days during the Second Boer War
Brilliant Defence by New Zealanders at Holspruit, February 25, 1902, 1902. CreatorBrilliant Defence by New Zealanders at Holspruit, February 25, 1902, 1902. Hoedspruit in Limpopo, South Africa was seconded by the British as a garrison to intercept shipments of arms being sent by
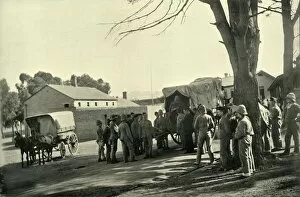
Conveying Wounded to Wynberg Hospital Camp, 1900. Creator: Alfs HoskingConveying Wounded to Wynberg Hospital Camp, 1900. A Military Hospital was set up at Wynberg, a suburb of Cape Town suring the Second Boer War. From " South Africa and the Transvaal War, Vol
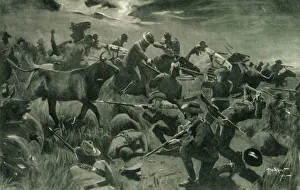
Mishap to the Scots Greys at Klippan, February 18, 1902, 1902. Creator: Hermanus Willem KoekkoekMishap to the Scots Greys at Klippan, February 18, 1902, 1902. Klippan was the last battle fought by the Greys in the Boer War, the British suffered many casualties
The Relief of Ladysmith - The Last Rush at Hlangwane Hill, 1900. Creator: Rene BullThe Relief of Ladysmith - The Last Rush at Hlangwane Hill, 1900. The Boers, under heavy bombardment abandoned Hlangwane and withdrew north of the Tugela
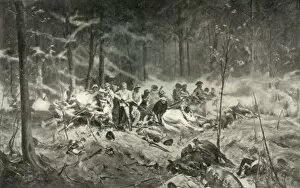
To The Memory of Brave Men. The Last Stand of Major Wilson on the Shanghai River" To The Memory of Brave Men." The Last Stand of Major Wilson on the Shanghai River, 1893, 1900. From " South Africa and the Transvaal War, Vol. I", by Louis Creswicke. [T. C
The Great Assault on Ladysmith - The Devons Clearing Wagon Hill, 1900. Creator: William T MaudThe Great Assault on Ladysmith - The Devons Clearing Wagon Hill, 1900. The Battle of Wagon Hill took place during the Siege of Ladysmith in South Africa in 1900
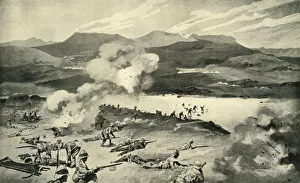
The Battle of Colenso - The Dublin Fusiliers Attempt to Ford the Tugela, 1900. CreatorsThe Battle of Colenso - The Dublin Fusiliers Attempt to Ford the Tugela, 1900. From " South Africa and the Transvaal War, Vol. II", by Louis Creswicke. [T. C. & E. C. Jack, Edinburgh, 1900]
The Defence of Rorkes Drift, 22nd to 23rd January 1879, 1900. Creator: Alphonse de NeuvilleThe Defence of Rorkes Drift, 22nd to 23rd January 1879, 1900. From " South Africa and the Transvaal War, Vol. I", by Louis Creswicke. [T. C. & E. C. Jack, Edinburgh, 1900]
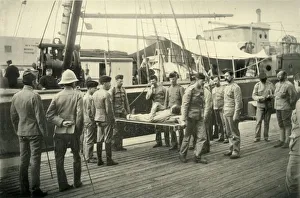
Arrival at Cape Town of Wounded from Natal, 1900. Creator: HoskingArrival at Cape Town of Wounded from Natal, 1900. Transports brought sick and wounded soldiers to hospitals in Cape Town because of inadequate hospital facilities in Natal
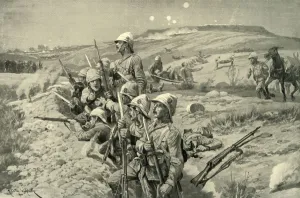
Fix Bayonets! - Repelling an Attack from the Trenches around Ladysmith, 1900. CreatorFix Bayonets! - Repelling an Attack from the Trenches around Ladysmith, 1900. From " South Africa and the Transvaal War, Vol. II", by Louis Creswicke. [T. C. & E. C. Jack, Edinburgh, 1900]
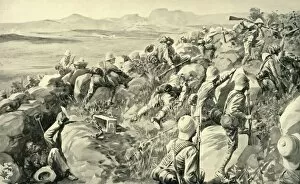
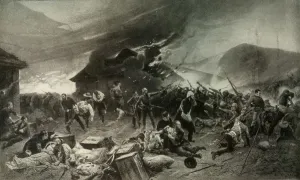
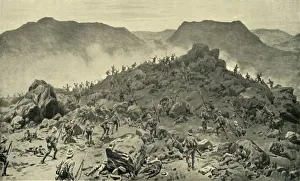
The Scene on Spion Kop - Major Thorneycrofts Desperate Situation, 1900. Creator: Frank CraigThe Scene on Spion Kop - Major Thorneycrofts Desperate Situation, 1900. British forces captured what they thought was the summit of Spion Kop
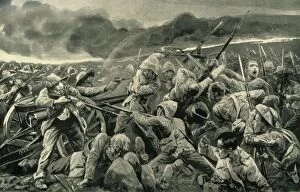
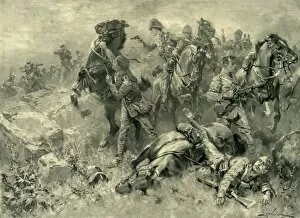
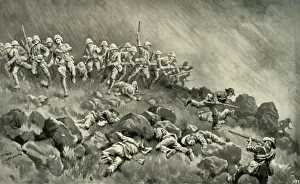
The Battle of Belmont, 23rd November 1899 - Bayonet Attack by the Scots and Grenadier Guards, 1900. From " South Africa and the Transvaal War, Vol. II", by Louis Creswicke. [T. C. & E. C
Creelman, just after Dismounting from Horse... Spanish-American War, 4 July 1898, (1899). Creelman, just after Dismounting from Horse which had Carried him from Hospital, Eleven Miles away
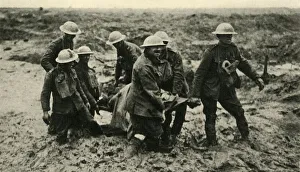
Red Cross Work in the Flanders Mud, First World War, 1 August 1917, (c1920). Creator: UnknownRed Cross Work in the Flanders Mud, First World War, 1 August 1917, (c1920). R.A.M.C. stretcher-bearers bringing in wounded during the advance on Passchendaele
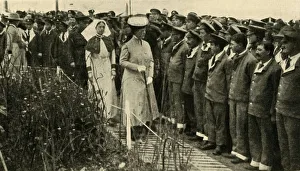
Queen Mary in northern France, First World War, July 1917, (c1920). Creator: UnknownQueen Mary in northern France, First World War, July 1917, (c1920). Her Majesty inspecting convalescent [British] troops on the Western Front