mail_outline sales@mediastorehouse.com
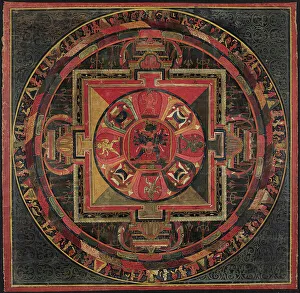
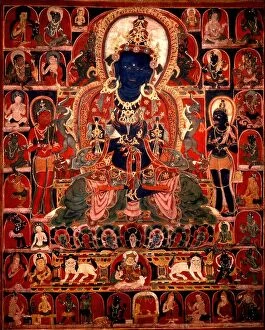
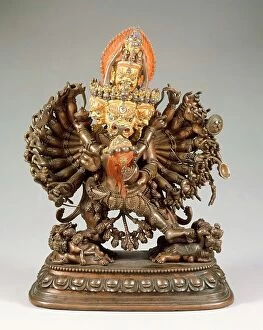
Mandala of Chakrasamvara, c1400. Creator: UnknownMandala of Chakrasamvara, c1400. Chakrasamvara, a semi-wrathful Buddha, is represented in dark blue at the centre, united with his female partner, the red Vajravarahi
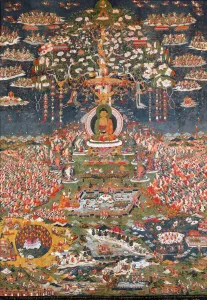
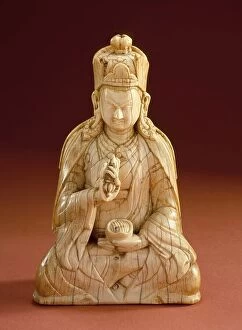
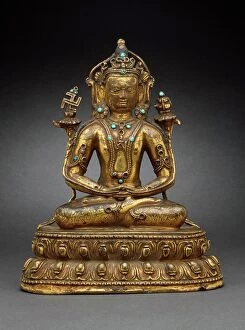
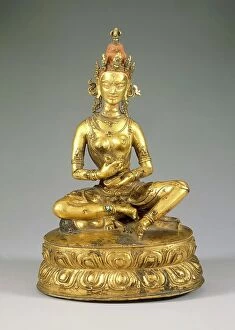
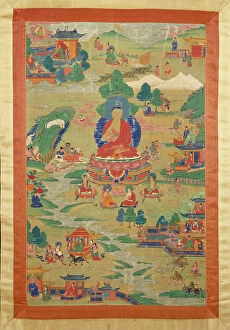
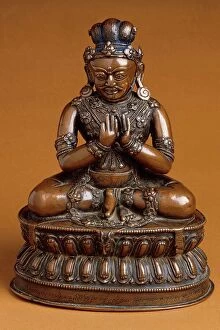
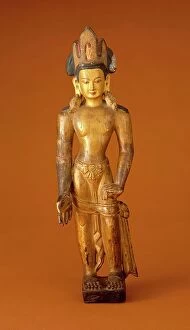
Amitabha, the Buddha of the Western Pure Land (Sukhavati), ca. 1700. Creator: UnknownAmitabha, the Buddha of the Western Pure Land (Sukhavati), ca. 1700. Amitayus, the Buddha of Eternal Life
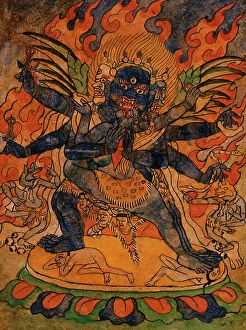
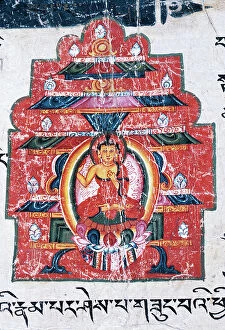
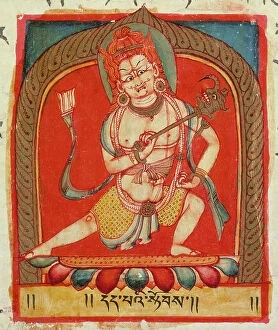
Vajrakumara (?) and Consort, Nyingmapa Buddhist or Bon Ritual Card, 18th-19th century. Creator: UnknownVajrakumara (?) and Consort, Nyingmapa Buddhist or Bon Ritual Card, 18th-19th century
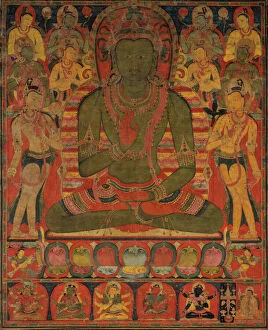
Amoghasiddhi, the Buddha of the Northern Pure Land, ca. 1200-50. Creator: UnknownAmoghasiddhi, the Buddha of the Northern Pure Land, ca. 1200-50
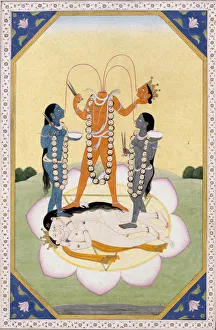
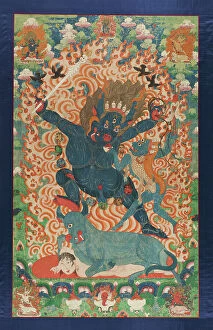
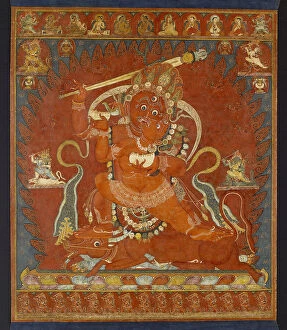
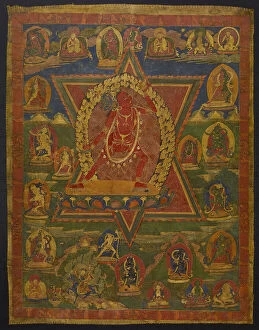
Chhinnamasta, c. 1800. Artist: AnonymousChhinnamasta, c. 1800. Found in the collection of Arturo Schwarz Collection
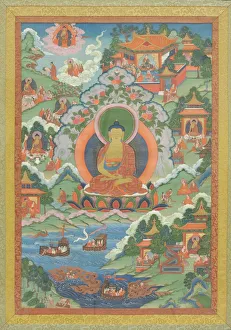
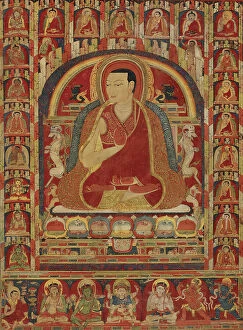
Thanka with Buddha, 19th century. Creator: UnknownThanka with Buddha, 19th century
Vajradhara with Mahasiddhas, c1400. Creator: UnknownVajradhara with Mahasiddhas, c1400. Vajradhara, the primordial Buddha, is considered to be the original teacher of the tantric Buddhist (Vajrayana) teachings
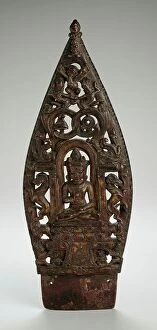
A Buddha in a Shrine, Folio from a Shatasahasrika Prajnaparamita... 11th-13th century (?). Creator: UnknownA Buddha in a Shrine, Folio from a Shatasahasrika Prajnaparamita (The Perfection of Wisdom in 100, 000 Verses) (image 2 of 2), 11th-13th century (?)
Power of Faith, Folio from a Shatasahasrika Prajnaparamita... 11th century. Creator: UnknownPower of Faith, Folio from a Shatasahasrika Prajnaparamita (The Perfection of Wisdom in 100, 000 Verses) (image 2 of 2), 11th century
Yama and Yami (image 1 of 21), between c1675 and c1725. Creator: AnonYama and Yami (image 1 of 21), between c1675 and c1725
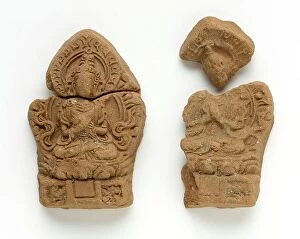
Pair of Votive Tablets with a Buddhist Deity, 18th-19th century. Creator: UnknownPair of Votive Tablets with a Buddhist Deity, 18th-19th century
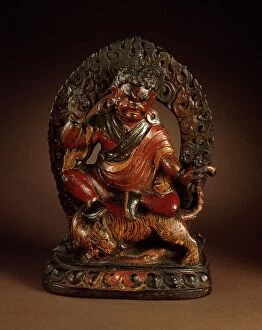
Padmasambhava (Guru Rinpoche, 8th cent) in his form as Dorje Drölö, Subduer of Demons, 18th century. Creator: UnknownPadmasambhava (Guru Rinpoche, 8th century) in his form as Dorje Drolo, Subduer of Demons, 18th century
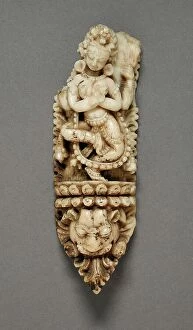
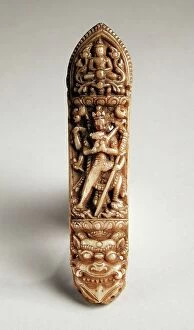
Apron Plaque with a Dancing Goddess, 17th-18th century. Creator: UnknownApron Plaque with a Dancing Goddess, 17th-18th century
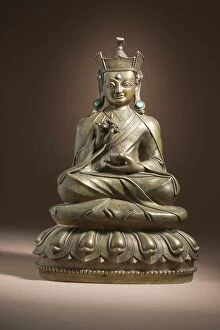
Padmasambhava (Guru Rinpoche, 8th century), 17th century. Creator: UnknownPadmasambhava (Guru Rinpoche, 8th century), 17th century
Vajrabhairava, 17th century. Creator: UnknownVajrabhairava, 17th century
Yama and Yami, 17th century. Creator: UnknownYama and Yami, 17th century
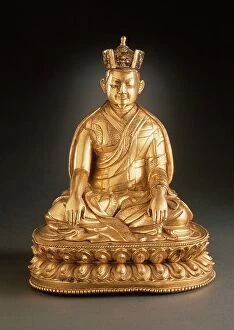
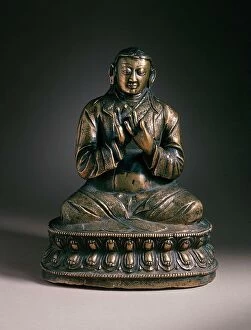
Karma Pakshi (1206-1283) (image 1 of 2), 17th century. Creator: UnknownKarma Pakshi (1206-1283) (image 1 of 2), 17th century
The Buddhist Goddess Vajravarahi, 17th century. Creator: UnknownThe Buddhist Goddess Vajravarahi, 17th century
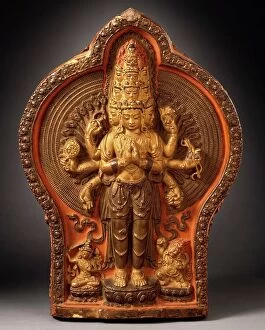
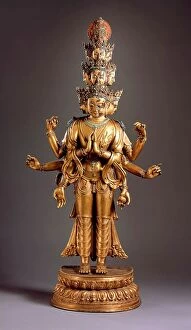
Cosmic Form of the Bodhisattva Avalokiteshvara, 17th century. Creator: UnknownCosmic Form of the Bodhisattva Avalokiteshvara, 17th century
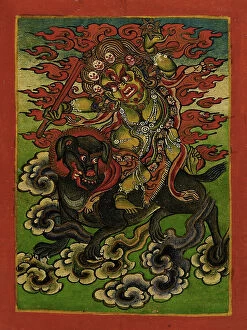
Dakini on a Gray Dog, Nyingmapa Buddhist or Bon Ritual Card, 18th-19th century. Creator: UnknownDakini on a Gray Dog, Nyingmapa Buddhist or Bon Ritual Card, 18th-19th century
The Bonpo Deity Kunzang Akor (image 1 of 2), 16th century. Creator: UnknownThe Bonpo Deity Kunzang Akor (image 1 of 2), 16th century
Eleven-Headed Avalokiteshvara, 16th century. Creator: UnknownEleven-Headed Avalokiteshvara, 16th century
Sonam Tsemo (1142-1182) (image 1 of 2), 16th century. Creator: UnknownSonam Tsemo (1142-1182) (image 1 of 2), 16th century
Khenchen Tashi Tshultrim and His Ordination Lineage, c1400. Creator: UnknownKhenchen Tashi Tshultrim and His Ordination Lineage, c1400. This masterful and meticulous portrait shows an abbot within a niche - one ornamented with lively scrollwork influenced by the traditions
The Buddhist Goddess Nairatmya, 16th century. Creator: UnknownThe Buddhist Goddess Nairatmya, 16th century
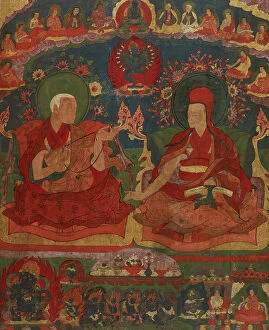
Abbots of the Ngor Monastery, late 16th century. Creator: UnknownAbbots of the Ngor Monastery, late 16th century. The first two abbots of the Ngor Monastery in central Tibet, the older Sempa Chenpo and the younger Jamyang Sherab Gyatsho
Green Tara, 1160s-1180s. Creator: UnknownGreen Tara, 1160s-1180s. This Buddhist "thangka" (or "thanka, " scroll painting) depicts the enlightened Buddha and compassionate goddess Tara
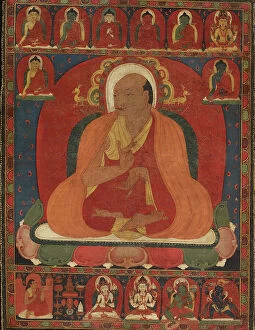
Portrait of a Tibetan Monk, 12th century. Creator: UnknownPortrait of a Tibetan Monk, 12th century. Wearing the robes of a Tibetan Buddhist monk, the individual depicted in this portrait was probably a teacher of the Kadampa order
Mahasiddhas Shavaripa and Dharikapa, c1600. Creator: UnknownMahasiddhas Shavaripa and Dharikapa, c1600. Painted in a style closely related to Chinese painting, two of the eighty-four mahasiddhas ("great perfected ones")
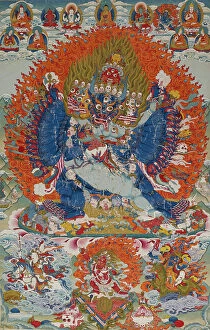
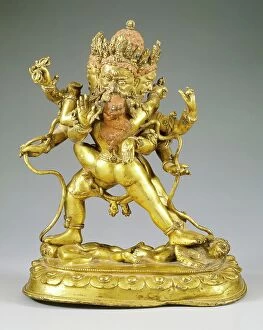
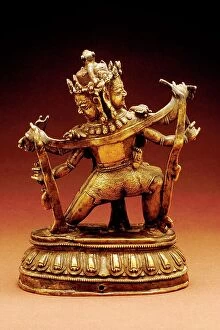
Vajrabhairava with Vajravetali, 18th century. Creator: UnknownVajrabhairava with Vajravetali, 18th century. The enlightened wrathful deity Vajrabhairava, Buddhist conqueror of death, embraces his female partner, Vajravetali
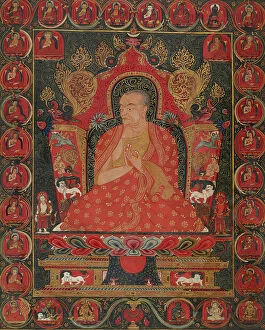
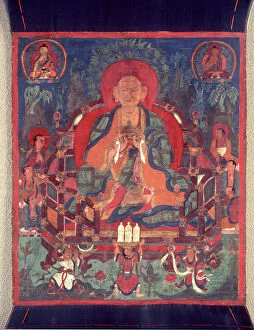
Arhat Rahula, 1400-1450. Creator: UnknownArhat Rahula, 1400-1450. The Buddha Shakyamuni had a son named Rahula, who became a disciple of his father. Tibetan monks regard him as a spiritual ancestor
Padmasambhava (Guru Rinpoche, 8th century) (image 1 of 6), 15th-16th century. Creator: UnknownPadmasambhava (Guru Rinpoche, 8th century) (image 1 of 6), 15th-16th century
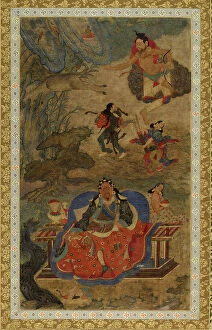
Buddha Shakyamuni with "Jataka" Tales, late 17th-early 18th century. Creator: UnknownBuddha Shakyamuni with "Jataka" Tales, late 17th-early 18th century. The Buddha Shakyamuni, who lived in the 6th-5th century BC, is shown here telling stories of his previous existences
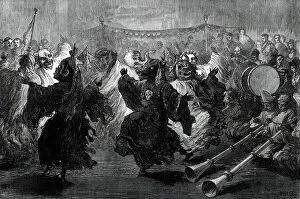
Lama Dance at Jummoo, performed before the Prince of Wales...1876. Creator: W. H. OLama Dance at Jummoo, performed before the Prince of Wales, from a sketch by one of our special artists, 1876....a weird terrible performance of Lamas from Thibet...[there were] four large brazen
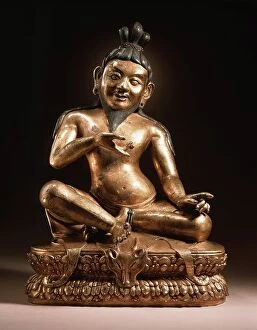
The Mahasiddha (Great Adept) Naropa (956-1040), 15th-16th century. Creator: UnknownThe Mahasiddha (Great Adept) Naropa (956-1040), 15th-16th century
Raktayamari and Vajravetali, early 14th century. Creator: UnknownRaktayamari and Vajravetali, early 14th century. The Buddhist deity Raktayamari embraces his female partner, Vajravetali, their union symbolizing the bliss of enlightenment
Kuyalwa, Second Abbot of Taklung Monastery, with Three Lineages, mid-13th century. Creator: UnknownKuyalwa, Second Abbot of Taklung Monastery, with Three Lineages, mid-13th century. This painting commemorates Kuyalwa (1191-1236), the second abbot of Taklung Monastery in central Tibet
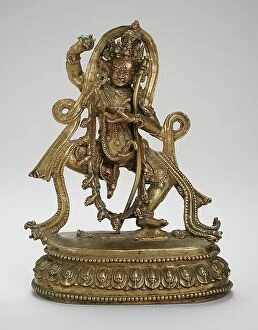
Vajrayogini as Naro Dakini, 18th century. Creator: UnknownVajrayogini as Naro Dakini, 18th century. The goddess and Buddha Vajrayogini lunges powerfully as she tramples two figures that symbolize the three mental poisons: delusion, hatred, and desire
The Mahasiddha (Great Adept) Virupa, 837-909 (image 1 of 2), 15th century. Creator: UnknownThe Mahasiddha (Great Adept) Virupa, 837-909 (image 1 of 2), 15th century
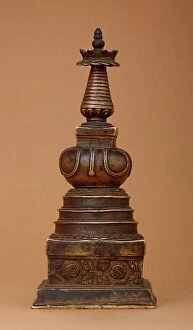
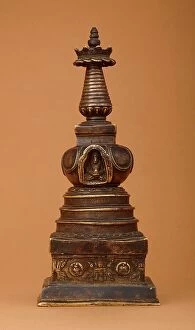
Stupa (Tibetan: Chöten) with Relics (image 2 of 2), 15th century. Creator: UnknownStupa (Tibetan: Choten) with Relics (image 2 of 2), 15th century
Stupa (Tibetan: Chöten) with Relics (image 1 of 2), 15th century. Creator: UnknownStupa (Tibetan: Choten) with Relics (image 1 of 2), 15th century
Apron Plaque with Chakrasamvara and Vajravarahi, 15th century. Creator: UnknownApron Plaque with Chakrasamvara and Vajravarahi, 15th century
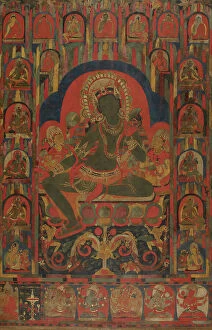
The Bodhisattva Vajrapani (Tibetan: Chana Dorje) and His Consort, 15th century. Creator: UnknownThe Bodhisattva Vajrapani (Tibetan: Chana Dorje) and His Consort, 15th century
Portrait of a Monk, 14th century. Creator: UnknownPortrait of a Monk, 14th century
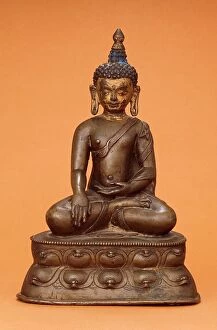
Buddha Shakyamuni or the Jina Buddha Akshobhya (image 1 of 2), 14th century. Creator: UnknownBuddha Shakyamuni or the Jina Buddha Akshobhya (image 1 of 2), 14th century
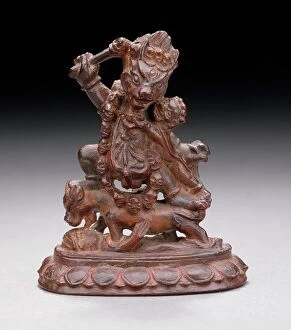
The Buddhist God Hayagriva and his Consort, 13th-14th century. Creator: UnknownThe Buddhist God Hayagriva and his Consort, 13th-14th century
Phagpa Lokeshvara (Copy of the original in the Potala, Lhasa, Tibet), 13th-14th century. Creator: UnknownPhagpa Lokeshvara (Copy of the original in the Potala, Lhasa, Tibet), 13th-14th century
Ritual Diadem Plaque with the Jina Buddha Amoghasiddhi, 13th-14th century. Creator: UnknownRitual Diadem Plaque with the Jina Buddha Amoghasiddhi, 13th-14th century