mail_outline sales@mediastorehouse.com
The Battle of Majuba Hill, 1900. Creator: Richard Caton Woodville IIThe Battle of Majuba Hill, 1900. From " South Africa and the Transvaal War, Vol. I", by Louis Creswicke. [T. C. & E. C. Jack, Edinburgh, 1900]
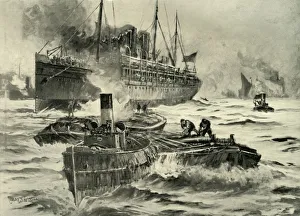
The Outbreak of the War - Transport Leaving England for the Cape, 1900. CreatorThe Outbreak of the War - Transport Leaving England for the Cape, 1900. From " South Africa and the Transvaal War, Vol. II", by Louis Creswicke. [T. C. & E. C. Jack, Edinburgh, 1900]
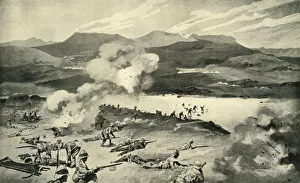
The Battle of Colenso - The Last Desperate Attempt to Save the Guns of the 14th and 66th Batteries, 1900. From " South Africa and the Transvaal War, Vol. II", by Louis Creswicke. [T. C
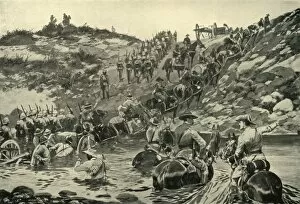
The Battle of Modder River - The Argyll and Sutherland Highlanders Crossing the Drift, 1900. From " South Africa and the Transvaal War, Vol. II", by Louis Creswicke. [T. C. & E. C
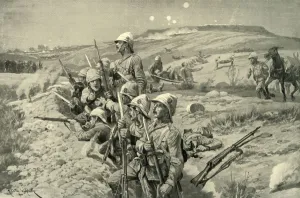
All That Was Left of Them. The Black Watch After the Battle of Magersfontein, 1900" All That Was Left of Them." The Black Watch After the Battle of Magersfontein, 1900. From " South Africa and the Transvaal War, Vol. II", by Louis Creswicke. [T. C. & E. C
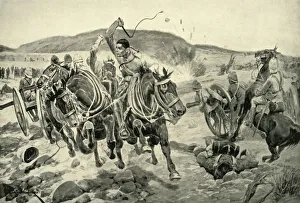
Night Sortie from Mafeking, 1900. Creator: Richard Caton Woodville IINight Sortie from Mafeking, 1900. From " South Africa and the Transvaal War, Vol. II", by Louis Creswicke. [T. C. & E. C. Jack, Edinburgh, 1900]
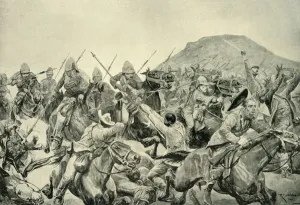
The Battle of Elandslaagte - Charge of the 5th Lancers, 1900. From " South Africa and the Transvaal War, Vol. II", by Louis Creswicke. [T. C. & E. C. Jack, Edinburgh, 1900]
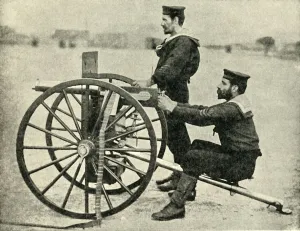
Types of Arms - The Maxim Gun, 1900. Creator: Gregory & CoTypes of Arms - The Maxim Gun, 1900. From " South Africa and the Transvaal War, Vol. II", by Louis Creswicke. [T. C. & E. C. Jack, Edinburgh, 1900]
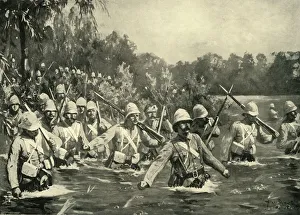
The Battle of Colenso - The Dublin Fusiliers Attempt to Ford the Tugela, 1900. CreatorsThe Battle of Colenso - The Dublin Fusiliers Attempt to Ford the Tugela, 1900. From " South Africa and the Transvaal War, Vol. II", by Louis Creswicke. [T. C. & E. C. Jack, Edinburgh, 1900]
Before Ladysmith - Horse Artillery Galloping to Take Up a New Position, 1900. CreatorBefore Ladysmith - Horse Artillery Galloping to Take Up a New Position, 1900. From " South Africa and the Transvaal War, Vol. II", by Louis Creswicke. [T. C. & E. C. Jack, Edinburgh, 1900]
The Battle of Colenso - Queens (Royal West Surrey) Regiment Leading the Central Attack, 1900. From " South Africa and the Transvaal War, Vol. II", by Louis Creswicke. [T. C. & E. C
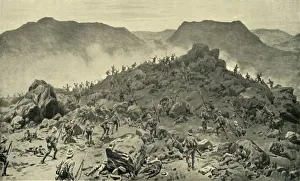
Stormberg Pass - The Scene of General Gatacres Operations, 1900. Creator: HC Seppings WrightStormberg Pass - The Scene of General Gatacres Operations, 1900. From " South Africa and the Transvaal War, Vol. II", by Louis Creswicke. [T. C. & E. C. Jack, Edinburgh, 1900]
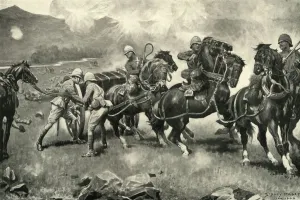
From Frere to Chieveley - Difficultues of Transport, 1900. Creator: Richard Caton Woodville IIFrom Frere to Chieveley - Difficultues of Transport, 1900. From " South Africa and the Transvaal War, Vol. II", by Louis Creswicke. [T. C. & E. C. Jack, Edinburgh, 1900]
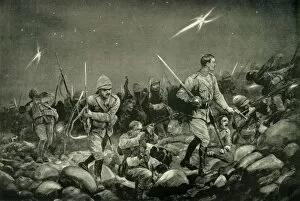
Fix Bayonets! - Repelling an Attack from the Trenches around Ladysmith, 1900. CreatorFix Bayonets! - Repelling an Attack from the Trenches around Ladysmith, 1900. From " South Africa and the Transvaal War, Vol. II", by Louis Creswicke. [T. C. & E. C. Jack, Edinburgh, 1900]
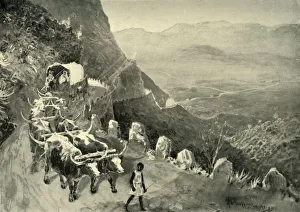
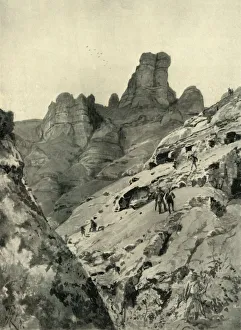
The Outbreak of War - The Drakenberg Mountains Where The Boers Were Laagered, 1900. From " South Africa and the Transvaal War, Vol. II", by Louis Creswicke. [T. C. & E. C
Types of Arms - 15-Pounder Field-Gun, 1900. Creator: CribbTypes of Arms - 15-Pounder Field-Gun, 1900. From " South Africa and the Transvaal War, Vol. II", by Louis Creswicke. [T. C. & E. C. Jack, Edinburgh, 1900]
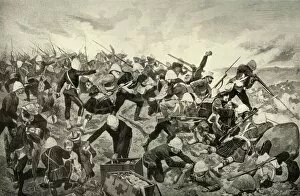
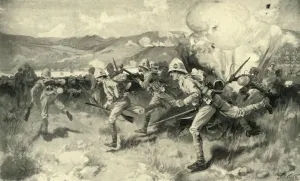
The Battle of Belmont, 23rd November 1899 - Bayonet Attack by the Scots and Grenadier Guards, 1900. From " South Africa and the Transvaal War, Vol. II", by Louis Creswicke. [T. C. & E. C
Heading Off Cronje - General French Blocking the Way at Koodoosrand Drift, (1901). The British under John French fought Piet Cronjes forces in the South African War in 1899
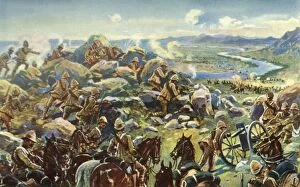
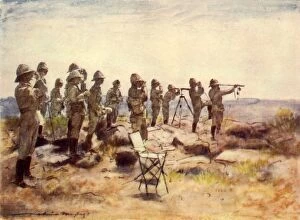
Lord Roberts and Staff Watching the Battle of Osfontein, 1900, (1901). Creator: Mortimer L MenpesLord Roberts and Staff Watching the Battle of Osfontein, 1900, (1901). British commander Sir Frederick, 1st Earl Roberts (1832-1914) watching the action between British forces and the Boers in 1900