mail_outline sales@mediastorehouse.com
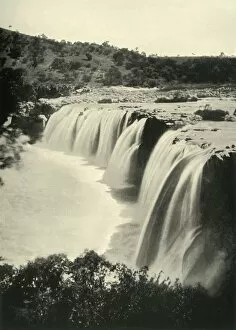
Falls on the Tugela River, 1900. Creator: WilsonFalls on the Tugela River, 1900. The Tugela River in Northern Natal, South Africa - a feature in strategy during the Second Boer War. From " South Africa and the Transvaal War, Vol
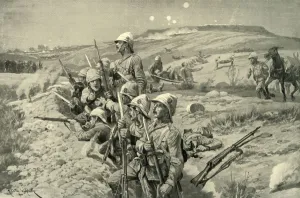
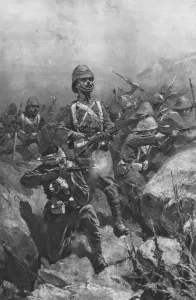
Fix Bayonets! - Repelling an Attack from the Trenches around Ladysmith, 1900. CreatorFix Bayonets! - Repelling an Attack from the Trenches around Ladysmith, 1900. From " South Africa and the Transvaal War, Vol. II", by Louis Creswicke. [T. C. & E. C. Jack, Edinburgh, 1900]
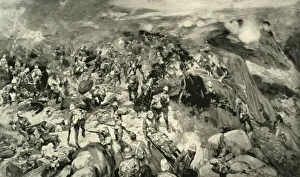
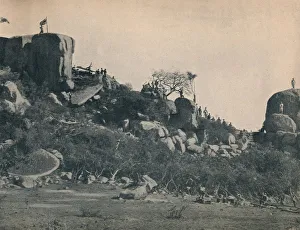
The Scene on Spion Kop - Major Thorneycrofts Desperate Situation, 1900. Creator: Frank CraigThe Scene on Spion Kop - Major Thorneycrofts Desperate Situation, 1900. British forces captured what they thought was the summit of Spion Kop
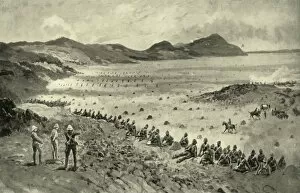
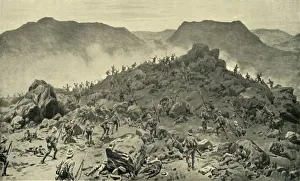
Colonel Pilchers Attack on Sunnyside Kopje, 1900. Creator: HC Seppings WrightColonel Pilchers Attack on Sunnyside Kopje-Canadian and Australian Contingents Receive Their " Baptism of Fire". 1900
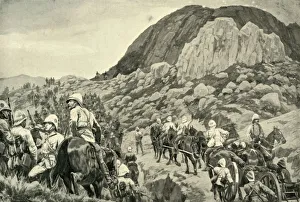
Going Out to the Attack on Spion Kop on January 24, 1900. Creator: Richard Caton Woodville IIGoing Out to the Attack on Spion Kop on January 24, 1900. The Battle of Spion Kop was fought on the hilltop of Spioenkop in Natal, South Africa from 23-24 January 1900
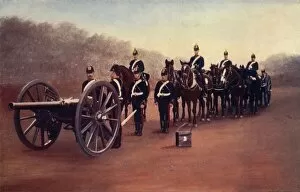
Royal Field Artillery (Action Front), 1900. Creator: Gregory & CoRoyal Field Artillery (Action Front), 1900. From " South Africa and the Transvaal War, Vol. III", by Louis Creswicke. [T. C. & E. C. Jack, Edinburgh, 1900]
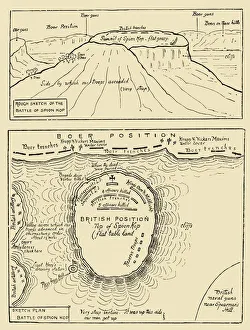
Sketch and Plan of the Battle of Spion Kop, 1900. Creator: UnknownSketch and Plan of the Battle of Spion Kop, 1900. The Battle of Spion Kop was fought on the hilltop of Spioenkop in Natal in South Africa from 23-24 January 1900
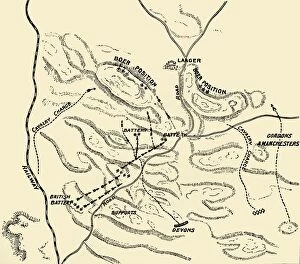
Plan of battle of Elandslaagte, 1900. Creator: UnknownPlan of battle of Elandslaagte, 1900. From " South Africa and the Transvaal War, Vol. II", by Louis Creswicke. [T. C. & E. C. Jack, Edinburgh, 1900]
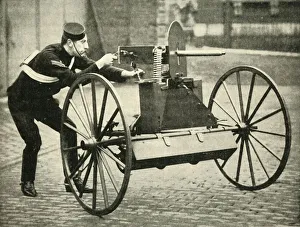
Types of Arms - Lord Dundonalds Galloping Gun-Carriage with Maxim, 1900. CreatorTypes of Arms - Lord Dundonalds Galloping Gun-Carriage with Maxim, 1900. Douglas Cochrane, 12th Earl of Dundonald served in the Second Boer War
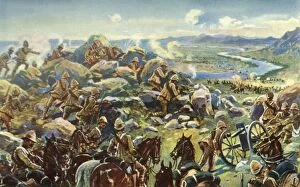
The Battle of Belmont, 23rd November 1899 - Bayonet Attack by the Scots and Grenadier Guards, 1900. From " South Africa and the Transvaal War, Vol. II", by Louis Creswicke. [T. C. & E. C
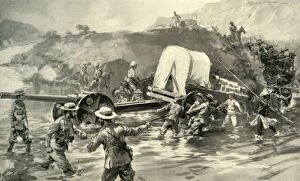
Taking the 4. 7 Naval Gun Across The Tugela, 1900. Creator: Joseph FinnemoreTaking the 4.7 Naval Gun Across The Tugela, 1900. The British crossed the Tugela River in Natal, South Africa with field artillery during the Second Boer War
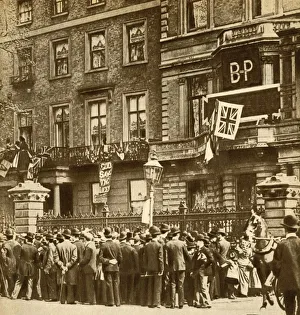
Mafeking Relieved, 1900, (1933). Creator: UnknownMafeking Relieved, 1900, (1933). Patriotic crowds celebrate outside the London home of British colonel Robert Baden-Powell after his part in the relief of the British-held town in South Africa
Boer and Briton Nursed Together, 1900, (1933). Creator: Horace Walter NichollsBoer and Briton Nursed Together, 1900, (1933). Red Cross nurses treating wounded of both sides during the Boer War in South Africa
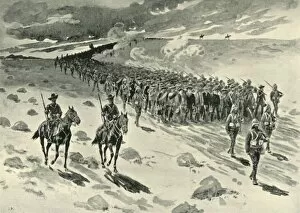
Colonial Troops in South Africa, 1899-1901: Australian Bushmen on the March, (1901). About 20, 000 Australians served and about 1, 000 were killed in the Second Boer War (October 1899-May 1902)
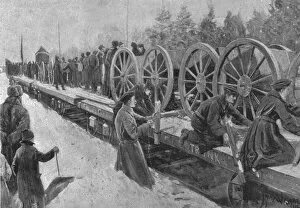
Colonial Troops for South Africa, 1900: Canadian Artillery entraining at Ottawa, (1901). Soldiers climbing onto flat-bed railway wagons carrying heavy artillery at Ottawa in Canada
The Transvaal War, 1899-1901: A Sharp Engagement, (1901). Creator: UnknownThe Transvaal War, 1899-1901: A Sharp Engagement, (1901). Episode from the Second Boer War (October 1899-May 1902), fought between the the British Empire and two Boer states
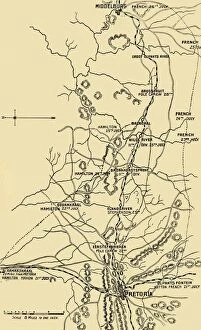
Map Illustrating the Eastward Move from Eerstefabrieken to Middelburg, 1901. Creator: UnknownMap Illustrating the Eastward Move from Eerstefabrieken to Middelburg, 1901. The Second Boer War (1899-1902) was fought between the British Empire and two Boer states
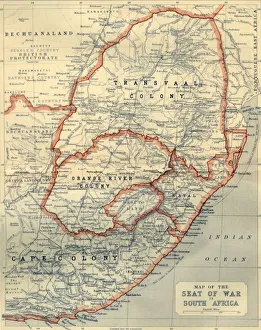
Map of the Seat of War in South Africa, 1901. Creator: John BartholomewMap of the Seat of War in South Africa, 1901. Map showing Bechuanaland, Transvaal Colony, Orange River Colony, Natal, Basutoland and Cape Colony, the theatre of war during the Boer Wars (1880-1902)
Lord Roberts at the Orange Grove Inn: A Characteristic Incident, (1901)Lord Roberts at the " Orange Grove" Inn: A Characteristic Incident, (1901). British soldier Frederick Sleigh Roberts (1832-1914) fought the Boers in South Africa, 1899-1900
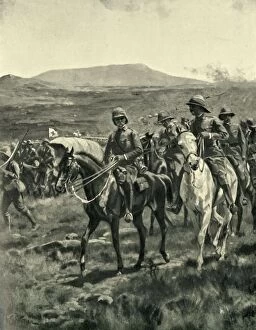
Lord Roberts and Staff on the Veldt Approaching Pretoria, (1901). Creator: William Barnes WollenLord Roberts and Staff on the Veldt Approaching Pretoria, (1901). British soldier Frederick Sleigh Roberts (1832-1914) fought the Boers in South Africa, 1899-1900
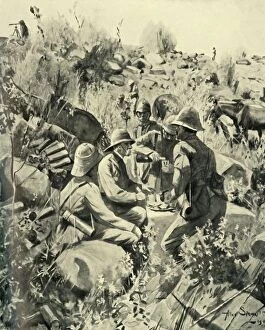
Lord Roberts and Staff at Lunch on the Veldt, (1901). Creator: UnknownLord Roberts and Staff at Lunch on the Veldt, (1901). British soldier Frederick Sleigh Roberts (1832-1914) fought the Boers in South Africa, 1899-1900
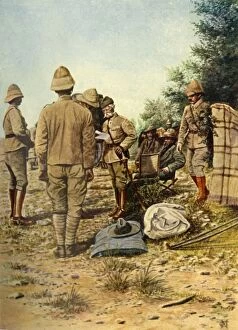
The Surrender of General Cronje to Lord Roberts at Paardeberg... 27 February 1900, (1901)The Surrender of General Cronje to Lord Roberts at Paardeberg - A Despatch Arrives from the Laager, 27 February 1900, (1901)
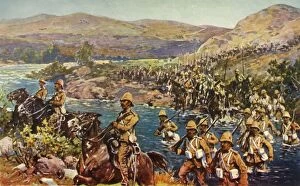
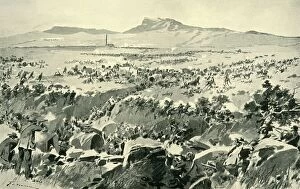
The Great Turning Movement - Crossing the Riet, (1901). Creator: UnknownThe Great Turning Movement - Crossing the Riet, (1901). British forces crossing the Riet River in South Africa during the Boer Wars (1880-1902). From " The Life and Deeds of Earl Roberts, Vol
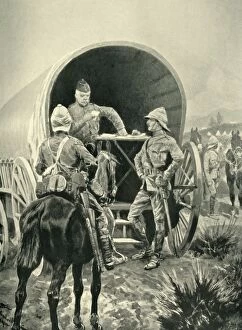
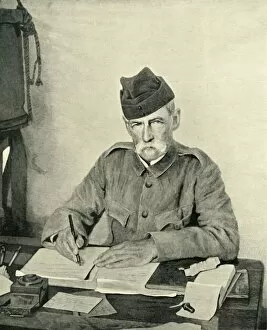
Lord Roberts Writing Despatches in the Transport Waggon in Which He Slept, (1901). British soldier Frederick Sleigh Roberts (1832-1914) fought the Boers in South Africa, 1899-1900
The Ambuscade at Koornspruit: A Critical Moment, 1900, (1901). Creator: Frederic de HaenenThe Ambuscade at Koornspruit: A Critical Moment, 1900, (1901). The Battle of Sannas Post (also known as Korn Spruit) was fought during the Second Boer War (1899-1902)
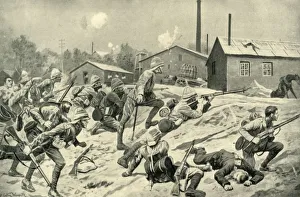
The Capture of Johannesburg: The Guards Attack at Germiston, (1901). Creator: UnknownThe Capture of Johannesburg: The Guards Attack at Germiston, (1901). British forces under Frederick Sleigh Roberts captured Johannesburg in the South African Republic, (now part of South Africa)
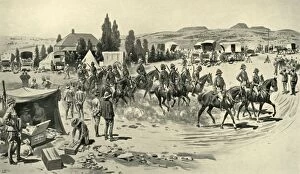
Lord Roberts and Staff Starting for a Reconnaissance from Headquarters at Smaldeel, (1901). British soldier Frederick Sleigh Roberts (1832-1914) fought the Boers in South Africa
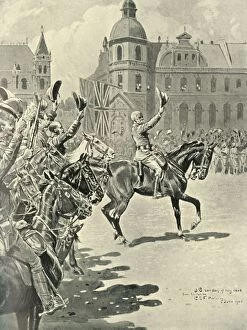
Hoisting the British flag at Pretoria: Lord Roberts Leading Cheers for the Queen, 1900, (1901). British soldier Frederick Sleigh Roberts (1832-1914) fought the Boers in South Africa, 1899-1900
Lord Roberts Cheered By the Troops on his Arrival at Wonder RIver, (1901). Creator: UnknownLord Roberts Cheered By the Troops on his Arrival at Modder River, (1901). The Battle of Modder River during the Second Boer War took place on 28 November 1899, in what is now Northern Cape province
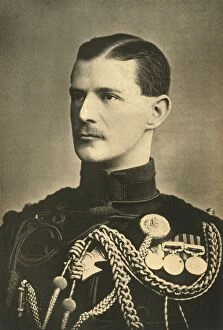
Lieut. The Hon. F. H. S. Roberts, V. C. late 1890s, (1901). Creator: ChancellorLieut. The Hon. F. H. S. Roberts, V.C. late 1890s, (1901). Portrait of Lieutenant Frederick Hugh Sherston Roberts, British soldier
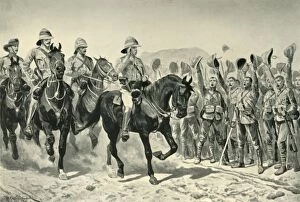
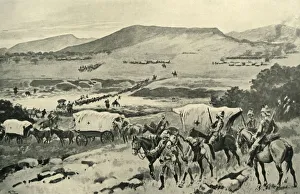
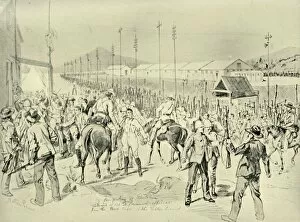
After Paardeberg: Boer Prisoners on the March, (1901). Creator: UnknownAfter Paardeberg: Boer Prisoners on the March, (1901). The Boer general Piet Cronje (1835-1911) surrendered to Lord Frederick Sleigh Roberts (1832-1914)
Heading Off Cronje - General French Blocking the Way at Koodoosrand Drift, (1901). The British under John French fought Piet Cronjes forces in the South African War in 1899
Generals French and Hutton Crossing the Vaal into Transvaal Territory, (1901). CreatorGenerals French and Hutton Crossing the Vaal into Transvaal Territory, (1901). In 1900, British forces and ambulance convoys under John French
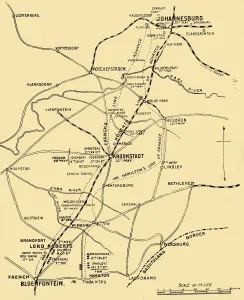
Map Showing the Lines of Advance from Bloemfontein to Pretoria, 1901. Creator: UnknownMap Showing the Lines of Advance from Bloemfontein to Pretoria, 1901. Positions and lines of advance of British forces c1900
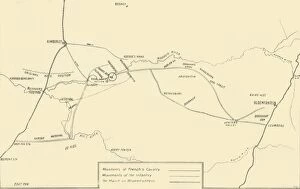
Map Illustrating the Movements for the Relief of Kimberley and the Capture of Bloemfontein, 1901. The key indicates the movements of Major General Frenchs cavalry and of the infantry
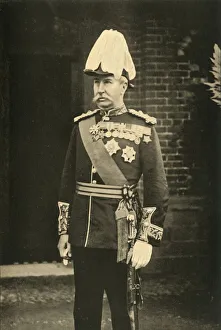
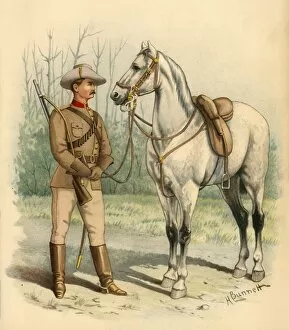
General Sir Redvers Buller, 1901. Creator: M H HackGeneral Sir Redvers Buller, 1901. Portrait of British Army officer Redvers Henry Buller (1839-1908). Buller won the Victoria Cross at Inhlobane, in the Zulu War, 1879
The Occupation of Pretoria: Release of British Officers, (1901). Creator: Melton PriorThe Occupation of Pretoria: Release of British Officers, (1901). Scene from the Second Boer War in South Africa, 1899-1900. From " The Life and Deeds of Earl Roberts, Vol. IV
Lord Roberts Writing in his Tent, c1900, (1901). Creator: UnknownLord Roberts Writing in his Tent, c1900, (1901). British soldier Frederick Sleigh Roberts (1832-1914) fought the Boers in South Africa, 1899-1900
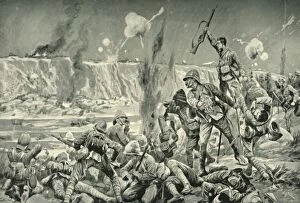
Paardeberg: The Assault on Cronjes Position, (1901). Creator: UnknownPaardeberg: The Assault on Cronjes Position, (1901). The Boer general Piet Cronje surrendered to Lord Roberts, the British commander-in-chief in South Africa, after the Battle of Paardeberg in 1899
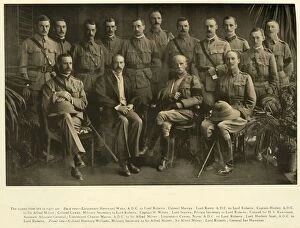
Lord Roberts and Sir Alfred Milner with their Personal Staffs, 1900, (1901). Creator: UnknownLord Roberts and Sir Alfred Milner with their Personal Staffs, December 1900, (1901). Group portrait of British officers taken at Government House, Cape Town, South Africa
Just Like Bobs, (1901). Creator: UnknownJust Like Bobs, (1901). British commander Frederick Sleigh Roberts (1832-1914) fought the Boers in South Africa, 1899-1900
Victorian Mounted Rifles, 1890. Creator: Godfrey Douglas GilesVictorian Mounted Rifles, 1890. From " Her Majestys Army, Vol. III", by Walter Richards. [J. S. Virtue & Co. Limited, London, ]
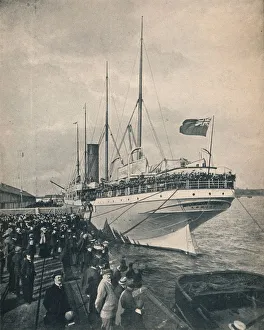
The Braemar Castle off to the Cape, with Troops, c1900. Creator: UnknownThe " Braemar Castle" off to the Cape, with Troops, c1900. Union Castle Line ship Braemar castle was built in 1898
Fort Halstead, c1900. Creator: UnknownFort Halstead, c1900. From " South Africa in Peace and War" edited by C. Lang Neil. [Miles & Miles, London]
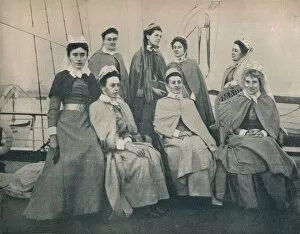
Off to the War! Nurses on a Liner bound for Cape Town, c1900. Creator: UnknownOff to the War! Nurses on a Liner bound for Cape Town, c1900. From " South Africa in Peace and War" edited by C. Lang Neil. [Miles & Miles, London]
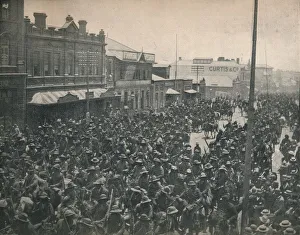
Boer Commando passing through Johannesburg (Second Transvaal War), c1900. Creator: UnknownBoer Commando passing through Johannesburg (Second Transvaal War), c1900. From " South Africa in Peace and War" edited by C. Lang Neil. [Miles & Miles, London]
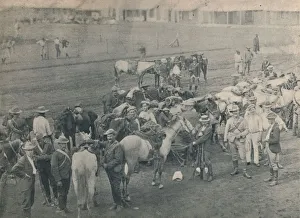
Plumers Horse, c1900. Creator: UnknownPlumers Horse, c1900. From " South Africa in Peace and War" edited by C. Lang Neil. [Miles & Miles, London]
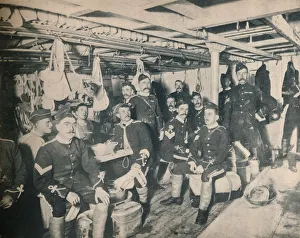
Soldiers in a Cabin of a Transport, c1900. Creator: UnknownSoldiers in a Cabin of a Transport, c1900. From " South Africa in Peace and War" edited by C. Lang Neil. [Miles & Miles, London]