mail_outline sales@mediastorehouse.com
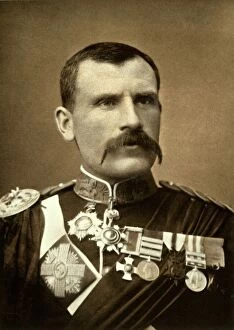
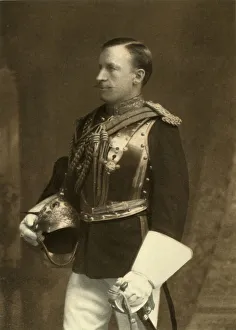
Household Cavalry-Captain, 2nd Life Guards, 1900. Creator: Gregory & CoHousehold Cavalry-Captain, 2nd Life Guards, 1900. 2nd Regiment of Life Guards was renamed 2nd Life Guards in 1877 and contributed to the Household Cavalry Composite Regiment in the Second Boer War
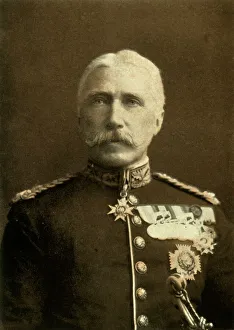
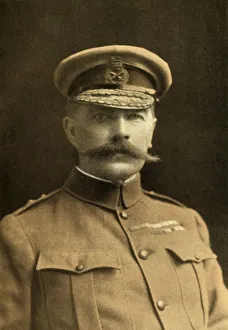
General Sir Bindon Blood, 1902. Sir Bindon Blood (1842-1940) British Army commander who served in Egypt, Afghanistan, India and Southern Africa. From " South Africa and the Transvaal War, Vol
The Cape Town Highlanders, 1900. Creator: JE BrutonThe Cape Town Highlanders, 1900. The Cape Town Highlanders infantry regiment of the South African Army was mobilised for active duty during the Second Boer War
Lord Methuen Rallying His Broken Forces at Tweebosch, 1902. Creator: Charles Mills SheldonLord Methuen Rallying His Broken Forces at Tweebosch, 1902. Koos de la Rey ambushed Methuens column at Tweebosch on on 7 March 1902, Lord Methuen was captured by the Boers
The Night Charge of the 19th Hussars Near Lydenberg on Nov. 7th 1900, 1901. CreatorThe Night Charge of the 19th Hussars Near Lydenberg on Nov. 7th 1900, 1901. From " South Africa and the Transvaal War, Vol. VI", by Louis Creswicke. [T. C. & E. C. Jack, Edinburgh, 1901]
Major-General Hector A. Macdonald, C. B. 1900. Creator: HeathMajor-General Hector A. Macdonald, C.B. 1900. Hector MacDonald (1853- 1903) also known as Fighting Mac, served as as subaltern in the First Boer War
Mr. Kruger's Portrait, Hung in the Raad-Saal at Pretoria, c1900. Creator: UnknownMr. Kruger's Portrait, Hung in the Raad-Saal at Pretoria, c1900. South African Boer leader Paul Kruger, President of Transvaal. Engraving after a photograph
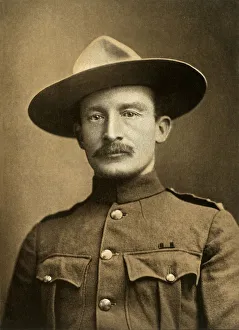
Lieut.-General Baden-Powell, c1900. Creator: LafayetteLieut.-General Baden-Powell, c1900. Portrait of Lieutenant General Robert Stephenson Smyth Baden-Powell, British soldier and defender of Mafeking in the Boer War
Dr. Leyds, c1900. Creator: UnknownDr. Leyds, c1900. Portrait of Dutch lawyer Willem Johannes Leyds who served as state attorney and state secretary of the South African Republic
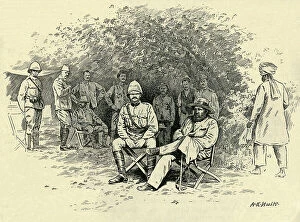
After Paardeberg: General Cronje A Prisoner, February 1900, (c1900). Creator: A.E. HuittAfter Paardeberg: General Cronje A Prisoner, February 1900, (c1900). Boer general Piet Cronje surrendered to the British after the Battle of Paardeberg, South Africa. Engraving after a photograph
Cronje's Surrender, 27 February 1900, (c1900). Creator: Marguerite JacobCronje's Surrender, 27 February 1900, (c1900). Boer general Piet Cronje surrenders to Lord Frederick Sleigh Roberts, Commander in Chief of the British Army, after the Battle of Paardeberg
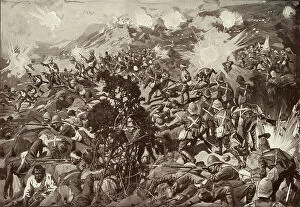
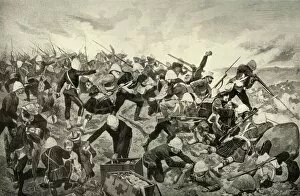
The Defence of Spion Kop, January 1900, (c1900). Creator: UnknownThe Defence of Spion Kop, January 1900, (c1900). The Boers defeat the British in South Africa. From "Cassell's History of England, Vol. IX"
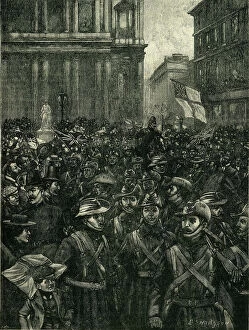
The C.I.V.'s Marching Down Ludgate Hill, On The Way From The Mansion House To Waterloo... c1900. Creator: E. BThe C.I.V.'s Marching Down Ludgate Hill, On The Way From The Mansion House To Waterloo Station, c1900. Crowds cheer British soldiers leaving London to fight in South Africa
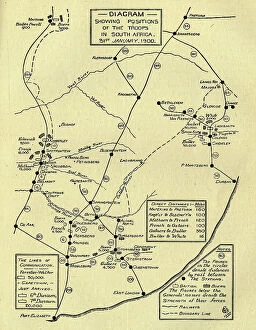
Diagram Showing Positions of the Troops in South Africa, 31st January 1900, (c1900). Creator: UnknownDiagram Showing Positions of the Troops in South Africa, 31st January 1900, (c1900). Boer Wars. Map showing lines of communication and the positions of the British and the Boers
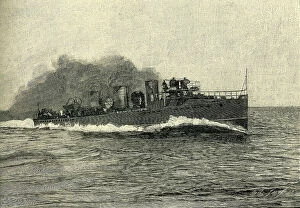
H.M.'s Torpedo Boat Destroyer Viper, c1900. Creator: Marguerite JacobH.M.'s Torpedo Boat Destroyer Viper, c1900. Engraving after a photograph. From "Cassell's History of England, Vol. IX"
The Imperial Light Horse at Waggon Hill, January 6, 1900, c1900. Creator: Andre & SleighThe Imperial Light Horse at Waggon Hill, January 6, 1900, c1900. The South African Light Horse, a regiment of the British Army, was formed in 1899
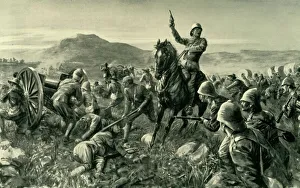
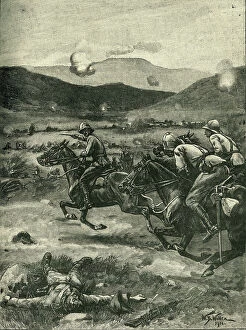
The Battle of Colenso: Lieutenant Roberts Galloping Forward... 1899, (c1900). Creator: William Barnes WollenThe Battle of Colenso: Lieutenant Roberts Galloping Forward to Retrieve The Disaster to the Guns, 1899, (c1900). Lieutenant Roberts (the only son of Lord Roberts)
Transports in Table Bay During the South African War, c1900. Creator: Charles John De LacyTransports in Table Bay During the South African War, c1900. Transports were now daily reaching Cape Town, and during the next ten days a brigade of Guards numbering 4, 000
A Boer Commando, c1900. Creator: UnknownA Boer Commando, c1900. South Africa. From "Cassell's History of England, Vol. IX". [Cassell and Company, Limited, London, Paris, New York & Melbourne]
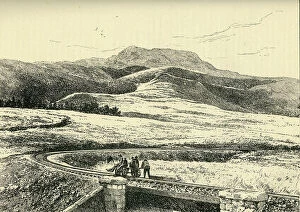
Majuba, c1900. Creator: UnknownMajuba, c1900. South Africa. Site of the Battle of Majuba Hill (1881), the final and decisive battle of the First Boer War. Illustration from a photograph
"In Sight": Lord Dundonald's Dash on Ladysmith, February 28, 1900, by Lucy E. Kemp-Welch, c1900. Douglas Cochrane, 12th Earl of Dundonald
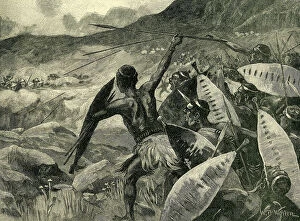
Fighting in the Matoppo Hills: Charge of the Matabele, c1900. Creator: William Barnes WollenFighting in the Matoppo Hills: Charge of the Matabele, c1900. Scene from the Second Matabele War. From "Cassell's History of England, Vol. IX"
Piet J. Joubert (1831-1900), Commandant-General of the South African Republic, 1890. Creator: Thérèse SchwartzePiet J. Joubert (1831-1900), Commandant-General of the South African Republic, 1890
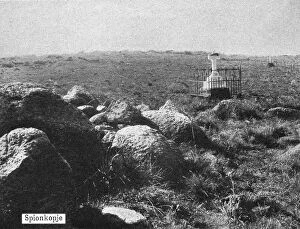
'Spionkopje; Afrique Australe, 1914. Creator: Unknown'Spionkopje; Afrique Australe, 1914. From "Grande Geographie Bong Illustree", 1914
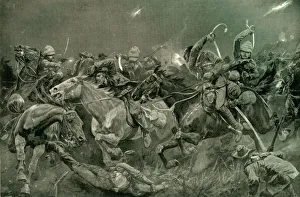
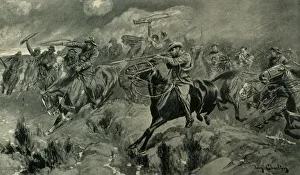
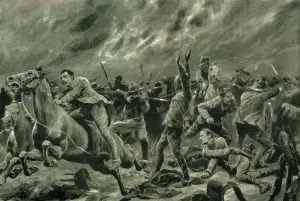
The Fight at Brakenlaagte: Boers Charging, 1902. Creator: John CharltonThe Fight at Brakenlaagte: Boers Charging, 1902. Boers charged British positions at the Battle of Bakenlaagte, 30 October 1901. From " South Africa and the Transvaal War, Vol
Delagoa Bay, 1902. Creator: Donald McCrackenDelagoa Bay, 1902. Maputo Bay formerly Delagoa Bay, an inlet of the Indian Ocean on the coast of Mozambique, a strategic position, in terms of trade, transport and labour links
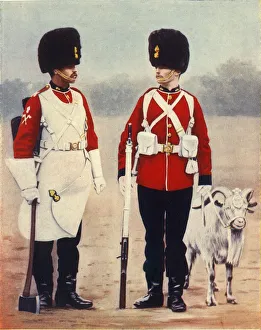
The Grenadier Guards (Colour-Sergeant & Sergeant-Major), 1901. Creator: Gregory & CoThe Grenadier Guards (Colour-Sergeant & Sergeant-Major), 1901. The Grenadier Guard, an infantry regiment of the British Army were deployed to South Africa
Boers Caught in the Act of Cutting the Telegraph Wires, 1902. Creators: Walter PagetBoers Caught in the Act of Cutting the Telegraph Wires, 1902. Telegraph wires were cut and railways sabotaged by the Boers. From " South Africa and the Transvaal War, Vol
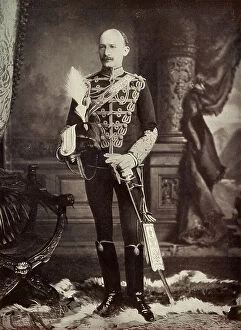
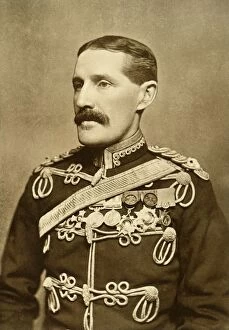
Brigadier-General The Earl of Erroll, 1902. Creator: Elliott & FryBrigadier-General The Earl of Erroll, 1902. Charles Gore Hay, 20th Earl of Erroll, (1852-1927), Scottish general commissioned to the Imperial Yeomanry
Mafeking: Eloffs Desperate Attack on the Eve of the Relief, (1901). Creator: UnknownMafeking: Eloffs Desperate Attack on the Eve of the Relief, (1901). The town of Mafeking, (now called Mahikeng, in South Africa)
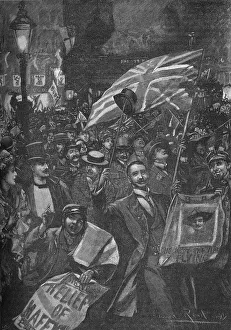
Mafeking night in London, 1900 (1906). Celebrations on the street for the relief of the British-held town in South Africa, besieged by the Boers for 217 days from October 1899 until May 1900
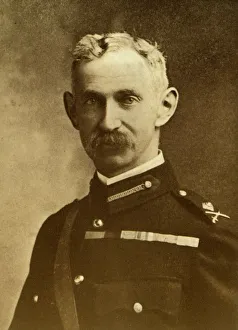
General Babington, 1902. Creator: Charles KnightGeneral Babington, 1902. Sir James Melville Babington (1854-1936) British Army officer and cavalry leader who took part in the Battle of Magersfontein on 10-11 December 1899
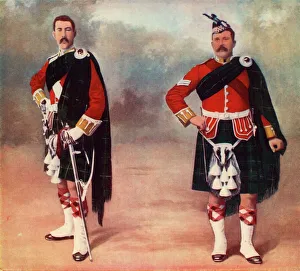
Officers of the Highland Light Infantry, 1901. Creator: Gregory & CoOfficers of the Highland Light Infantry, 1901. The Highland Light Infantry regiment of the British Army formed in 1881 and was posted to South Africa in October 1899
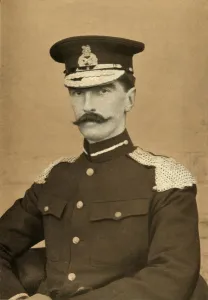
Major-General Walter Kitchener, 1902. Creator: London Stereoscopic & Photographic CoMajor-General Walter Kitchener, 1902. Frederick Walter Kitchener (1858- 1912) British soldier and colonial administrator, brother of Lord Kitchener Commander-in-Chief of the troops in South Africa
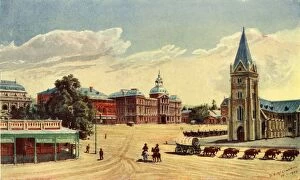
Church Square, Pretoria, 1902. Creator: Donald McCrackenChurch Square, Pretoria, 1902. Historic centre of the city of Pretoria, South Africa in 1954 had a statue of the Boer leader and president of the South African Republic, Paul Kruger, at its centre
The Mishap to the Victorians at Wilmansrust, June 12, 1901, 1902. Victorian Mounted Rifles under attack on their camp at Wilmansrust by Boers dressed in captured khaki uniforms and turned up hats
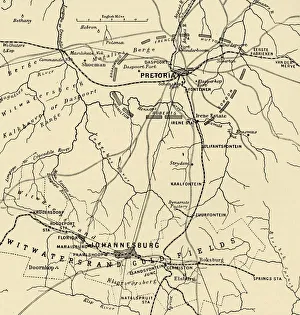
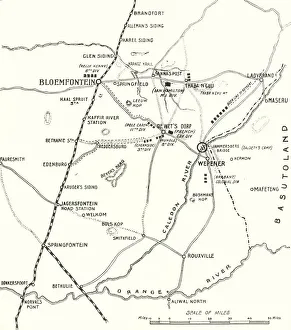
Map Showing District Between Johannesburg and Pretoria, and the Position of the British Forces Round the Latter, 1901. From " South Africa and the Transvaal War, Vol
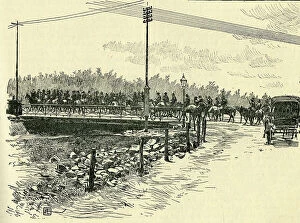
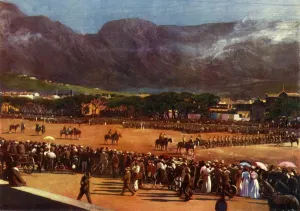
Muster of the Cape Town Guard on the Parade Ground Cape Town, January 12, 1901, 1901Muster of the Cape Town Guard on the Parade Ground Cape Town, for Inspection by General Brabant, January 12, 1901, 1901. British military parade in colonial South Africa
Their Ordeal of Fire: The Grenadier Guards at the Battle of Biddulphs Berg, 1901. From " South Africa and the Transvaal War, Vol. V", by Louis Creswicke. [T. C. & E. C
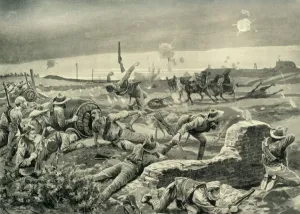
The Tentacles at Work, 1901. Creator: UnknownThe Tentacles at Work, 1901. From " South Africa and the Transvaal War, Vol. V", by Louis Creswicke. [T. C. & E. C. Jack, Edinburgh, 1901]
Major-General H. L. Smith-Dorrien, D. S. O. 1901. Creator: Bassano LtdMajor-General H. L. Smith-Dorrien, D.S.O. 1901. Horace Smith-Dorrien (1858-1930) British Army General. One of the few British survivors of the Battle of Isandlwana who also distinguished himself in
Major-General Barton, C. B. 1901. Creator: Debenham & SmithMajor-General Barton, C.B. 1901. Major General Sir Geoffrey Barton (1844- 1922) served the British Army from 1862 until 1904 commanded the 6th Brigade of the South Natal Field Force in the Relief of
Mr M. T. Steyn. Late President Orange Free State, 1900. Creator: UnknownMr M. T. Steyn. Late President Orange Free State, 1900. Martinus Theunis Steyn (1857-1916) South African lawyer, politician, and statesman
The Royal Welsh Fusiliers, 1901. Creator: Gregory & CoThe Royal Welsh Fusiliers, 1901. The 1st battalion of the Royal Welsh Fusiliers line infantry regiment of the British Army served in the 1899 to 1902 Second Boer War
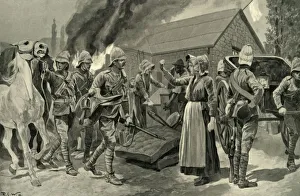
Burning the Farm of a Treacherous Burgher, 1901. Creator: Richard Caton Woodville IIBurning the Farm of a Treacherous Burgher, 1901. During Peace talks of February 1901, Kitchner declared he would stop his troops burning farms if Louis Botha instructed the Boers to stop using them
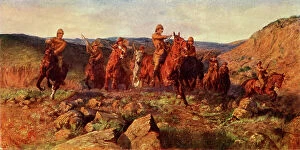
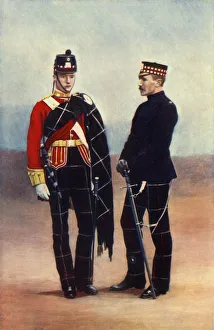
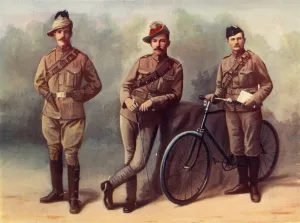
South African Light Horse (Trooper), Brabants Horse (Trooper), Duke of Edinburgh sSouth African Light Horse (Trooper), Brabants Horse (Trooper), Duke of Edinburghs Volunteer Rifles (Dispatch Rider), 1900
Colonel Robert S. S. Baden-Powell, The Defender of Mafeking, 1900. Creator: Elliot & FryColonel Robert S. S. Baden-Powell, The Defender of Mafeking, 1900. From " South Africa and the Transvaal War, Vol. II", by Louis Creswicke. [T. C. & E. C. Jack, Edinburgh, 1900]
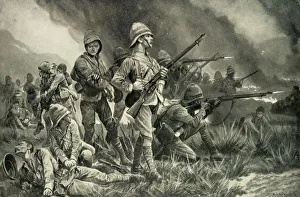
The Battle of Majuba Hill, 1900. Creator: Richard Caton Woodville IIThe Battle of Majuba Hill, 1900. From " South Africa and the Transvaal War, Vol. I", by Louis Creswicke. [T. C. & E. C. Jack, Edinburgh, 1900]