mail_outline sales@mediastorehouse.com
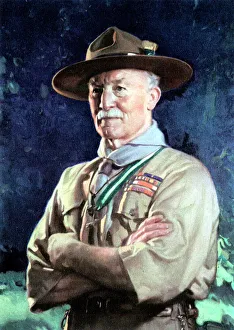
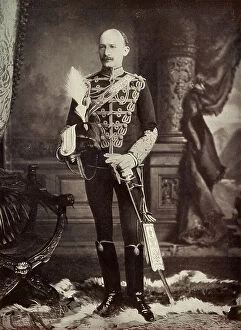
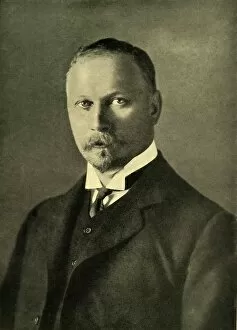
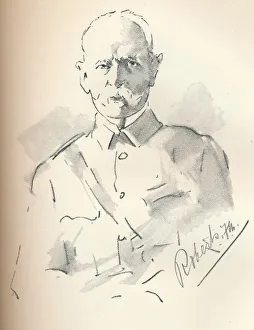
Robert Stephenson Smyth Baden-Powell, lst Viscount Baden-Powell, English soldier. Baden-Powell (1857-1941) became famous as the defender of Mafeking in the Boer War (1899-1902)
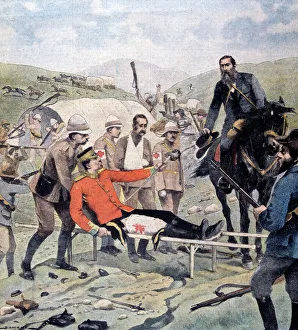
General Methuen surrendering to de la Rey, 2nd Boer War, 7 March 1902. Paul Sandford Methuen (1845-1932) British Lieutenant-General
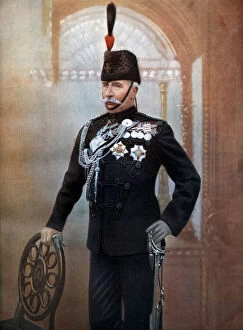
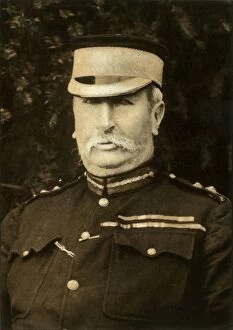
Sir Redvers Henry Buller, British general and Victoria Cross holder, 1902. Artist: KnightSir Redvers Henry Buller, British general and Victoria Cross holder, 1902. Buller (1839-1908) won the Victoria Cross at Inhlobane, in the Zulu War, 1879
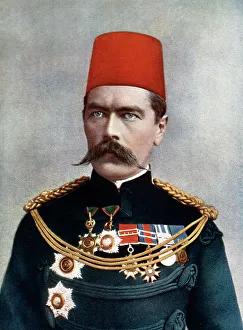
Horatio Herbert Kitchener, 1st Earl Kitchener, British Field Marshal, diplomat and statesman, 1902. Artist: G LekegianHoratio Herbert Kitchener, 1st Earl Kitchener, British Field Marshal, diplomat and statesman, 1902. Kitchener (1850-1916) regained the Sudan for Egypt by his victory at the Battle of Omdurman (1898)
Lieut.-General Baden-Powell, c1900. Creator: LafayetteLieut.-General Baden-Powell, c1900. Portrait of Lieutenant General Robert Stephenson Smyth Baden-Powell, British soldier and defender of Mafeking in the Boer War
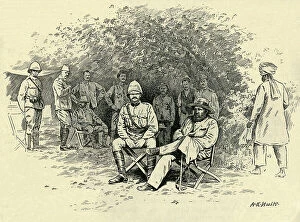
After Paardeberg: General Cronje A Prisoner, February 1900, (c1900). Creator: A.E. HuittAfter Paardeberg: General Cronje A Prisoner, February 1900, (c1900). Boer general Piet Cronje surrendered to the British after the Battle of Paardeberg, South Africa. Engraving after a photograph
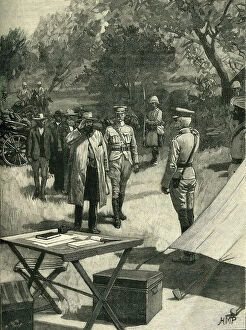
Cronje's Surrender, 27 February 1900, (c1900). Creator: Marguerite JacobCronje's Surrender, 27 February 1900, (c1900). Boer general Piet Cronje surrenders to Lord Frederick Sleigh Roberts, Commander in Chief of the British Army, after the Battle of Paardeberg
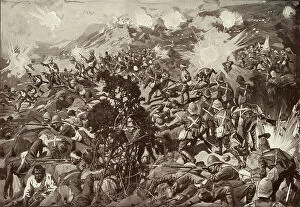
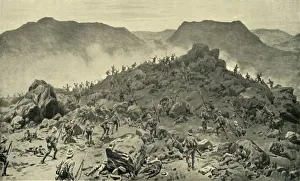
The Defence of Spion Kop, January 1900, (c1900). Creator: UnknownThe Defence of Spion Kop, January 1900, (c1900). The Boers defeat the British in South Africa. From "Cassell's History of England, Vol. IX"
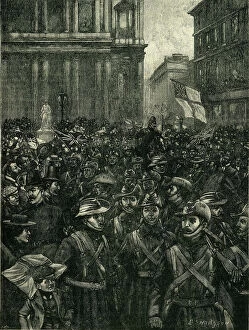
The C.I.V.'s Marching Down Ludgate Hill, On The Way From The Mansion House To Waterloo... c1900. Creator: E. BThe C.I.V.'s Marching Down Ludgate Hill, On The Way From The Mansion House To Waterloo Station, c1900. Crowds cheer British soldiers leaving London to fight in South Africa
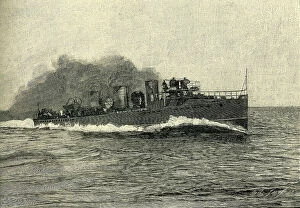
H.M.'s Torpedo Boat Destroyer Viper, c1900. Creator: Marguerite JacobH.M.'s Torpedo Boat Destroyer Viper, c1900. Engraving after a photograph. From "Cassell's History of England, Vol. IX"
The Imperial Light Horse at Waggon Hill, January 6, 1900, c1900. Creator: Andre & SleighThe Imperial Light Horse at Waggon Hill, January 6, 1900, c1900. The South African Light Horse, a regiment of the British Army, was formed in 1899
Transports in Table Bay During the South African War, c1900. Creator: Charles John De LacyTransports in Table Bay During the South African War, c1900. Transports were now daily reaching Cape Town, and during the next ten days a brigade of Guards numbering 4, 000
A Boer Commando, c1900. Creator: UnknownA Boer Commando, c1900. South Africa. From "Cassell's History of England, Vol. IX". [Cassell and Company, Limited, London, Paris, New York & Melbourne]
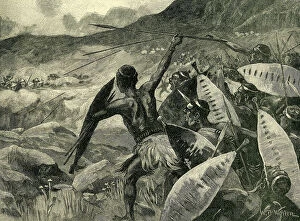
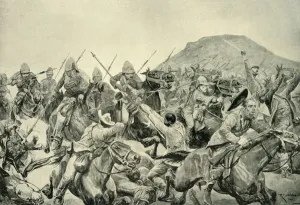
Fighting in the Matoppo Hills: Charge of the Matabele, c1900. Creator: William Barnes WollenFighting in the Matoppo Hills: Charge of the Matabele, c1900. Scene from the Second Matabele War. From "Cassell's History of England, Vol. IX"
England's dream in South Africa, 1899. Creator: Heine, Thomas Theodor (1867-1948)England's dream in South Africa, 1899. Private Collection
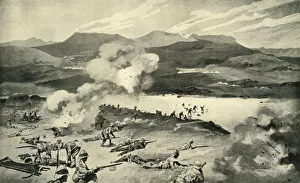
The Battle of Majuba Hill, 1900. Creator: Richard Caton Woodville IIThe Battle of Majuba Hill, 1900. From " South Africa and the Transvaal War, Vol. I", by Louis Creswicke. [T. C. & E. C. Jack, Edinburgh, 1900]
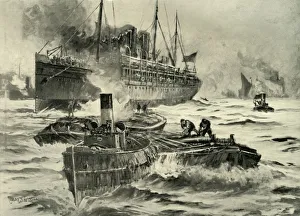
The Outbreak of the War - Transport Leaving England for the Cape, 1900. CreatorThe Outbreak of the War - Transport Leaving England for the Cape, 1900. From " South Africa and the Transvaal War, Vol. II", by Louis Creswicke. [T. C. & E. C. Jack, Edinburgh, 1900]
The Battle of Colenso - The Last Desperate Attempt to Save the Guns of the 14th and 66th Batteries, 1900. From " South Africa and the Transvaal War, Vol. II", by Louis Creswicke. [T. C
The Battle of Modder River - The Argyll and Sutherland Highlanders Crossing the Drift, 1900. From " South Africa and the Transvaal War, Vol. II", by Louis Creswicke. [T. C. & E. C
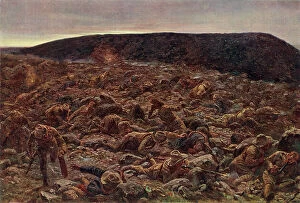
All That Was Left of Them. The Black Watch After the Battle of Magersfontein, 1900" All That Was Left of Them." The Black Watch After the Battle of Magersfontein, 1900. From " South Africa and the Transvaal War, Vol. II", by Louis Creswicke. [T. C. & E. C
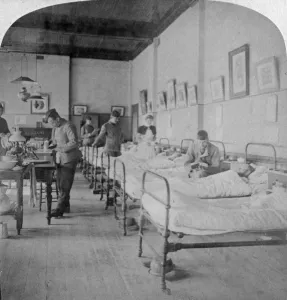
Ward in General Hospital No 10, formerly Greys College, Bloemfontein, South Africa, 1901. Artist: Underwood & UnderwoodWard in General Hospital No 10, formerly Greys College, Bloemfontein, South Africa, 1901. Casualties of the Boer War recuperating. Stereoscopic card
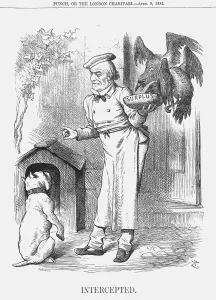
Intercepted, 1881. Artist: Joseph SwainThe Liberal Prime Minister, Gladstone, also held the office of Chancellor of the Exchequer and this cartoon shows him in a chefs outfit feeding his dog from the bowl of surplus
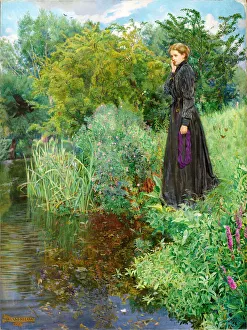
Boer War, 1900-1901 - Last Summer Things Were Greener, 1901. Creator: Byam ShawBoer War, 1900-1901 - Last Summer Things Were Greener, 1901. The subject is the artists sister, Margaret Glencairn. She is depicted mourning her cousin George killed in the Boer War, South Africa
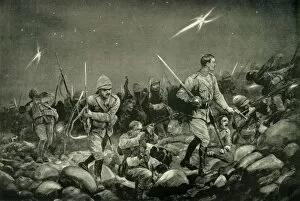
Night Sortie from Mafeking, 1900. Creator: Richard Caton Woodville IINight Sortie from Mafeking, 1900. From " South Africa and the Transvaal War, Vol. II", by Louis Creswicke. [T. C. & E. C. Jack, Edinburgh, 1900]
The Battle of Elandslaagte - Charge of the 5th Lancers, 1900. From " South Africa and the Transvaal War, Vol. II", by Louis Creswicke. [T. C. & E. C. Jack, Edinburgh, 1900]
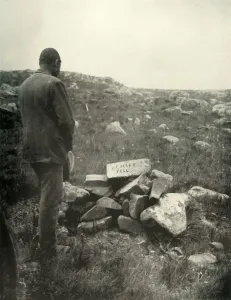
Where Colley Fell. Rough Cairn of Stones on Majuba Hill, 1900. Creator: George Washington WilsonWhere Colley Fell. Rough Cairn of Stones on Majuba Hill, 1900. From " South Africa and the Transvaal War, Vol. I", by Louis Creswicke. [T. C. & E. C. Jack, Edinburgh, 1900]
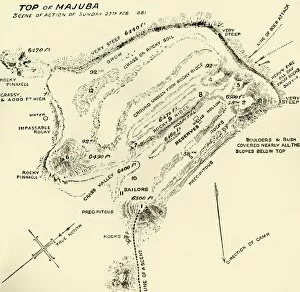
Top of Majuba - Scene of Action of Sunday 27th Feb 1881, 1900. Creator: UnknownTop of Majuba - Scene of Action of Sunday 27th Feb 1881, 1900. From " South Africa and the Transvaal War, Vol. I", by Louis Creswicke. [T. C. & E. C. Jack, Edinburgh, 1900]
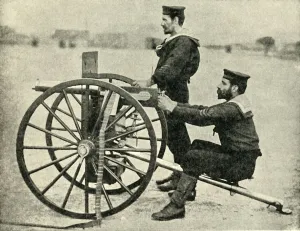
Types of Arms - The Maxim Gun, 1900. Creator: Gregory & CoTypes of Arms - The Maxim Gun, 1900. From " South Africa and the Transvaal War, Vol. II", by Louis Creswicke. [T. C. & E. C. Jack, Edinburgh, 1900]
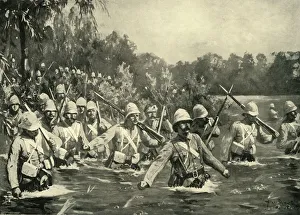
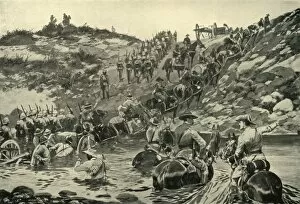
The Battle of Colenso - The Dublin Fusiliers Attempt to Ford the Tugela, 1900. CreatorsThe Battle of Colenso - The Dublin Fusiliers Attempt to Ford the Tugela, 1900. From " South Africa and the Transvaal War, Vol. II", by Louis Creswicke. [T. C. & E. C. Jack, Edinburgh, 1900]
Rt. Hon. Sir Redvers Henry Buller, K. C. B. V. C. 1900. Creator: KnightRt. Hon. Sir Redvers Henry Buller, K.C.B. V.C. 1900. From " South Africa and the Transvaal War, Vol. II", by Louis Creswicke. [T. C. & E. C. Jack, Edinburgh, 1900]
Before Ladysmith - Horse Artillery Galloping to Take Up a New Position, 1900. CreatorBefore Ladysmith - Horse Artillery Galloping to Take Up a New Position, 1900. From " South Africa and the Transvaal War, Vol. II", by Louis Creswicke. [T. C. & E. C. Jack, Edinburgh, 1900]
The Battle of Colenso - Queens (Royal West Surrey) Regiment Leading the Central Attack, 1900. From " South Africa and the Transvaal War, Vol. II", by Louis Creswicke. [T. C. & E. C
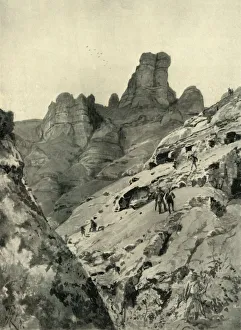
Stormberg Pass - The Scene of General Gatacres Operations, 1900. Creator: HC Seppings WrightStormberg Pass - The Scene of General Gatacres Operations, 1900. From " South Africa and the Transvaal War, Vol. II", by Louis Creswicke. [T. C. & E. C. Jack, Edinburgh, 1900]
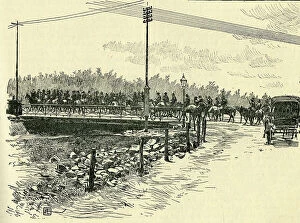
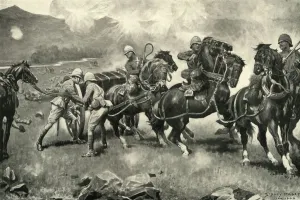
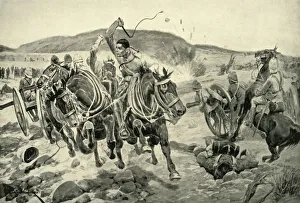
From Frere to Chieveley - Difficultues of Transport, 1900. Creator: Richard Caton Woodville IIFrom Frere to Chieveley - Difficultues of Transport, 1900. From " South Africa and the Transvaal War, Vol. II", by Louis Creswicke. [T. C. & E. C. Jack, Edinburgh, 1900]
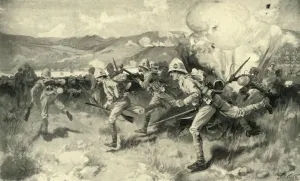
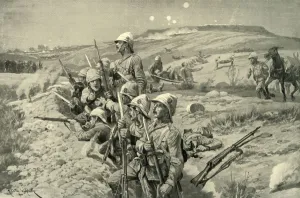
Fix Bayonets! - Repelling an Attack from the Trenches around Ladysmith, 1900. CreatorFix Bayonets! - Repelling an Attack from the Trenches around Ladysmith, 1900. From " South Africa and the Transvaal War, Vol. II", by Louis Creswicke. [T. C. & E. C. Jack, Edinburgh, 1900]
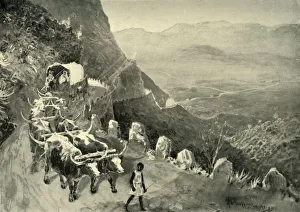
The Outbreak of War - The Drakenberg Mountains Where The Boers Were Laagered, 1900. From " South Africa and the Transvaal War, Vol. II", by Louis Creswicke. [T. C. & E. C
Types of Arms - 15-Pounder Field-Gun, 1900. Creator: CribbTypes of Arms - 15-Pounder Field-Gun, 1900. From " South Africa and the Transvaal War, Vol. II", by Louis Creswicke. [T. C. & E. C. Jack, Edinburgh, 1900]
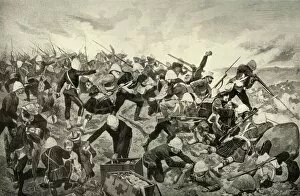
The Battle of Belmont, 23rd November 1899 - Bayonet Attack by the Scots and Grenadier Guards, 1900. From " South Africa and the Transvaal War, Vol. II", by Louis Creswicke. [T. C. & E. C
Lieut. General The Hon. J. C. Smuts, c1916, (c1920). Creator: Elliott & FryLieut. General The Hon. J. C. Smuts, c1916, (c1920). Portrait of Jan Christiaan Smuts (1870-1950), South African and British Commonwealth statesman
Boer and Briton Nursed Together, 1900, (1933). Creator: Horace Walter NichollsBoer and Briton Nursed Together, 1900, (1933). Red Cross nurses treating wounded of both sides during the Boer War in South Africa
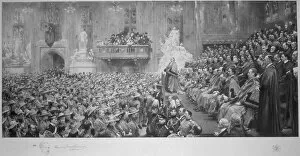
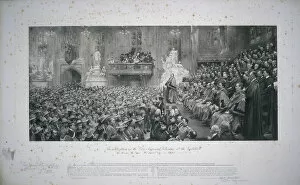
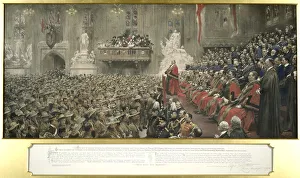
The City Imperial Volunteers in the Guildhall, City of London, 1900 (1902)
City Imperial Volunteers, 1902. Artist: John Henry Frederick BaconThe City Imperial Volunteers, 1902. They are assembled in Guildhall on their return from South Africa, October 29, 1900. The Volunteers were recieved by Sir Alfred Newton, Lord Mayor, Aldermen
The City Imperial Volunteers in Guildhall, London, 1900The City Imperial Volunteers in the Guildhall, London, 1900
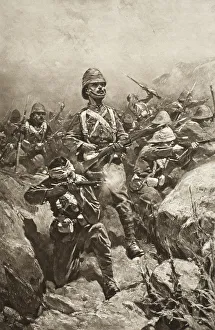
The Transvaal War, 1899-1901 (1901). A scene from the Second Boer War. From The Illustrated London News, 1901
Field Marshal Lord Roberts of Kandahar (1832-1914), British soldier, c1901. Artist: Mortimer Luddington MenpesField Marshal Lord Roberts of Kandahar (1832-1914), British soldier, c1901. Frederick Sleigh Roberts (1832-1914) was one of the foremost British military figures of Victorian times
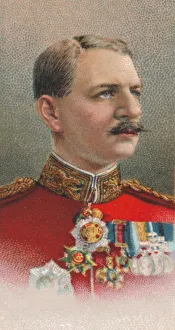
General Sir Henry Macleod Leslie Rundle (1856-1934), British Army General during World War I, 1917. Rundle also fought in the Zulu War in 1879
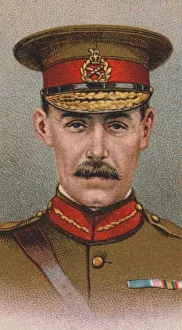
General Sir Archibald James Murray (1860-1945), British Army officer, 1917General Sir Archibald James Murray (1860-1945), British Army officer who served in the Second Boer War and World War I, 1917. From Wills Cigarettes Allied Army Leaders cigarette card series, 1917
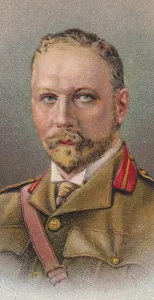
Jan Christiaan Smuts (1870-1950), South African and British Commonwealth statesman, 1917. Smuts led commandos in the Second Boer War for the Transvaal